Install a PCIe Card
PCIe cards are installed in pairs inside in Dual PCIe Card Carriers (DPCCs). To install a PCIe card, you must first remove its DPCC (see Remove a DPCC).
Perform this procedure when replacing a PCIe card or when changing its configuration.
Before You Begin
-
For component serviceability, locations, and designations, see About System Components.
-
Prepare the server for hot service. See Prepare the Server for Hot Service.
Alternatively, to prepare the server for cold service, see Prepare the Server for Cold Service.
- Identify the DPCC PCIe slot.
- If necessary, remove the DPCC. See Remove a DPCC.
- Orient the DPCC so that the hinge is to the left.
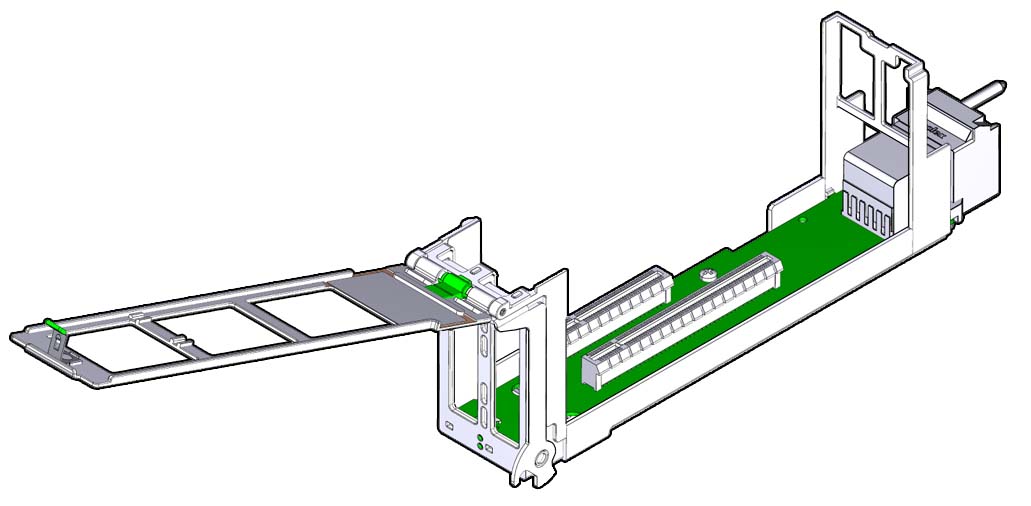
- To open the top of the DPCC, lift the release latch at the non-hinged end of the lid and rotate the lid upward and to the left.
-
Ensure that the DPCC top cover is open.
The top of the DPCC is hinged at one end. To open, lift the tab on the non-hinged end.

-
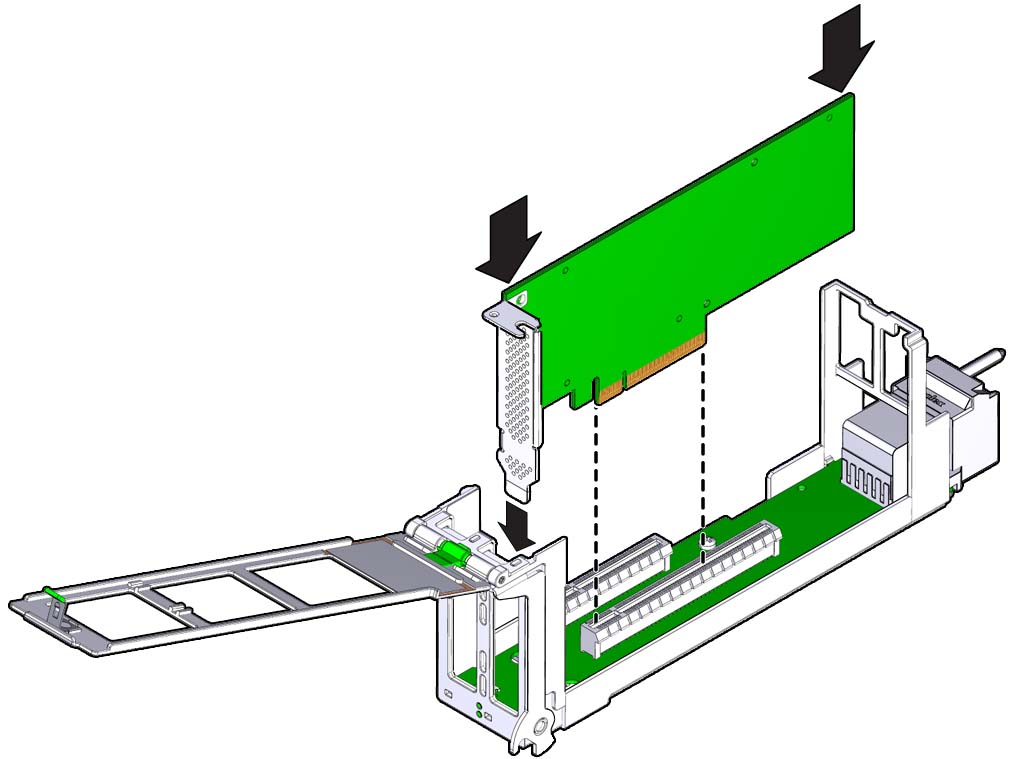
Orient the PCIe card with the edge (or bus) connector facing downward and
the IO (or cable connector) facing to the left.
This puts the component side of the card facing away from you.

- To install the card, align the edge connector with the slot in the DPCC and push the card downward into the slot.
-
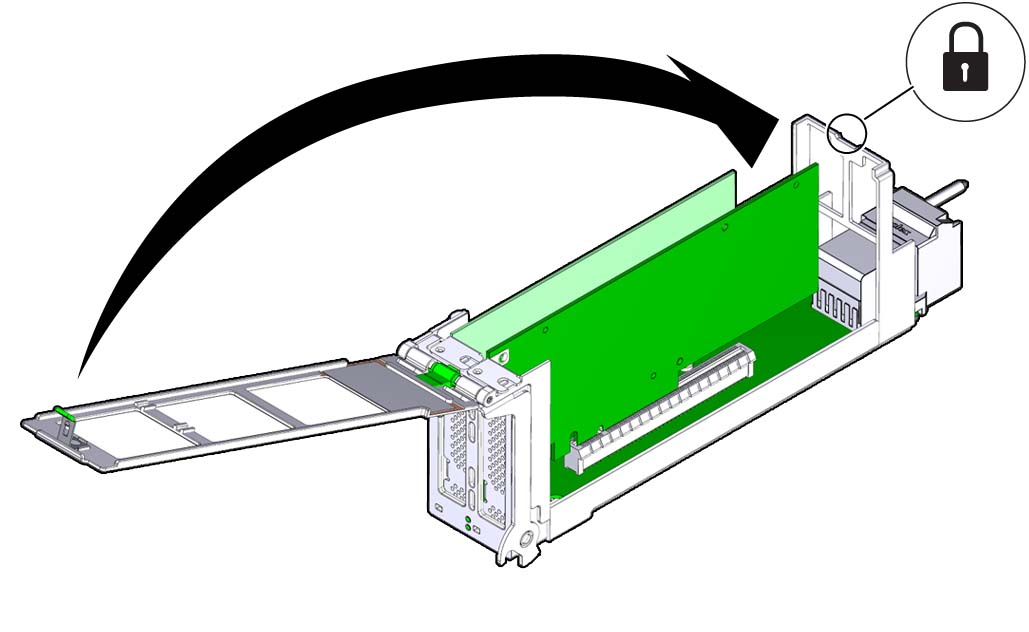
To close the top of the DPCC, rotate it to the right ensuring the clip on
the edge of the top is secured over the unhinged edge of the DPCC.

Caution - Pinch point. Keep fingers away from the underside of the top when closing it.

- Clear any related component faults. For more information see Clear Hardware Fault Messages.
Next Steps