Install a DPCC
Perform this procedure as part of a PCIe card replacement or configuration. To remove a DPCC, see Remove a DPCC.
Before You Begin
-
For component serviceability, locations, and designations, see About System Components.
-
Obtain a stylus for activating recessed buttons.
-
Prepare the server for hot service. See Prepare the Server for Hot Service.
Alternatively, to prepare the server for cold service, see Prepare the Server for Cold Service.
- Ensure the top of the DPCC is closed and secured and the lever on the front of the DPCC is in its fully open position.
-
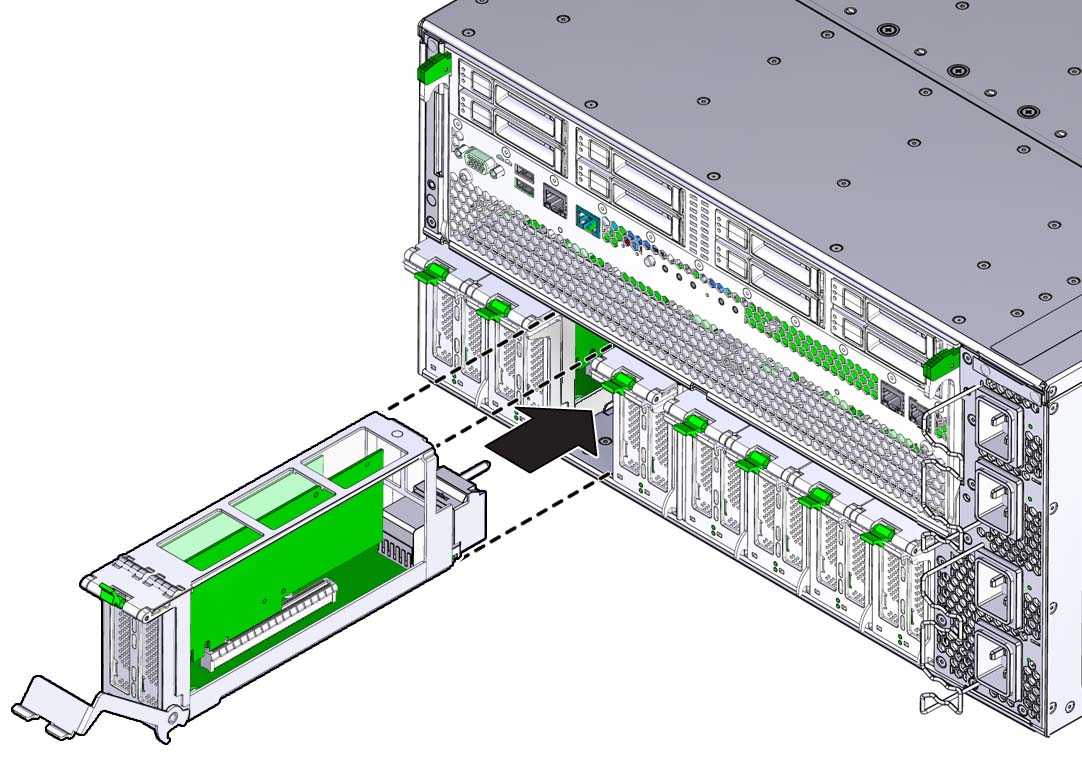
Align the DPCC with the vacant slot.
The connector (back) side of the DPCC faces inward toward the server.

-
Slide the DPCC into the slot until it stops.
This leaves the DPCC protruding slightly from the back of the server. Do not attempt push the DPCC inward beyond this point.
-
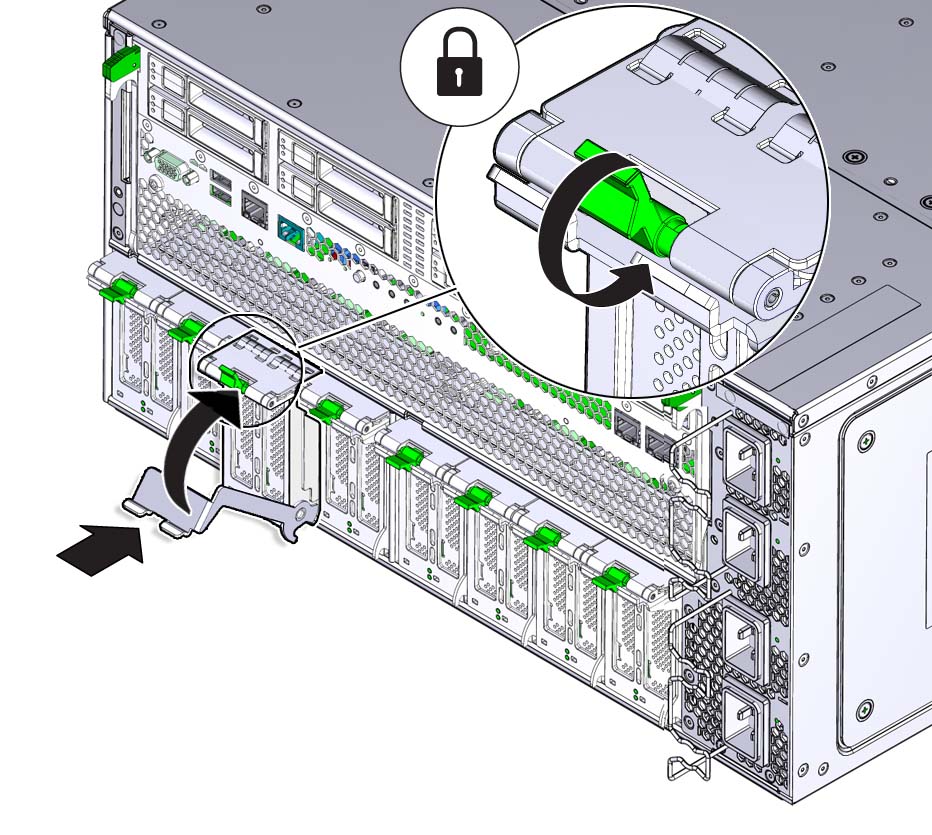
Rotate the lever on the DPCC upward until it locks into place.

Caution - Pinch point. Keep fingers away from the back side of the lever when closing it.
This action draws the DPCC inward engaging the connectors in the DPCC with the connectors on the server midplane.

-
Use a stylus to press both ATTN buttons on the front of the DPCC.
The buttons alert the system to a request to bring the devices online. When the system acknowledges the request, it turns on the indicators on the the DPCC.
- Verify that the green OK indicators on the front of the DPCC are on steady.
See Also