Each time you add a new content group, you need to define the content items that it will include. These definitions are made up of individual rule sets, each beginning with the phrase “Include this content” or “Exclude this content”. A horizontal line separates multiple rule sets within a definition. For examples, see theContent Group Definition Samples section.
To define the items in a content group:
Select the group from the Profile and Content Groups window. The Content Group Definition window appears.
Click Include or Exclude at the top of the Content Group Definition window.
Use Include to define the content group by the content you want to include.
Use Exclude to define the content group by the content you want to exclude.
The beginning of the new rule appears in the Content Group Definition panel. For example, if you click Include, the phrase “Include this content” appears. The following button bar appears immediately below the rule text:

Note: You may have to resize the window in order to see all the options.
Specify the content you want to include or exclude:
Click All Items if you want to include (or exclude) all content items stored in the selected repository. (To see the items that this repository holds, select the name of the repository from the Content menu in the main ATG Control Center window, and then display all items.)
Click Items in Group(s) if you want to include or exclude items from other existing content groups. The Content Groups dialog box appears as shown below, allowing you to choose from among the existing groups listed in the Content Groups panel.
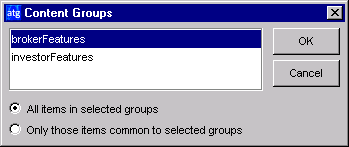
If multiple groups exist and you want to select more than one, hold down the Control key while making your selections. You can choose All Items in Selected Groups or Only Those Items Common to Selected Groups. When you click OK, a list of the groups you select appears at the bottom of the Content Group Definition panel along with an Edit Groups button. Click this button if you need to change your group selections.
If you select the Items in Group(s) option, you can define additional criteria by clicking the Whose button (described below).
Click Items in Folder(s) if you want to include or exclude all items from specific repository folders. The Select Items in Folders dialog box appears.
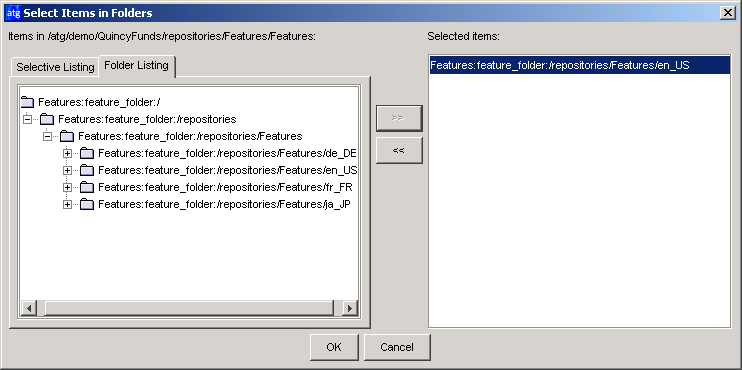
Select the folders containing the content you want to use, and then click the >> button to move them to the Selected Items list on the right. Click OK when you complete your selections.
You can then define additional criteria by clicking the Whose button (described below).
Click These Particular Items if you want to include or exclude specific items from the repository. When the Select Items dialog box (similar to the dialog box shown above) opens, select the individual content items you want to use and click the >> button to move them to the Selected Items list on the right. Click OK when you have completed your selections.
You can then define additional criteria by clicking the Whose button (described below).
Click Items Whose (or Whose if you clicked the Items in Groups(s), Items in Folder(s), or These Particular Items options) if you want to include or exclude items based on specific content properties. When you select this option, several drop-down lists appear as shown below, allowing you to select the property, comparison operator, and value you want to use.
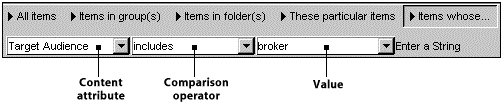
The properties that are available for selection depend on the repository you are working in. The selections in the Operator and Value drop-down lists change depending on the property you select. If the property has a limited set of values, the Value list will include all of your possible choices. If the property has an unlimited number of values, you can type a unique value directly into the list as shown below. The required value type (“string,” for example) appears next the text field.

If you want to add other condition statements to the rule, click the And Whose and Or Whose buttons at the bottom of the Content Group Definition panel. For examples, see the Content Group Definition Samples section.
If you want to make the group definition even more specific, click Include or Exclude again to create a rule set within the definition, and then repeat step 3.
Click Save when all your definition rules are set. Note: If you select another content group from the Content Groups panel or switch to another task window before saving your changes, the ATG Control Center saves them automatically.
Important: After you add new content groups to a repository, you must copy your changes from the staging server to your live site. For more information, see Copying and Switching Databases in the ATG Installation and Configuration Guide.
