Installing the Slide Rails into the Rack for a ZS4-4 or ZS3-4
Use the following procedure to install the slide rails into the rack for a ZS4-4 or ZS3-4 controller.
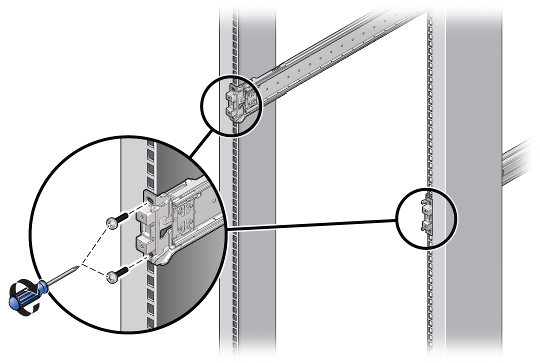
If you plan to move the rack after the controller is installed, use mounting screws and cage nuts to secure the slide-rail assembly. Refer to the Rail Rackmount Kit Overview and Information card for instructions on inserting these cage nuts. This card is included with the rack kit.
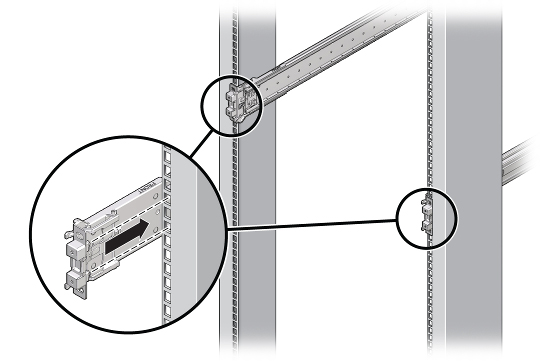
- Position a slide-rail assembly in your rack so that the slide-rail assembly front bracket is on the outside of the front rack post and the slide-rail assembly rear bracket is on the inside of the rear rack post.
-
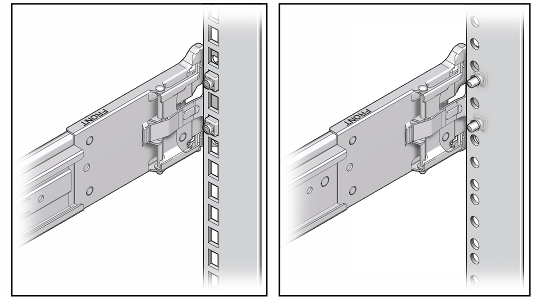
Align the slide-rail assembly mounting pins with the front and rear rack post mounting holes. Then lock the assembly into place by pushing the assembly toward the rear of the rack until the mounting pins engage the rack with an audible click.

Note - The slide rails can be used with either 9.5-mm square or M6 round mounting hole racks.
-
(Optional) If installing the assembly with cage nuts and mounting screws, insert the cage nuts into the front and rear rack posts in the desired positions. Then insert the mounting screws through the front and rear slide-rail brackets and rack posts.

- Repeat Steps 2 and 3 for the other slide-rail assembly.