Setting Up States, Provinces, and Counties
On the States/Provinces/Counties page at Setup > Company > States/Provinces/Counties, you can:
-
See lists of system-provided states and provinces for supported countries
-
Add and edit your own custom states, provinces, and counties
-
Set up custom lists of states, provinces, and counties for supported countries
-
Print lists of states, provinces, and counties you can use in NetSuite records
To see available states, provinces, and counties, expand Filters and select a country from the list. You'll see only countries that have system-provided or custom states, provinces, or counties.
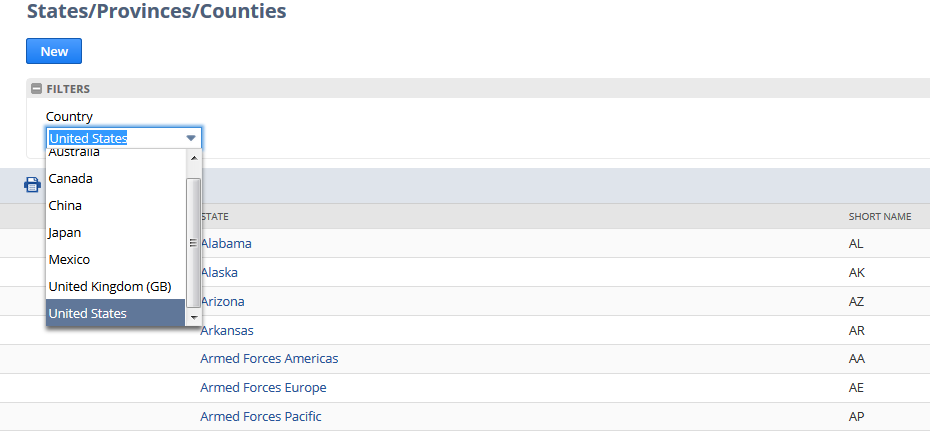
System names don't have an Edit link because you can't change system states and provinces. Custom states, provinces, and counties that you've added do have an Edit link, so you can click Edit to make changes.
To add a state, province, or county to used on NetSuite records, click New. On the New State/Province/County page, select a country, enter the full name and abbreviation for the state, province, or county you want to add, and click Save.
To print a list of states, provinces, and counties for a country, select the country and click Print.
You can set up lists for supported countries that don't have system-provided states, provinces, or counties.
For information about working with state values in SOAP web services, see Setting State Values in SOAP web services.
To set up a list of states, provinces, and counties for a supported country:
-
Go to Setup > Company > States/Provinces/Counties > New.
-
On the New State/Province/County page, select the country and enter a full name and abbreviation for the state, province, or county you want to add.
-
Click Save. The States/Provinces/Counties refreshes with your new list.
You can now select the country and see its list. Click Edit next to any state, province, or county to make changes.
-
Repeat Steps 2 and 3 to add more custom states, provinces, or counties.
Related Topics
- NetSuite Company Settings
- Configuring Company Information
- Set Company Preferences
- Change Record and Transaction Names
- Set Auto-Generated Numbers
- Supported Countries
- Setting Printing and Fax Preferences
- Setting Email Preferences
- Setting Up Duplicate Detection
- NetSuite Account Information
- Antivirus Scanning on File Cabinet Files
- Activating System Alert Reminders
- Searching Bulk Processing Jobs
- Administrative Notification Setup
- Managing Plug-ins
- NetSuite Service Tiers
- SuiteCloud Plus Settings
- Setting Up Transactions for NetSuite CRM+
- The Setup Page for NetSuite CRM+ Users
- Using Telephony Integration