Remove a Storage Drive
-
Prepare the system for the drive removal.
Refer to Take Antistatic Measures.
-
Identify the location of the drive that you want to remove.
For storage drive locations, see Storage Drive Locations and Numbering.
-
Remove the storage drive.
If you are removing an HDD storage drive, type the required operating system commands to stop the server from using the drive; otherwise, proceed to the next step.
The exact commands required depend on the configuration of your drives. Unmount file systems or issue RAID commands, as needed.
Note - The blue OK to Remove status indicator LED on the drive might not light, as support for this varies depending on the operating system in use. For information on storage drive status indicators (LEDs), refer to Storage Drive Status Indicators. -
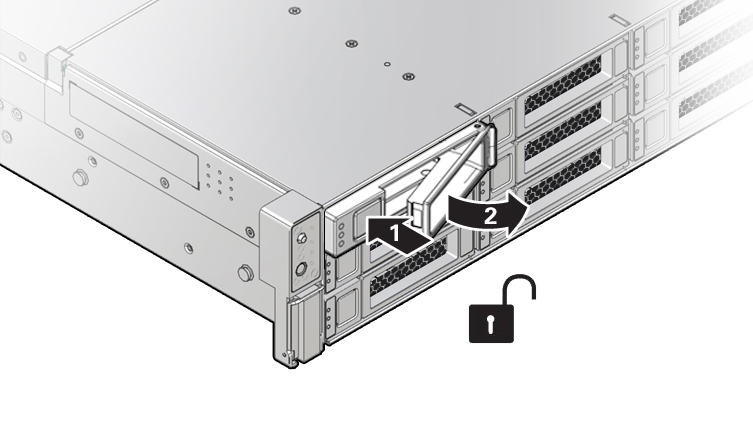
Push the latch release button to open the drive latch [1, 2].
 CalloutDescription1Pressing the latch release button.2Opening the latch.
Caution - The latch is not an ejector. Do not open the latch too far to the right. Doing so can damage the latch.
-
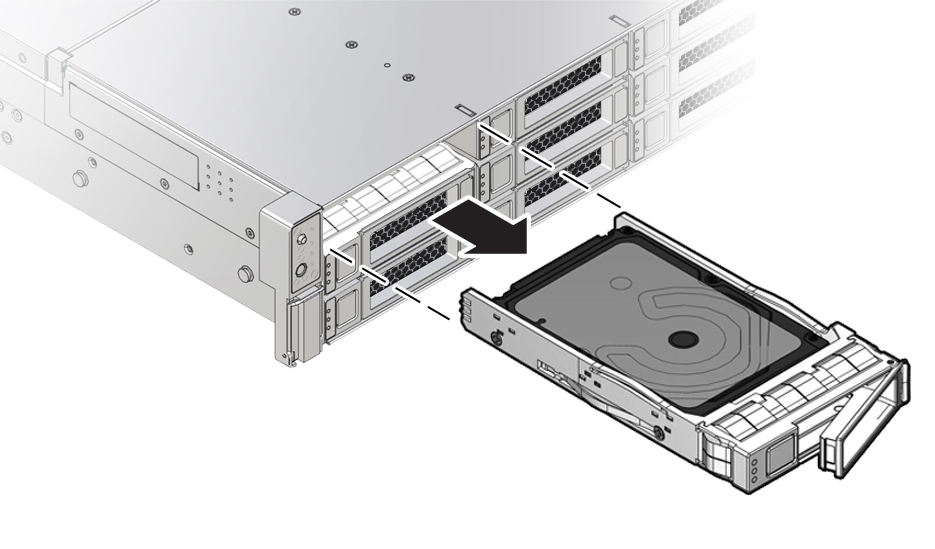
Grasp the latch and pull the drive out of the drive slot.

-
Consider your next steps:
-
If you are replacing the drive, continue to Install a Storage Drive.
-
If you are not replacing the drive, install a drive slot filler in the empty drive slot to maintain proper airflow, and perform administrative tasks to configure the server to operate without the drive.
For information on how to install a storage drive filler panel, see Remove and Install Filler Panels.
-