Install the Temperature Sensor
-
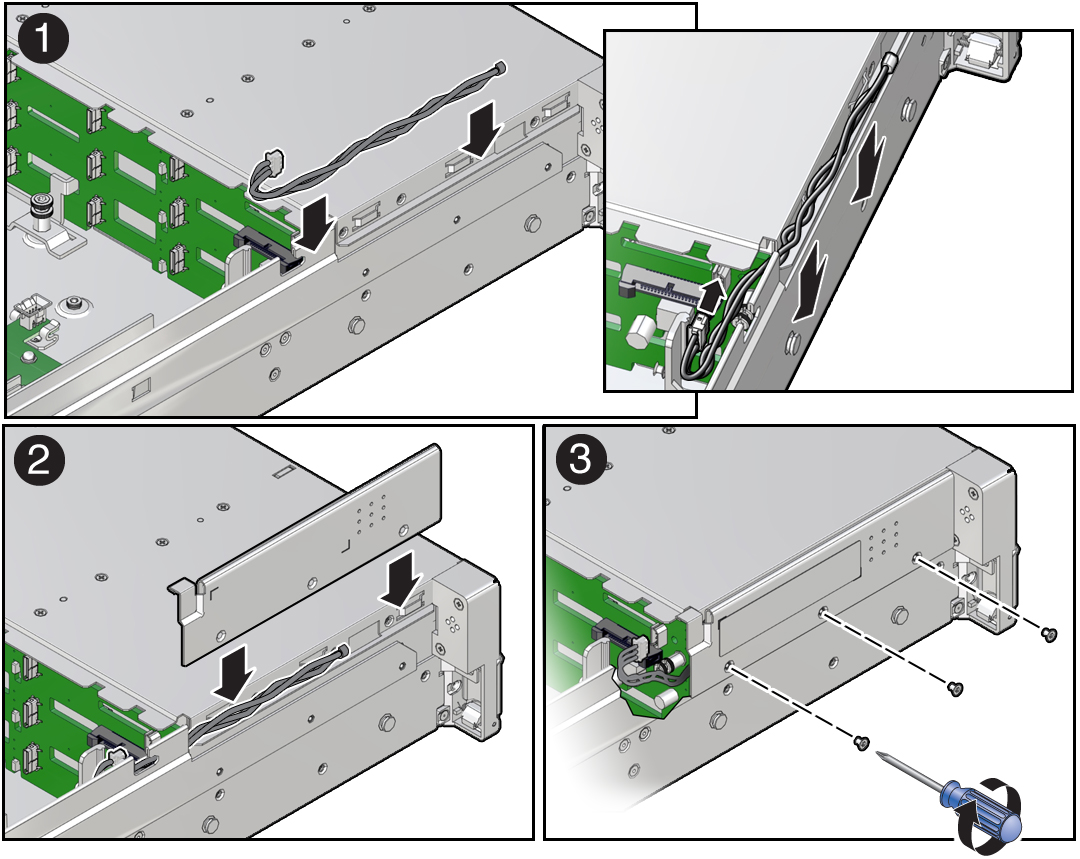
Install the temperature sensor by carefully inserting the sensor-end of the
cable through the back opening of the cable trough. Then pull the cable through
the opening and install it into the cable trough along the left side of the
chassis [1].

- Install the FIM cable and Temp Sensor Access cover to the chassis by inserting it into the FIM cable and Temp Sensor Access cover slot [2].
- Install the three No. 2 Phillips screws to secure the FIM cable and Temp Sensor Access cover to the chassis [3].
-
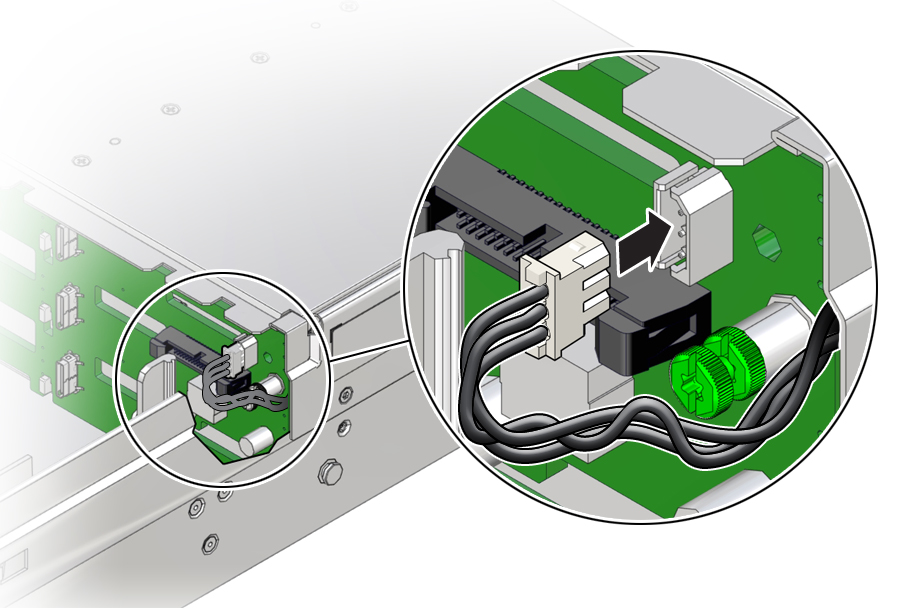
Reconnect the temperature sensor cable to the disk backplane.

-
Install the fan tray and fan modules.
See Install the Fan Tray and Install a Fan Module.
-
Return the server to operation.
- Install the server top cover.
- Return the server to the normal rack position.
-
Reconnect the power cords to the power supplies, and power on the
server.
See Reconnect Power and Data Cables and Power On the Server.
- Verify that the power supply AC OK LED is lit.