Install Shelf Rails and Back Mounting Brackets
Before You Begin
Identify the location in the rack where you plan to place the Sun Server X4-8. It requires five rack units.
Ensure that your rack meets the requirements in Rack Compatibility.
 | Caution - Equipment damage or personal injury. Always load equipment into a rack from the bottom up so that the rack will not become top-heavy and tip over. Deploy your rack's anti-tip device to prevent the rack from tipping during equipment installation. |
-
Determine your server location in the rack.
The Sun Server X4-8 requires five rack units.
-
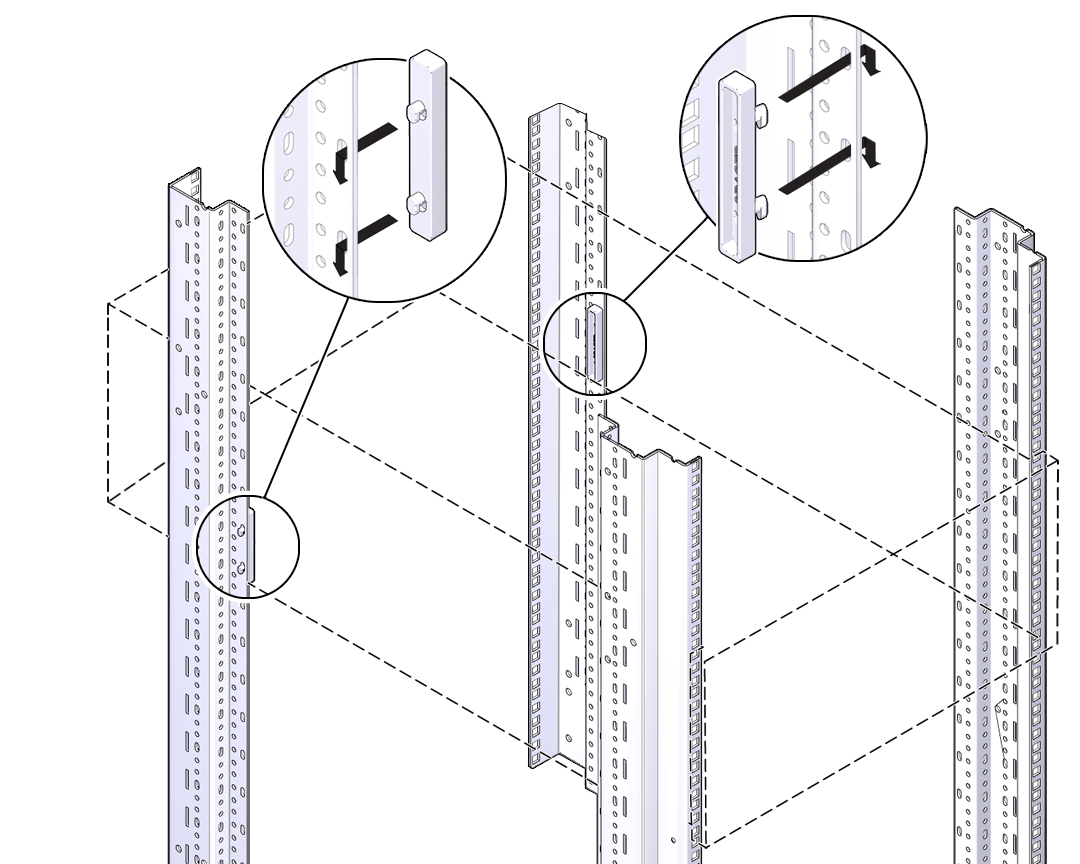
Install the two spacers in back rack rails.
Studs on the spacers fit into the oval holes on the inside of the back rack rail. Align the bottom of the spacer with the bottom of the system's rack space.
-
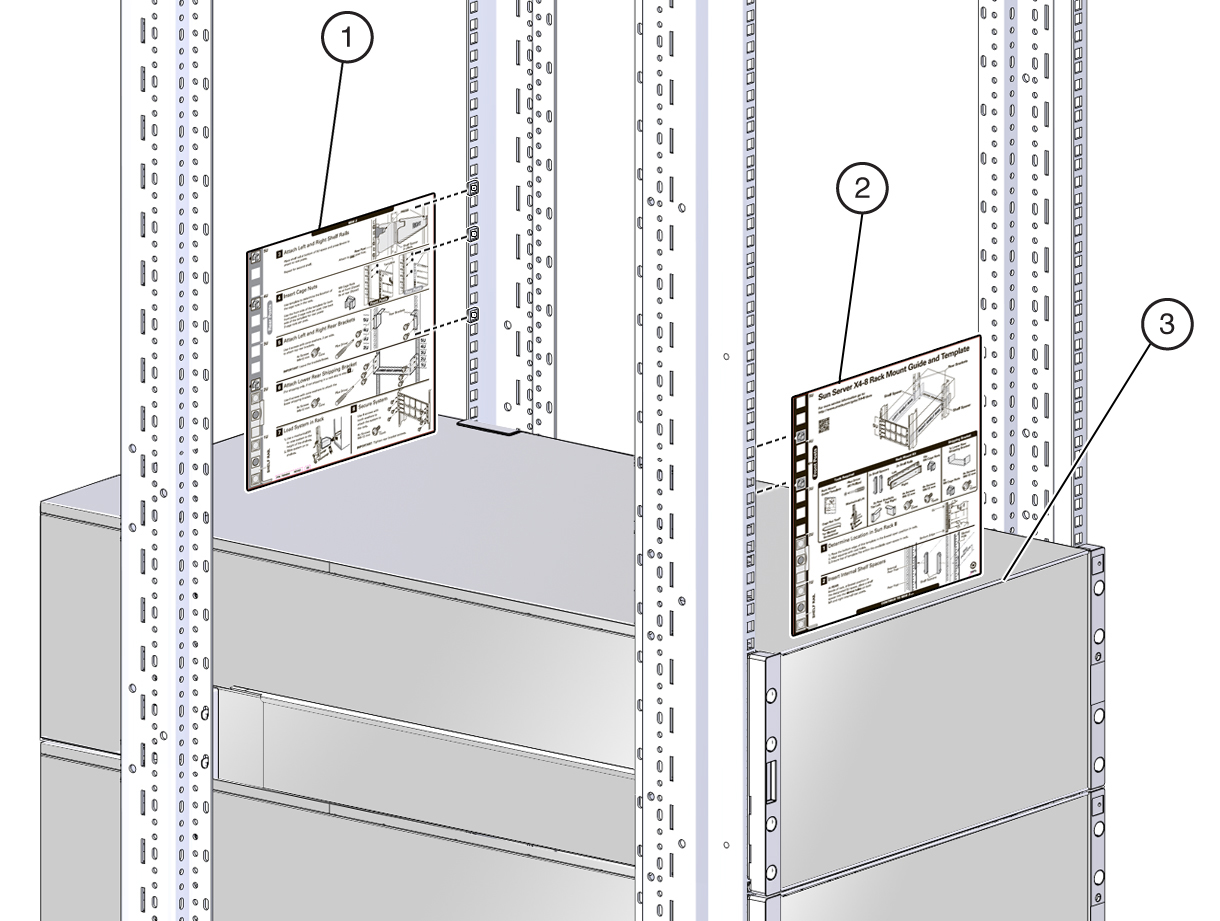
For square hole racks, place cage nuts in the locations indicated by the
alignment template (2). For round-hole racks, go to Step 4.
-
Align the template with the holes where you intend to place the
server.
The template has rack alignment images on either side; one for the back rack alignment [1], and one for the front rack alignment [2].
The server should sit directly above the rack unit below it [3] without any unfilled rack spaces.
-
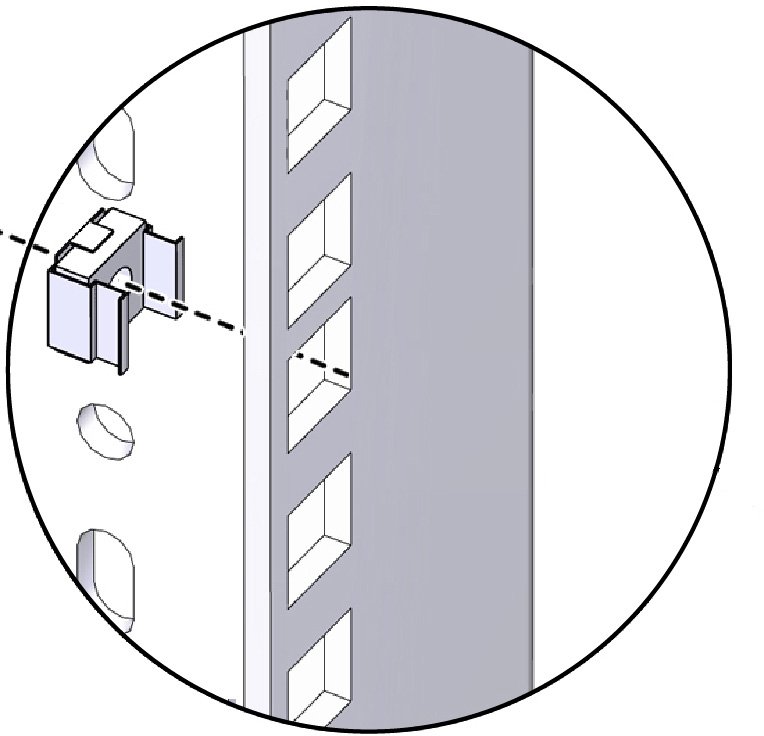
Place cage nuts in the locations indicated by the template.
Place the cage nuts on the inner-facing side of each rail. There should be two cage nuts in each front rail and three cage nuts in each back rail.
-
Align the template with the holes where you intend to place the
server.
-
Install the left and right shelf rails.
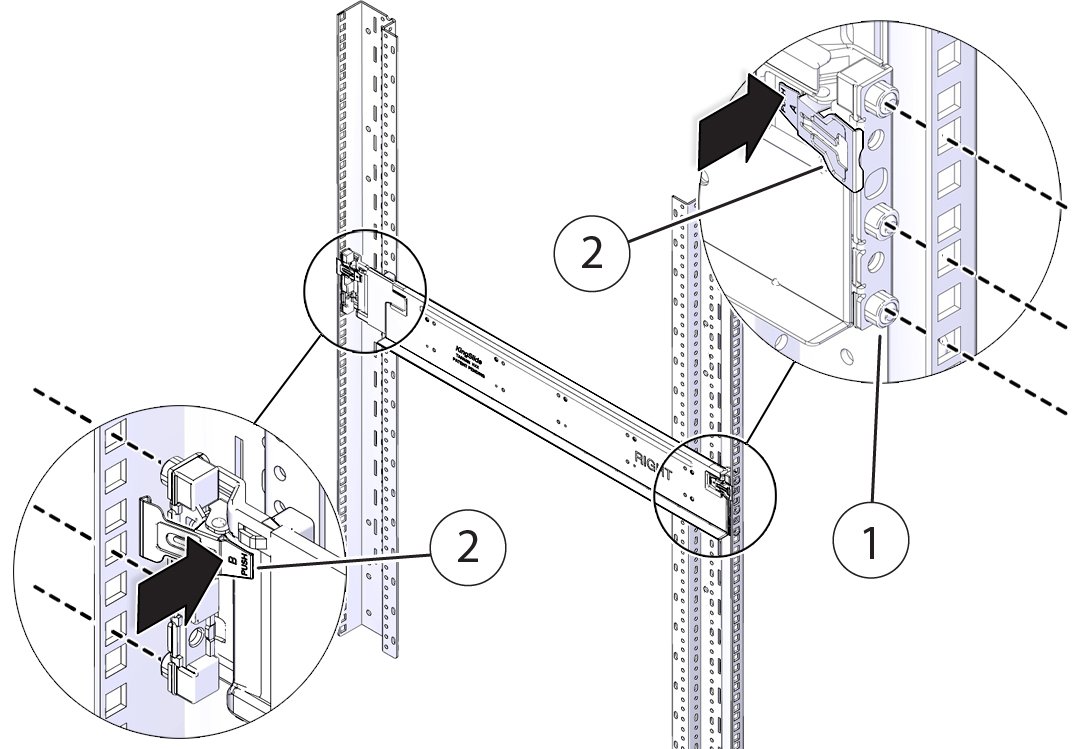
The rails are labeled left and right, front and back.
The rails have studs and a latch at each end. For each rail:
- Expand the shelf rail to fit the rack.
- Insert the studs [1] into the holes on the rack, and then press the tab [2] to open the latch and fasten it to the rack.
-
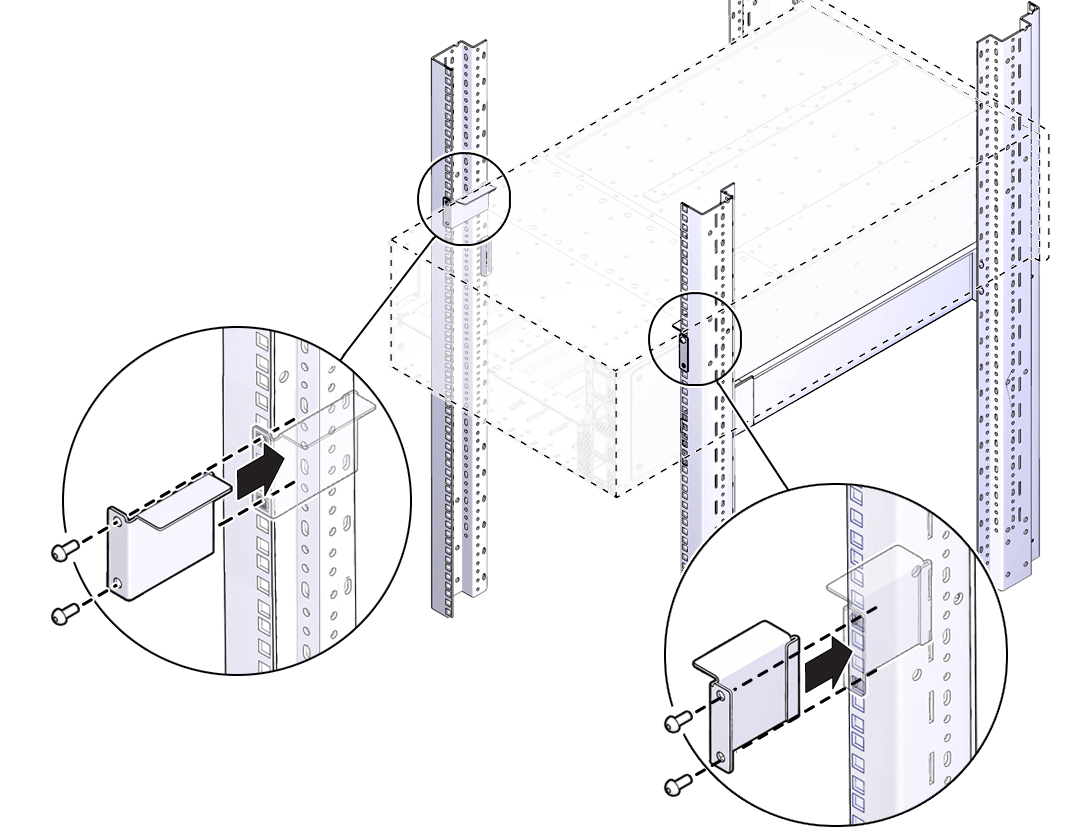
Attach the back mounting brackets.
- Align each bracket so that the flanges will go over the top of the server.
-
Use two screws to fasten each bracket to the rack.
Do not tighten the screws all the way.
See Also