Install the DVD Drive
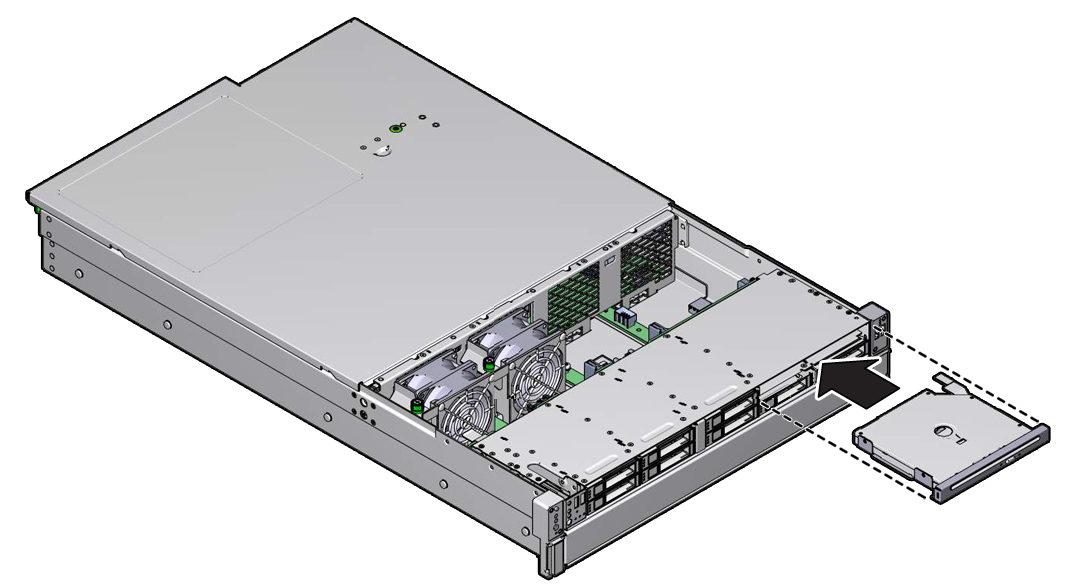
- Gently push the replacement DVD drive into the chassis [1].
-
Continue to push the DVD drive into the chassis until the release tab on
the rear of the drive engages the chassis with an audible click.

-
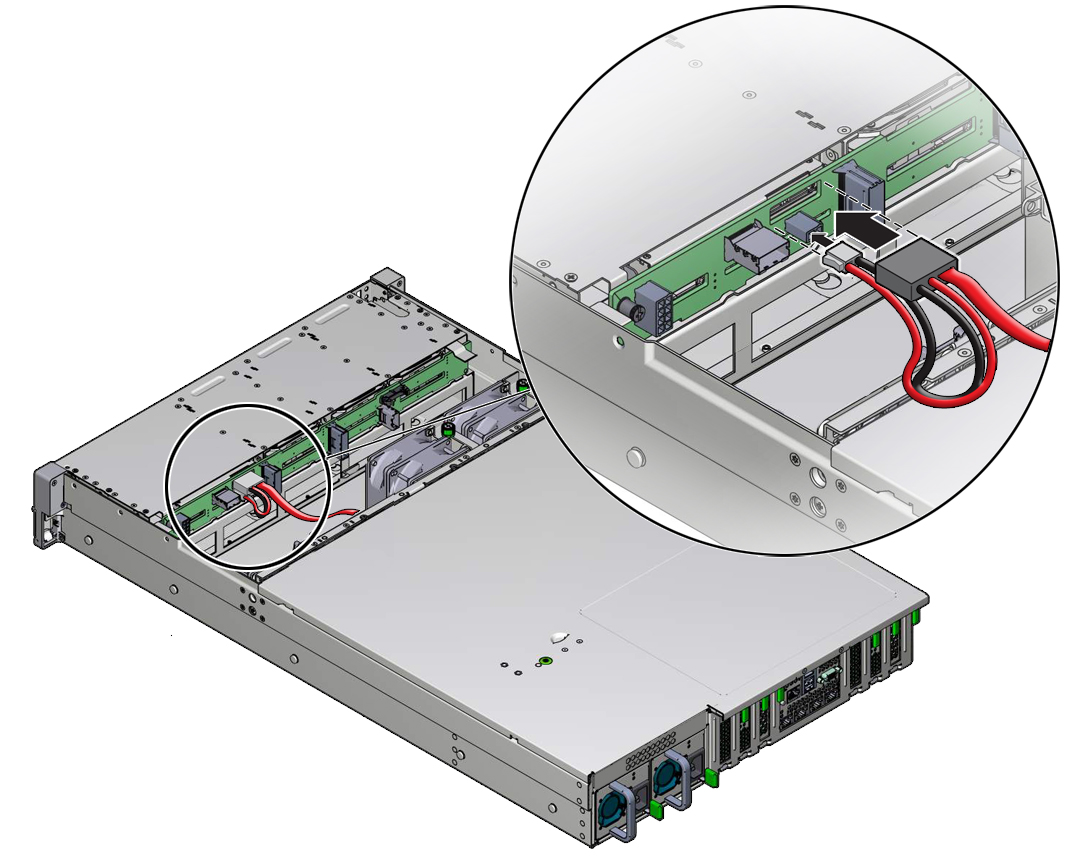
Reach into the server directly behind the DVD drive, and reconnect the
power and DVD data connectors to the rear of the DVD drive.
Note - Cable part number 7064128 is required to connect power and DVD data to the front storage drive backplane.
-
If removed, reinstall fan modules 2 and 3 in the chassis.
See Install a Fan Module.
- Install the disk cage cover, and close the fan assembly door.
-
Return the server to operation.
- Return the server to the normal rack position.
-
Reconnect the power cords to the server power supplies, and power
on the server.
See Reconnect Power and Data Cables and Power On the Server. Verify that the power supply AC OK LED is lit.