Install the Server (2-Post, 19-Inch Hardmount Rack Kit)
Note - The 19-inch, 2-post rackmount kit supports rack web thicknesses (the width of the rack post) of 3 in. (76.20 mm), 4 in. (101.6 mm), and 5 in. (127 mm).
 | Caution - You must install the server into a rack following these instructions for the 2-post, 19-inch hardmount kit. If you deviate from these instructions when installing the server, your installation will not be supported. |
- Gather the required tools.
-
Read the server cautions.
See Handling Precautions and ESD Precautions.
-
Read the rack cautions and stabilize the rack.
See Rack Cautions and Stabilize the Rack.
-
If you are changing the rack kit on an existing server in your data
center, perform these steps:
- Shut down the server, and remove the power and data cables.
- Remove the server from the rack, and place it on an antistatic mat.
- Remove the existing mounting brackets from the server and rack, if applicable.
-
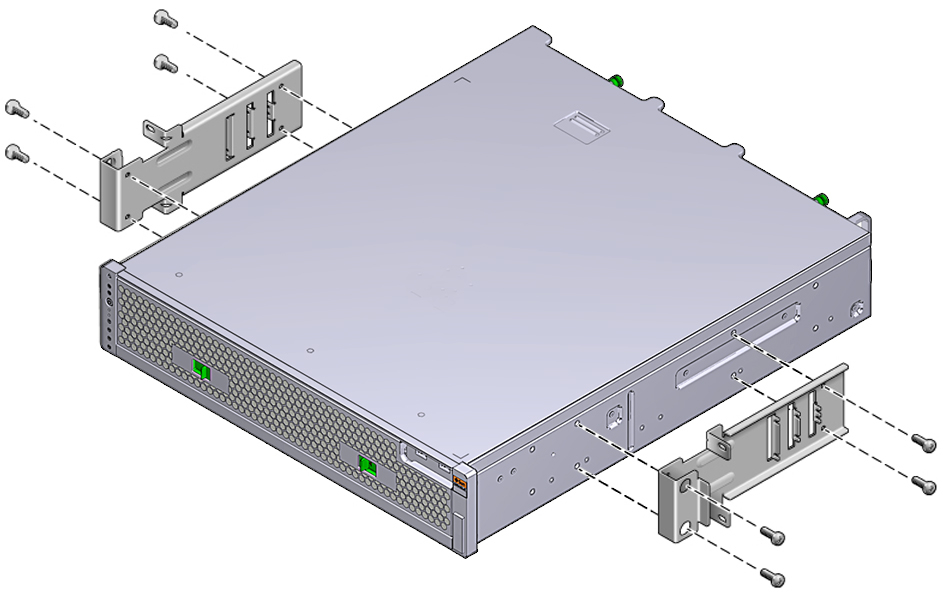
Secure the side brackets to the sides of the server.
Use four M5 x 7 SEM screws for each side bracket.
- Lift the server into the rack.
-
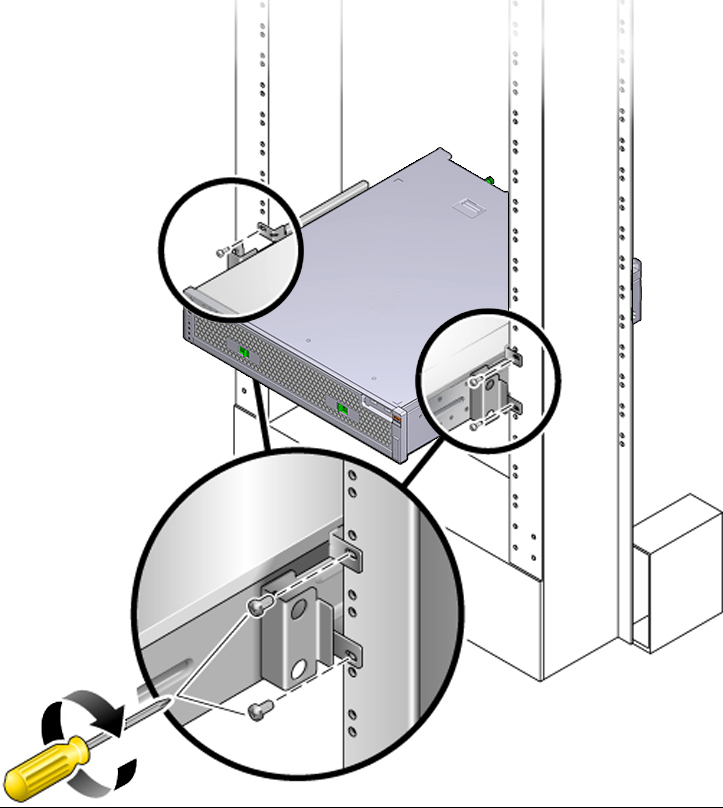
Using two screws for each bracket, secure the front of the server to the
front of the rack.
The size of the screws varies, depending on your rack.
-
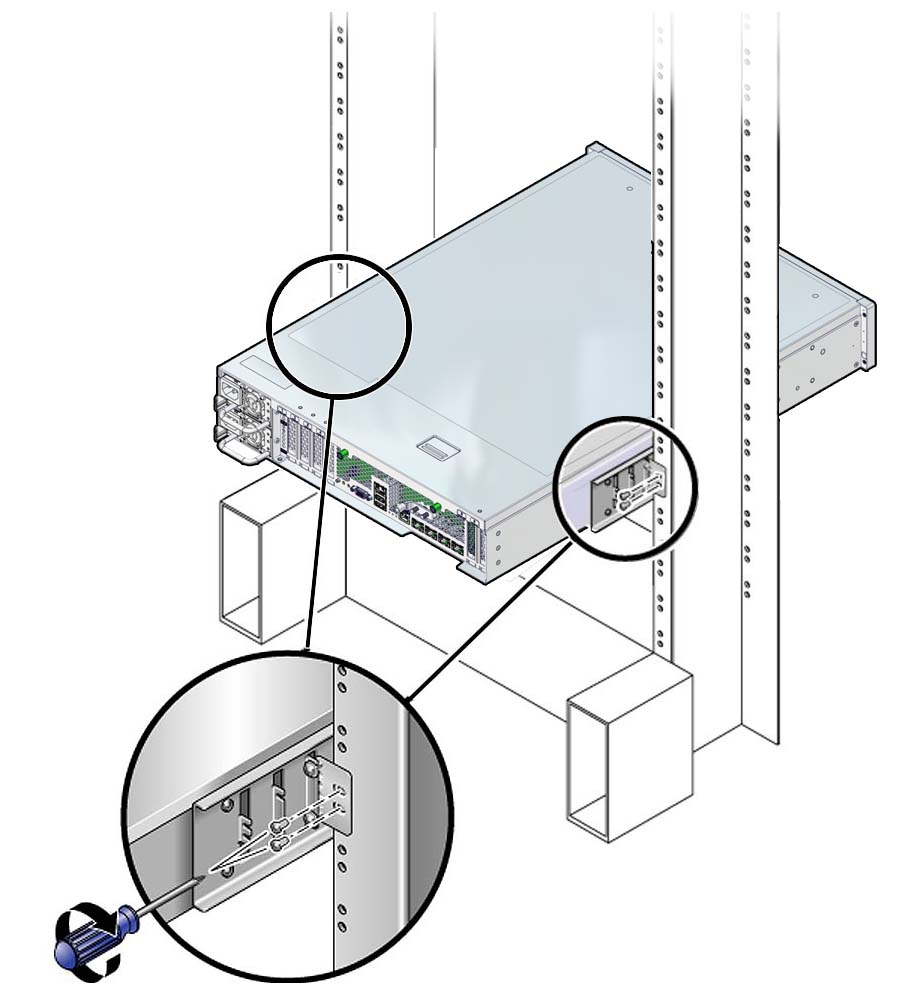
(Optional) If your environment contains especially high vibrations, use
the rear plates to further secure the server to the rack.
The rear plates attach to the rear of the post and to one of the three sets of eyelets on each side bracket, depending on the thickness of the post.
-
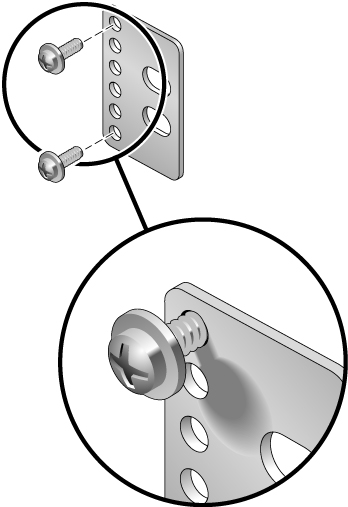
Loosely install the screws in one of the six positions on the rear
plate.
Use two M3 x 8 SEM screws for each rear plate. The position varies depending on the thickness of the rail in the rack. For example, this figure shows where to install the screws for the optimum rack position on the rear plate.
-
Slide the rear plate in so that the screws slide into position
into one set of the eyelets.
The screw heads should be facing the rear of the server. The other side of the rear plate should be in front of the rack post.
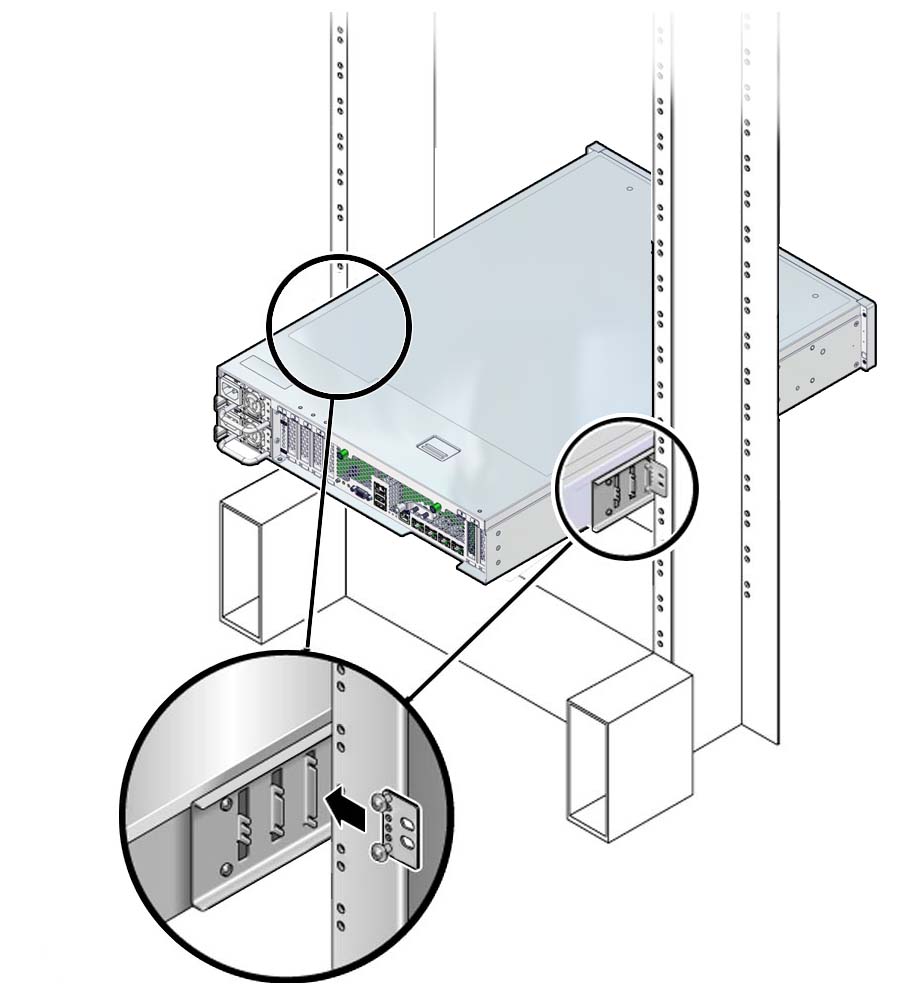
- Tighten the screws to secure the rear plate to the set of eyelets on the side bracket.
-
Secure the other side of the rear plates to the back of the
posts.
Use two screws per post. The size of the screws varies, depending on your rack.
-
Loosely install the screws in one of the six positions on the rear
plate.
-
Connect required and optional cables.
See Connecting Cables.
-
Consider your next step:
- For existing servers, return the server to operation by following the steps in the service manual.
- For new servers, continue the installation by following the steps in Connecting Cables.