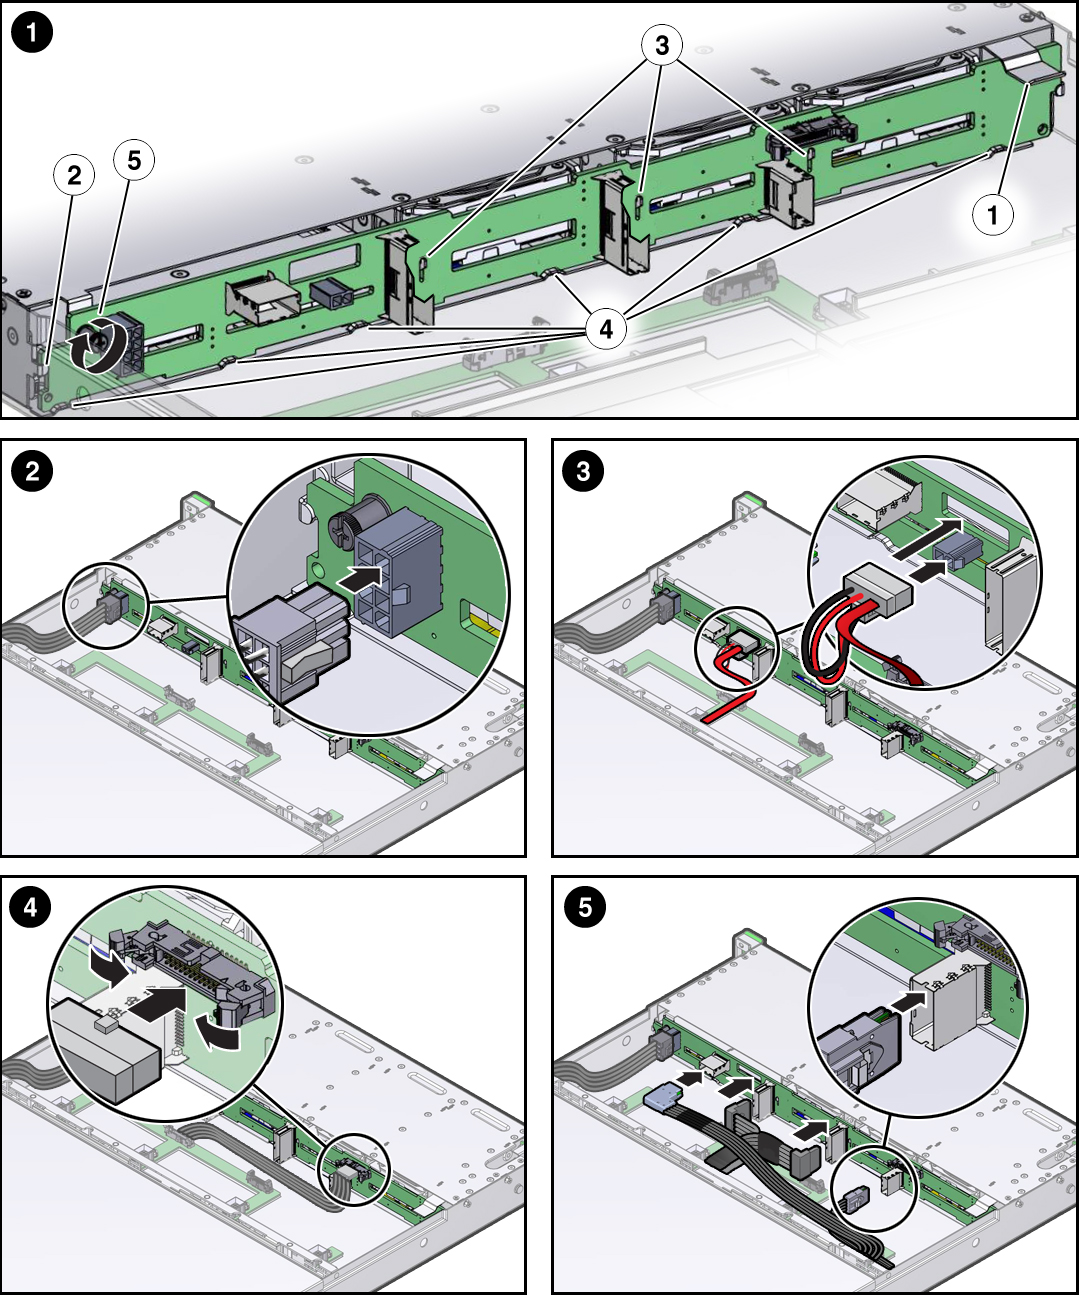
Install the Drive Backplane
This is a cold-service procedure that must be performed by qualified service personnel. Power down the server completely before performing this procedure.
 | Caution - This procedure requires that you handle components that are sensitive to ESD which can cause server components to fail. |
-
Place the backplane into the disk cage.
- Lift the metal spring retainer (1.1) and position the backplane so that it fits into the two metal brackets that are located on the chassis side walls (1.2).
- Lower the drive backplane into the disk cage so that it engages the three metal hooks in the disk cage (1.3)
- Continue to lower the drive backplane into the disk cage until it is positioned in all six troughs that are located at the bottom of the disk cage (1.4) .
-
Turn the drive backplane captive screw clockwise until the drive
backplane is secure (1.5).

- Reconnect the drive backplane power cable to the drive backplane (2).
- Reconnect the drive backplane auxiliary power and signal cable to the drive backplane (4).
- Reconnect the SAS cables and the NVMe card cables to the drive backplane (5).
-
Reinstall all of the storage drives into the storage drive cage.
See Install a Drive.
- Install the disk cage cover.
-
Install all four fan modules.
See Install a Fan Module.
- Return the server to operation.