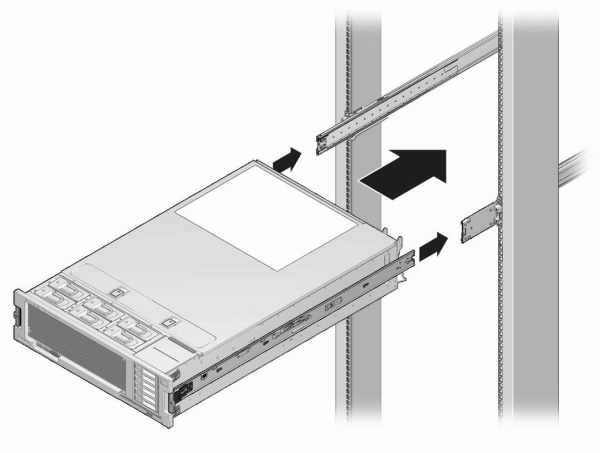
Installing a 7x20 onto the Rack Slide Rails
Use the following procedure to install a 7420, 7320, or 7120 controller onto the rack slide rails.
 | Caution - This procedure requires a minimum of two people because of the weight of the chassis. Attempting this procedure alone could result in equipment damage or personal injury. Always load equipment into rack from the bottom up. |
Before You Begin
Extend all anti-tilt and stabilization devices from the bottom of the rack.
-
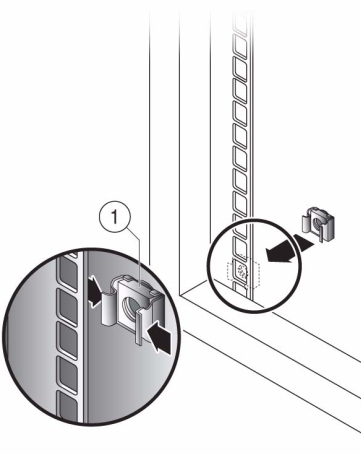
If you are using a universal 19-inch cabinet, snap an M6 square cage nut into
the top and bottom holes of the location where you will be installing the rail
plate as shown.
-
Position a slide rail assembly in your rack so that the brackets at each end
of the slide rail assembly are on the outside of the front and back rack
posts.
The following graphic illustrates the rail assembly brackets.
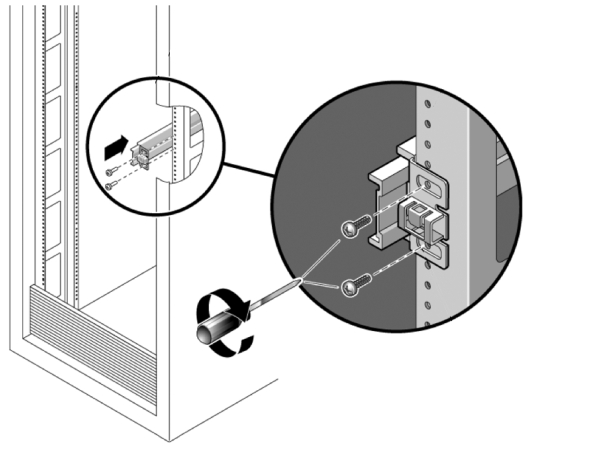
- Attach each slide rail assembly to the rack posts, but do not tighten the screws completely.
-
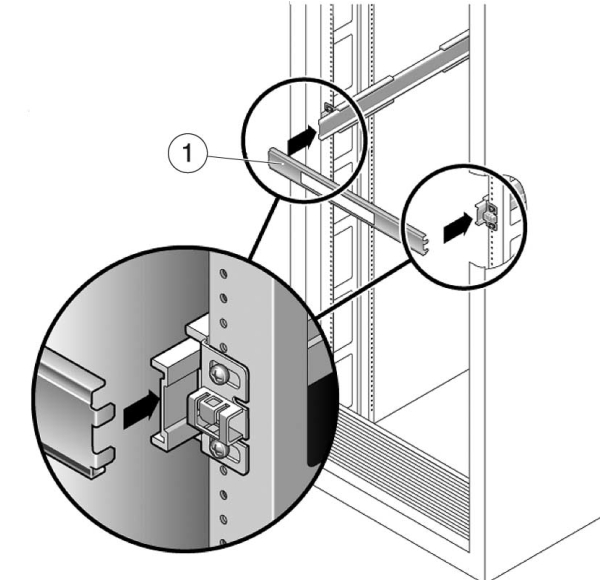
From the front of the rack, set the proper width of the rails with the
rail-width spacer (1).
- Tighten the screws on the brackets.
- Remove the spacer and confirm that the rails are attached tightly to the rack.
- Lower the rack stabilization and anti-tilt devices if you have not already done so.
- Push the slide rails into the slide rail assemblies in the rack as far as possible.
-
Raise the chassis so that the back ends of the mounting brackets are aligned
with the slide rail and insert the chassis into the slide rails, pushing the
chassis slowly, until the mounting brackets meet the slide rail stops (~12 in or
30 cm).
You will hear an audible click.
The following graphic illustrates the 7120/7320 chassis insertion and slide rail locks usage.
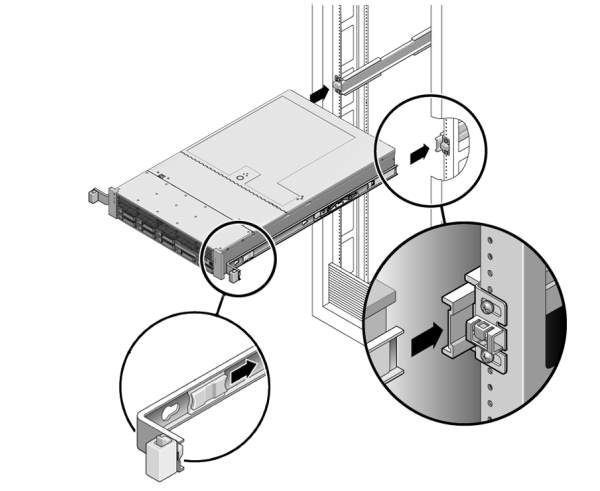 Example 4 Installing a 7420 onto the Rack Slide Rails
The following graphic illustrates 7420 chassis insertion.
