Installing the Mounting Brackets on a 7x20
Use the following procedure to install the mounting brackets on a 7420, 7320, or 7120 controller.
Note - If the mounting brackets are shipped inside the slide rails, you must remove them before beginning this procedure; see Removing the 7x20 Mounting Brackets from inside the Slide Rails.
-
Position a mounting bracket against the chassis so that the slide rail lock is
at the front of the chassis, and the keyed openings on the mounting bracket are
aligned with the locating pins on the side of the chassis.
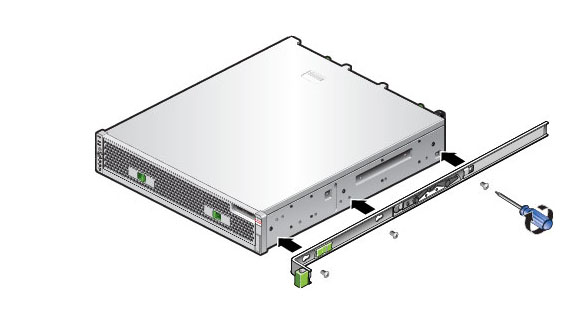
The following graphic illustrates how to attach the 7120/7320 mounting brackets.

-
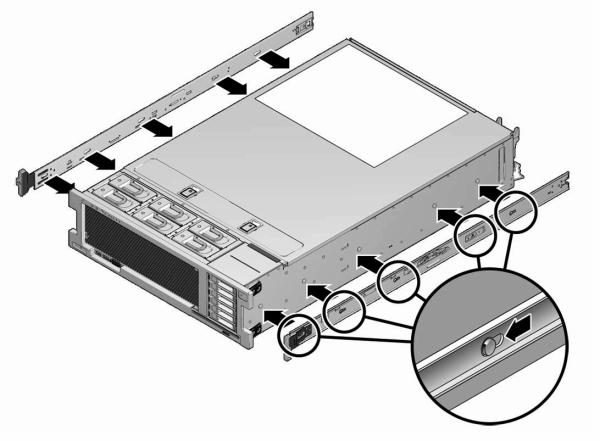
The following graphic illustrates how to attach the 7x20 mounting
brackets.

- With the heads of the four chassis locating pins protruding though the four keyed openings in the mounting bracket, pull the mounting-bracket toward the front of the chassis until the mounting-bracket clip locks into place with an audible click.
- Verify that all mounting pins are securely fastened to the chassis.
- Repeat to install the remaining mounting bracket on the other side of the chassis.