Creating an ASN after a Return
If you are receiving inventory back in your facility, this feature allows you to find the return inventory in the system and create an ASN in the returned facility, so that you can account for the correct inventory. There are two ways to receive returned inventory, via the Order Headers UI (where you can return the whole order) or from the OBLPN UI (where you can return one or multiple LPNs).
Return Whole Orders from Order Headers UI
You can receive returns from inventory that was shipped from your current facility or from a different facility from the Order Headers UI. You can search for the \shipped order , select it, and create an ASN so that later you can receive this inventory in your return facility.
This feature requires a group permission such as 'order hdr/Create ASN ' for this button so that only users with sufficient access can select it. By default, only users with an ‘ADMINISTRATORS’ or ‘MANAGEMENT’ role have access to this button. All other users will have to get the corresponding group permission enabled to be able to select this button.
To create an advanced shipment notice (ASN) for returns, go to the Order Header Screen and click “Create ASN.”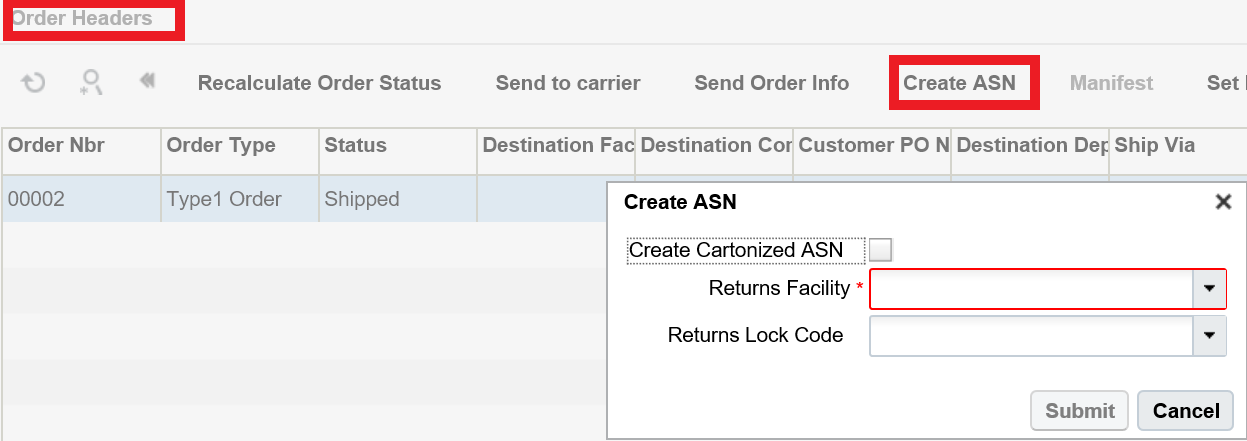
| Create ASN Fields | Description |
|---|---|
| Create Cartonized ASN |
The system will generate a cartonized ASN. |
| Returns Facility | Drop down with list of Facilities |
| Returns Lock Code | Drop down with list of Lock Codes which will be transferred to your newly created ASN |
The Create ASN button is only enabled if the order is in Shipped status. Once you select Create ASN, the Create ASN window appears. When you select Create Cartonized ASN, the system will generate a cartonized ASN. For more details about Cartonized ASNs. You can select the return facility from the Returns Facility (required field) drop-down. The ASN will be created from the facility you select. The Returns Lock Code drop-down gives you the option to assign your inventory Lock Code which will be transferred to your newly created ASN.
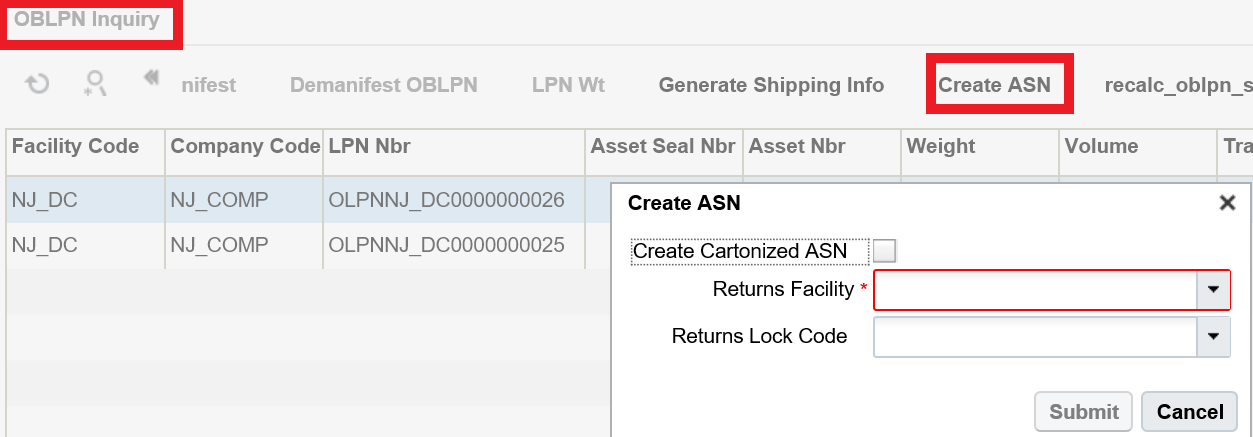
Return Items from the OBLPN Inquiry UI
If you need to return a specific inventory from your order, you can do this from the OBLPN Inquiry UI via the Create ASN button. You can access the Create ASN action button by selecting one or more OBLPNs. However, when you select one or more OBLPNs which are not in shipped status, then Create ASN will be disabled. The same logic applies for creating an ASN from the OBLPN Inquiry as it does from the Order Headers UI.
Viewing your ASN
To view your newly created ASN, you will need to change your facility to your return facility. If your return inventory had an inventory attribute, this information is copied to your new ASN.
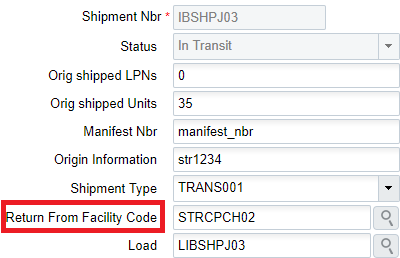
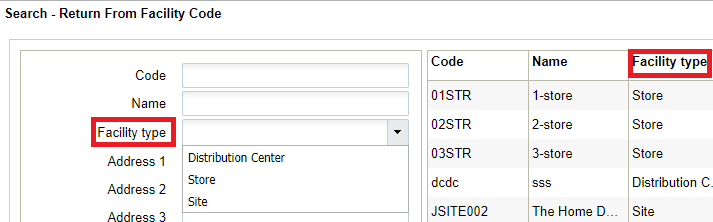
- The “Return From Facility Code” field (on the create pane of the Inbound
Shipment UI), features an advanced look up option to find the customer,
distribution center, or store from where the shipment was returned.
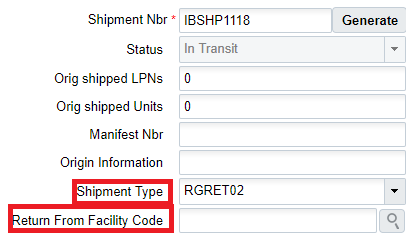
- “Return From Facility Code” is enabled only if the Shipment Type on the shipment has “Capture Returns Information” configured as Yes in the Shipment Type UI. In this example, Shipment Type RGRET02 has been configured with “Capture Returns Information” as Yes, which has enabled the “Return From Facility Code” field).
- Once you select the advanced look up option, the following screen appears,
and displays a facility type of “DC”, “Store”, or “Site”. Depending on where
the shipment is returned from, choose the appropriate facility type. If the
return shipment is from a customer, then choose “Site” as the facility
type.
- The system will not allow the creation of an ASN if the selected Shipment Type has “Capture Returns Information” configured as Yes, but the “Return From Facility Code” value has not been captured.
- When the Shipment Type has “Capture Returns Information” configured as No, and you populate “Return From Facility Code”, then the system removes the “Return From Facility Code” value before it creates a new ASN.
- When an ASN for return shipment is verified, the return facility information is included in the Shipment Verification file.
- When an inbound shipment is created from a Purchase Order (Header or Detail view), the Shipment Type for the shipment is determined from the PO Type of the Purchase Order. If the determined Shipment Type has “Capture Returns Information” configured as Yes, then the system prevents the Inbound Shipment from being created because return information is required.
- When an ASN is interfaced into WMS with a Shipment Type that has “Capture
Returns Information” configured as Yes, the system validates if the
field “returned_from_facility_code” is populated in the input file/msg.
- If this field is not populated, the system does not allow the ASN to be interfaced and displays the error message “Cannot Create Inbound Shipment, Return facility Information is required”.
- If this field is populated but the facility code is invalid, then the system does not allow the ASN to be interfaced and displays the error message “Invalid return from facility code”.
- When a Transfer Shipment is created for a load that is shipped from one facility to another, if the determined Shipment Type has “Capture Returns Information” configured as Yes, then the “return from facility code” is populated on the Transfer Shipment.