Install the Oracle PCIe NVMe Switch Card in PCIe Slot 1
- Unpack the replacement PCIe NVMe switch card and retrieve the slot 1 PCIe riser.
-
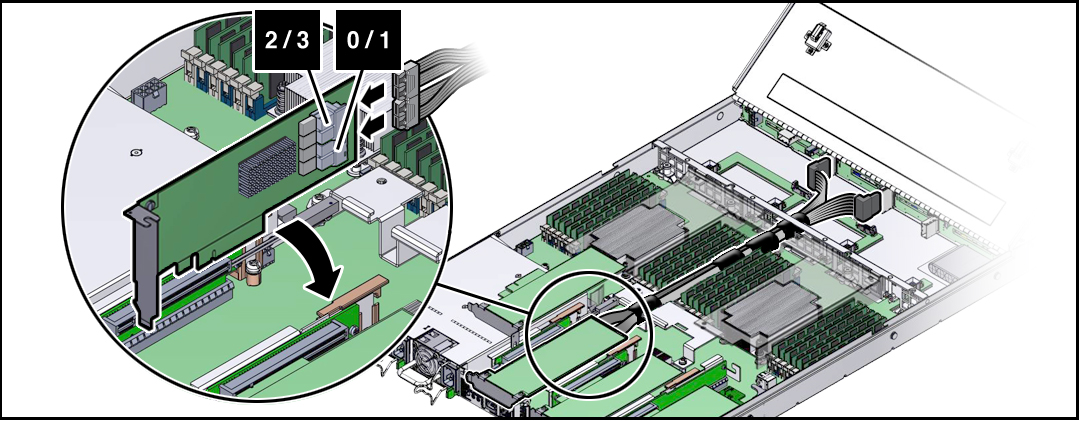
Reconnect the cables from the disk backplane to the switch card.
When connecting the cables, be sure to match the labels on the cables (2/3 and 0/1) with the connector labels shown in the following figure.

- Hold the riser in one hand and use your other hand to carefully insert the switch card connector into the Riser.
-
Install the PCIe riser into the server.
For instructions, see Install a PCIe Riser Into PCIe Slot 1 or 2.
-
Return the server to operation.
- Close the server fan door.
- Return the server to the normal rack position.
- Reconnect the data cables to the server and reconnect the power cords to the server power supplies.
-
Power on the server.
See Power On the Server.
Verify that the Power/OK status indicator is steady on.