The following procedure shows how to set up the initial or root stage of the campaign.
Display the Structure tab, either by creating a new campaign, as described in the previous section, or by displaying the campaign through the To Do list or the Browse Campaigns option in the BCC Home page.
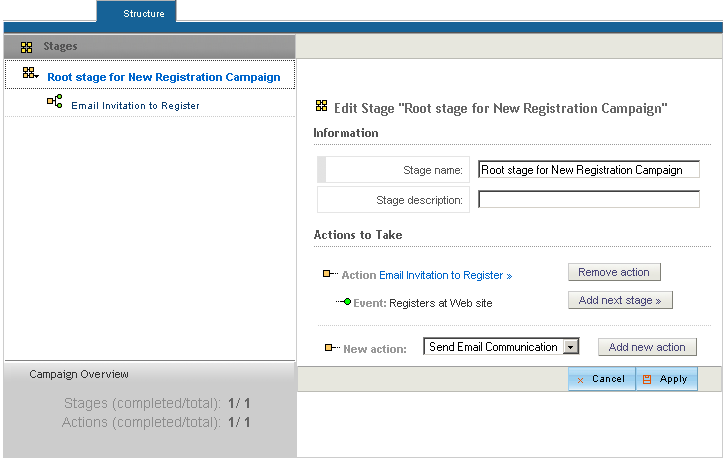
Enter a name for the stage. The name is used by ATG Outreach only and is not seen by customers. A note about stage names: If you plan to use ATG Outreach reports, make sure that each stage name is unique within a campaign. The reporting engine combines report rows for any stages that have the same name.
(Optional) Enter a description.
From the New Action dropdown menu, select the first action you want to occur in this stage of the campaign.
Click Add New Action, which changes the display in the right pane to show fields corresponding to the action you chose.
Complete the fields for this action and click Apply. For detailed information on configuring the different elements available, see Configuring Actions. Note also that any events that you want to add to this stage must be added through the action display, and only certain actions allow you to add events. For more information, see Adding Events.
The image below shows the Structure tab as it looks after you have defined one action.
At this point, you can do the following:
Add other actions to this stage. Any actions you add to the root stage start at the same time and run parallel to one another. To continue building the campaign shown at the beginning of this chapter, you would add another action, Wait for Timer, and configure it to wait for two weeks.
If the action you just added contains an event, you can start a child stage. To do so, click Add Next Stage. This button does not appear if no events have been added to the action. See Adding Child Stages for more information.
Delete the campaign by selecting Cancel from the Task Actions list. See Deleting Editable Campaigns.
Finish the campaign. See Finishing and Deploying a Campaign for more information.
