The Perform Action option allows you to add any of the following actions to a stage:
Add Items to Slot
Change (changes a profile property, a parent organization, or roles)
Redirect To Page
If your ATG product suite includes ATG Commerce, you can also add the following actions to a campaign stage:
Add Item to Order
Give Promotion
Revoke Promotion
You can also create custom actions for use in campaigns. For example, your environment could be configured to include a “Send Brochure” action that sends qualifying customers’ names and home addresses to a mailing list. Custom actions appear as part of the Perform Action option.
You can also add events through the Perform Action element. See Adding Events for more information.
Important: Any repository items you reference as part of creating an action are versioned items on the management server. Be aware that these items (the latest versions of them) may not have been deployed yet to the production server.
Adding an Action
To add one of the actions listed above, complete the following steps:
Add a Perform Action element to your campaign stage as described at the beginning of this section.
Click the Add Action button. The Action Picker appears, allowing you to create a new action or select an existing one. If you choose to add a new action, click Create New Action. The Edit Action page appears, as shown:
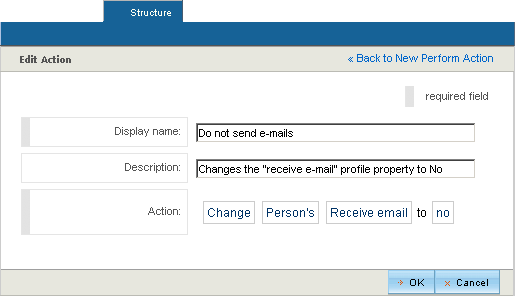
Enter a display name for this action. The name is used by ATG Outreach only and is not visible to customers. After you create this campaign, the action you are adding here will be available to other campaigns, and the name you enter will be used to identify this action in, for example, the Action Picker.
(Optional) Enter a description.
Use the Action fields to specify the parameters that make up the action. In many cases, you can click the element to see the options available for it. In others you type the value directly into the field. For information on how to configure specific actions, see the next section, Configuring Actions.
Click OK.
