Install a Power Supply
This is a hot-service procedure that can be performed by a customer while the server is running.
 | Caution - Always replace a faulty power supply with a power supply of the same type (model). |
 | Caution - Replace the power supply within 5 minutes to ensure proper system cooling. |
- Remove the replacement power supply from its packaging and place it on an antistatic mat.
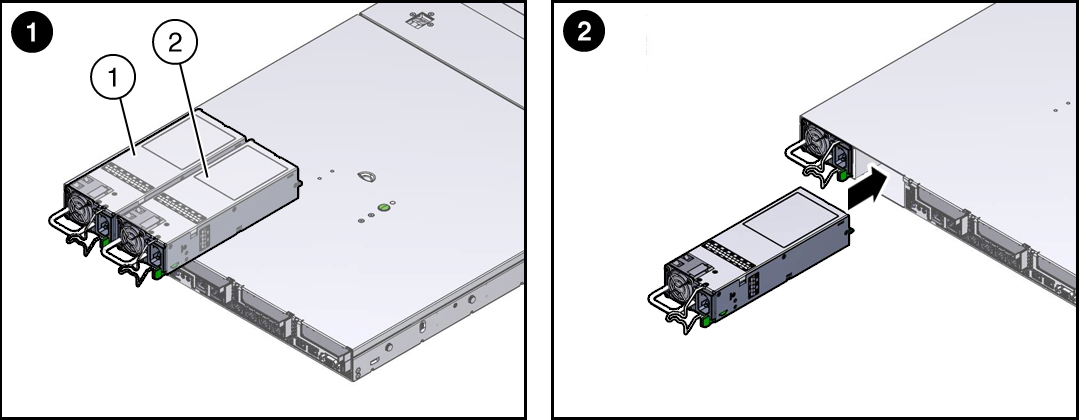
- Align the replacement power supply with the empty power supply slot (1).
-
Slide the power supply into the bay until it is fully seated (2).
Ensure you press the power supply in firmly, then close the latch. You hear an audible click when the power supply fully seats.

- Reconnect the power cord to the power supply.
- Verify that the amber LED on the replaced power supply and the Service Required LEDs on the front and rear panels of the server are not lit.
-
If you disconnected the two CMA left-side connectors, reconnect the
connectors.
For instructions for reconnecting the CMA left-side connectors, refer to Install the Cable Management Arm in SPARC S7-2 Server Installation Guide.