Remove the Drive Backplane
This is a cold-service procedure that must be performed by qualified service personnel. Power down the server completely before performing this procedure.
 | Caution - This procedure requires that you handle components that are sensitive to ESD which can cause server components to fail. |
- Prepare for servicing.
- Open the server fan door to gain access to the drive backplanes.
-
Remove all four fan modules.
See Remove a Fan Module.
-
Pull all storage drives out far enough to disengage them from the drive
backplane.
See Remove a Drive.
Note - It is not necessary to completely remove the storage drives from the server. Pull them out far enough to disengage the drives from the drive backplane. If you do remove the storage drives from the server, record their locations so that you can reinstall them in the same locations. -
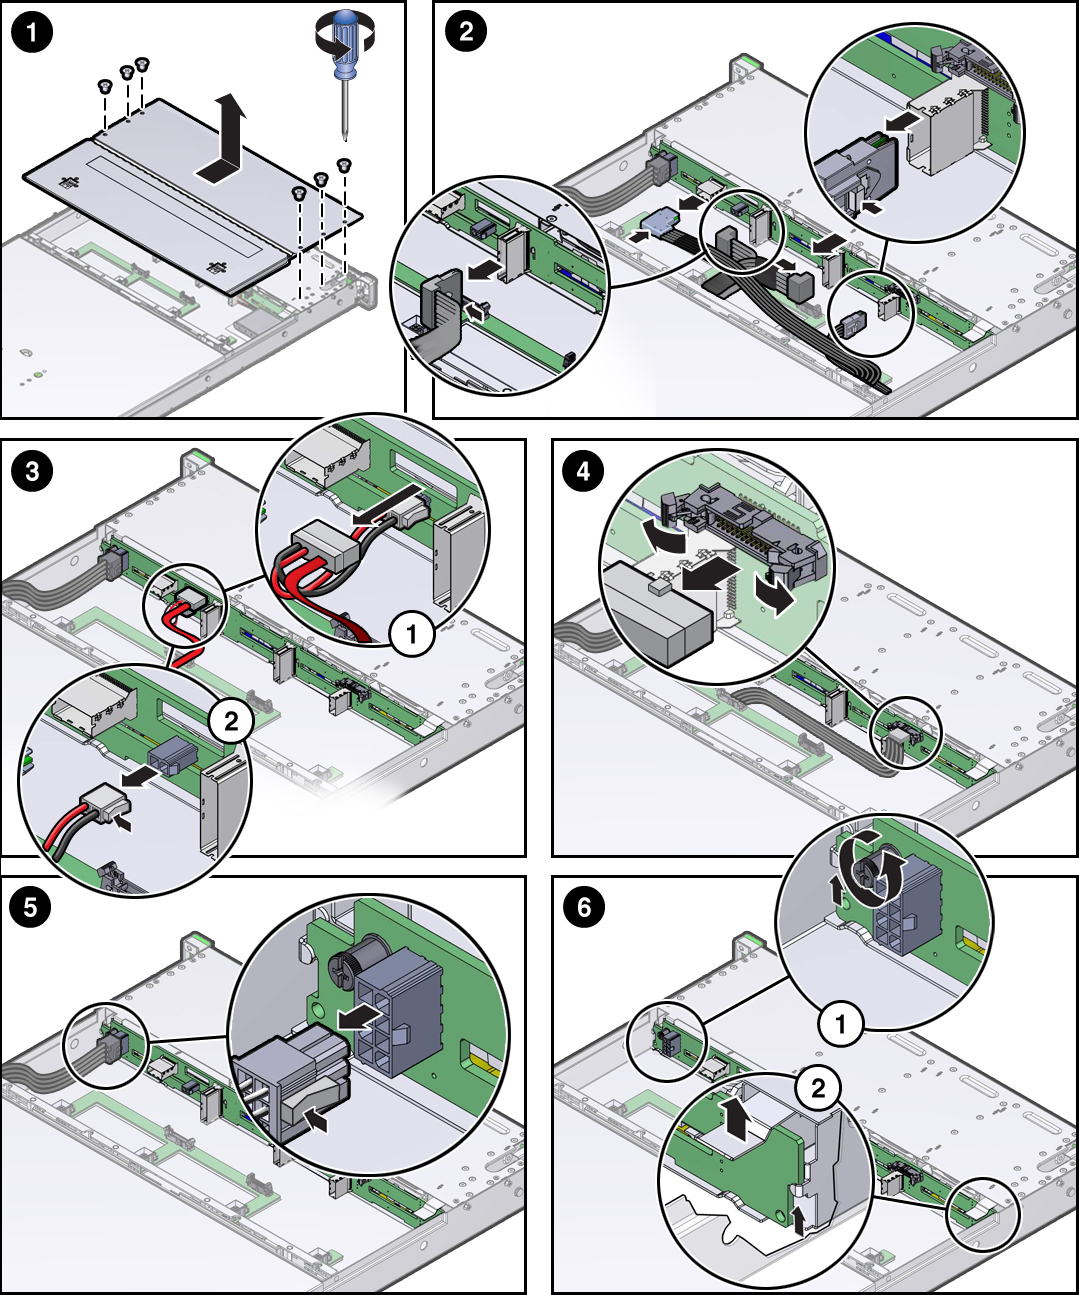
Remove six Philips screws from the disk cage cover and slide toward the front
of the server and lift up to remove it (1).

- Disconnect the SAS cables and the NVMe card cables from the drive backplane (2, 4).
- Disconnect the drive backplane auxiliary signal cable from the drive backplane (3).
- Disconnect the drive backplane power cable from the drive backplane (5).
- Loosen the captive screw that secures the drive backplane to the chassis (6.1).
- Lift the metal spring retainer on the right side of the drive backplane, lift the drive backplane up and tilt it toward the rear of the server to free it from the holding brackets, and lift it out of the server (6.2).
- Place the drive backplane on an antistatic mat.