Install the Side Panels
There are two panels on each side of the rack. The top panel is secured by two keys.
Both panels have tabs on the panel that slide into grooves on the rack frame to hold the panel in place.
Both panels have grounding straps that connect them to the rack frame.
You must install the lower panel before you can install the top panel.
-
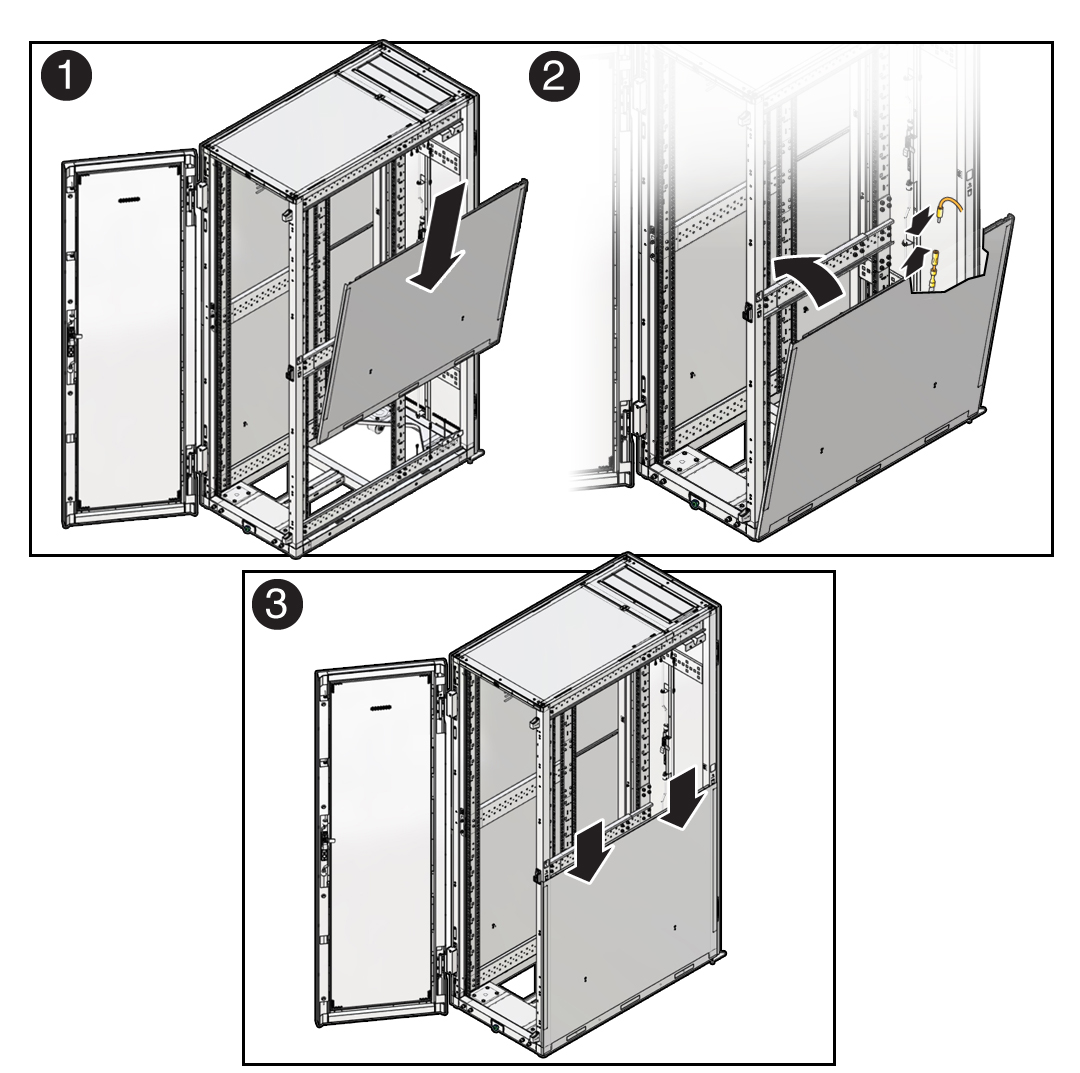
Lift the lower panel and lower it to insert the tabs on the bottom of the
panel into the grooves on the rack frame [1].
If the lower panel is already in place, skip to Step 4.
Make sure both tabs are inserted into the grooves.

-
Allow the panel to swing outward from the top about 6 inches (15.25 cm)
and connect the grounding strap [2].
Mate the two ends of the banana jack to complete the connection.
Note - If the rack is full, you might not be able to access the grounding straps once the panel is in place. -
Swing the lower panel back in, lift it slightly, and lower its upper tabs
onto the grooves [3].
Make sure both tabs are inserted into the grooves.
-
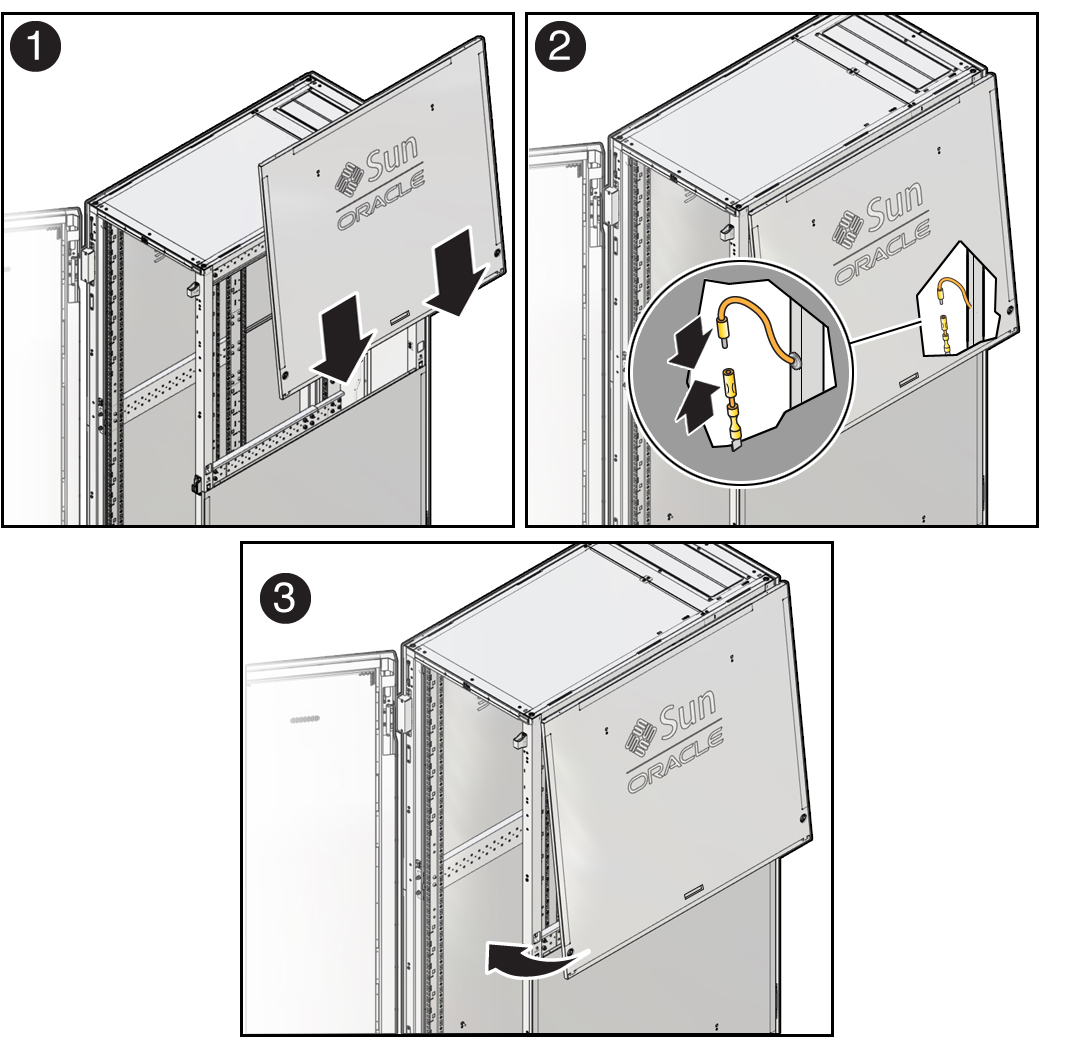
Lift the upper panel and lower it to insert its upper tabs into the
grooves [1].
Do not insert the lower tabs yet.
Caution - Drop Risk. Make sure that the upper panel is aligned correctly and that both tabs are secure in their respective grooves.

-
Swing the lower edge of the upper panel outward about 6 inches and
reconnect the grounding straps [2].
Mate the two ends of the banana jack to complete the connection.
Note - If the rack is full, you might not be able to access the grounding straps once the panel is in place. -
Swing the lower edge of the upper panel inward, lift the panel slightly
using the handle, and lower the tabs into the grooves [3].
The two lower tabs are located in the center of the upper panel, near the handle.
-
Use the keys to lock the upper panel.
The panel is locked when the key slot is in the vertical position.
-
Power on the rack.
See Power On the Rack.