Remove the Disk Backplane
-
Prepare the server for service.
- Power off the server and disconnect the power cords from the power supplies.
- Extend the server to the maintenance position.
- Attach an antistatic wrist strap to your wrist, and then to a metal area on the chassis.
- Remove the server top cover.
-
Lift up the super capacitor to release the capacitor from the
reclosable fasteners that secure it to the chassis.
Set the super capacitor aside (leaving the super capacitor cable attached) until you are ready to install the replacement storage drive backplane.
-
Pull all storage drives out far enough to disengage them from the disk
backplane.
Note - It is not necessary to completely remove the storage drives from the server; simply pull them out far enough to disengage them from the disk backplane. If you do remove the storage drives from the server, record their locations so that you can reinstall them in the same locations. -
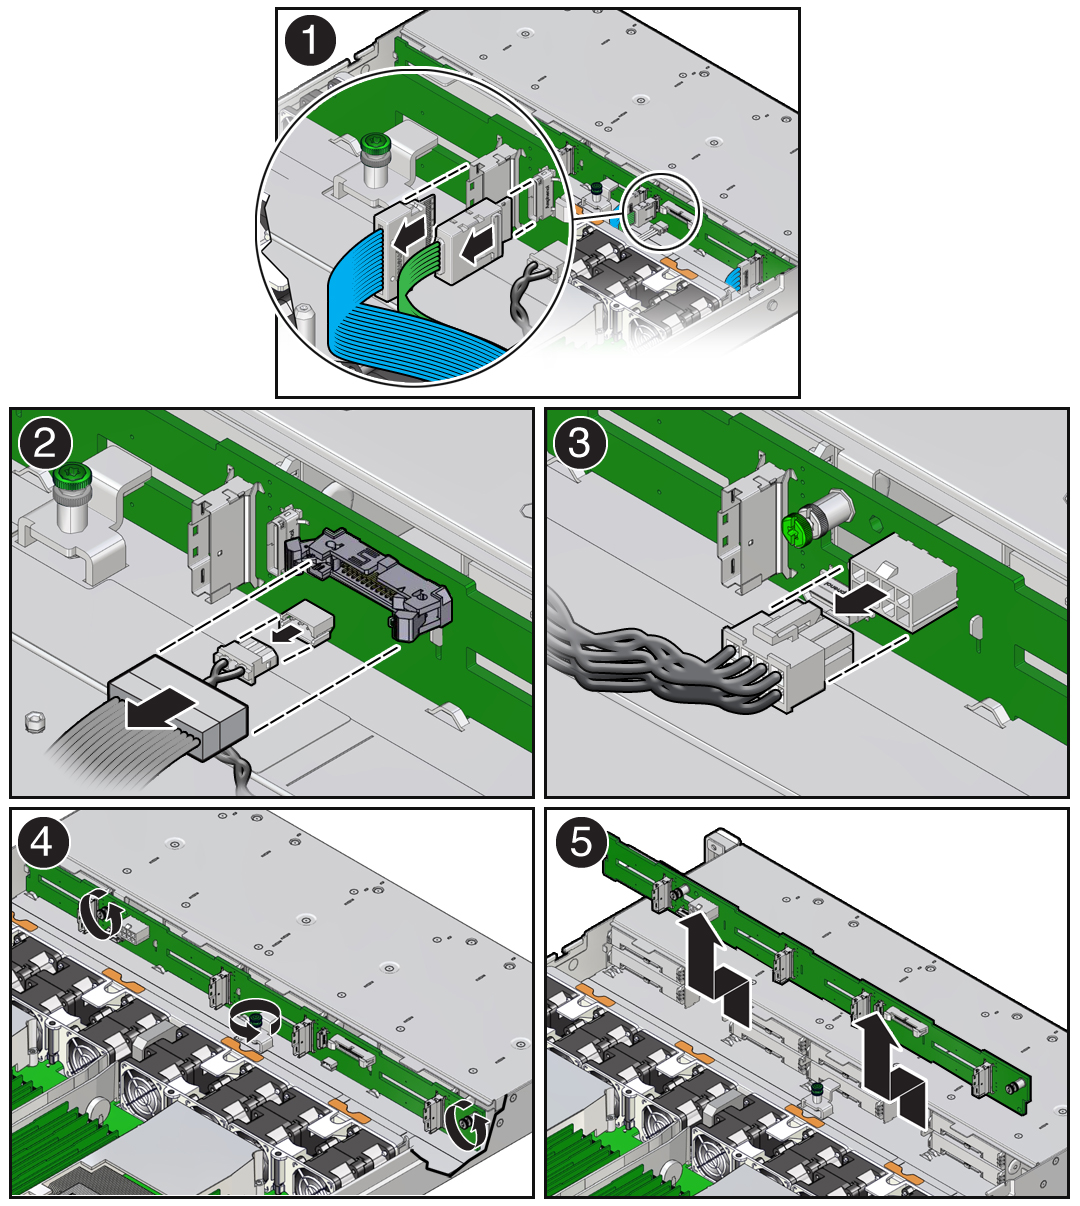
Disconnect the SAS cables or the NVMe cables (if present) from the disk
backplane [1].

- Disconnect the disk backplane data cable and the temperature sensor cable from the disk backplane [2].
- Disconnect the disk backplane power cable from the disk backplane [3].
- Using a Torx T15 screwdriver, loosen the three captive screws that secure the disk backplane to the chassis [4].
- Lift the backplane up and tilt it toward the rear of the server to free it from the hooks and right-side metal bracket, and lift it out of the server [5].
- Place the disk backplane on an antistatic mat.