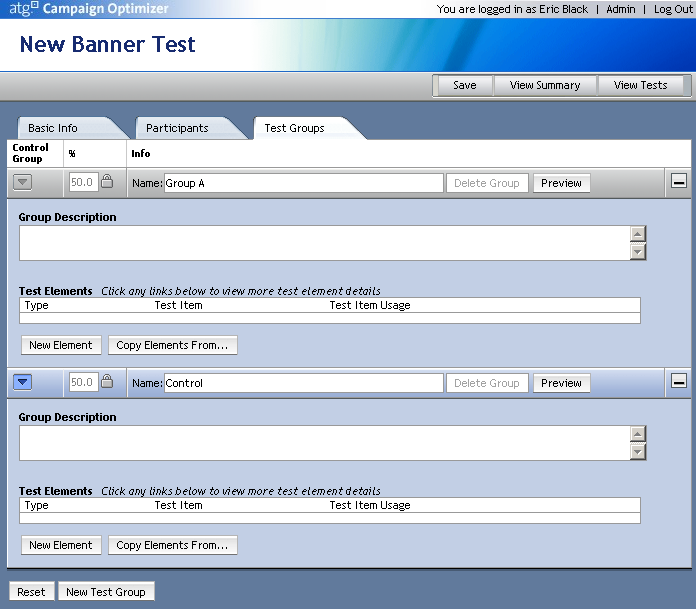
Participants in a test are broken up into groups. Each group sees different test elements. By default, the Test Group tab contains two groups. One group should contain the test elements to switch from the standard site. The Control group typically contains no test elements. Users in the control group see the same thing that users see when the test is not running.
Follow these steps to set up the test groups.
Open a test and select the Test Groups tab.
Create a new test group, if needed, by clicking on the New Test Group button.
Change the percentages associated with each group in the % column. The numbers must add up to 100%. By default, all groups are set to the same percentage. To change the percentages, click on the lock icon next to the number and enter a new number. Do not click on the lock icon again or the numbers will reset to the default.
Note: If you unlock all test group percentages, the system no longer verifies that the total adds up to 100%.
Change the Name for each group in the Name field. (optional)
Enter a short description of each group in the Group Description field. (optional)
Configure test elements for each group. For more information, see Configuring Test Elements.
Click on Save to save the group information.
You can hide a group by clicking on the minimize button (an underscore in a box) in the right hand corner of each group. This will minimize the group so you can only see the name and percentage value. Maximize the group by clicking on the maximize button.
Clicking on the Reset button resets all fields to the last saved value.
