Each time you add a new content group, you need to set up the rules that define the content that will be included in the group.
Note: The configuration for the basic definition of the contents in a content group is the same in an unregistered site or a multisite environment. However, in a multisite environment, multisite rule extensions are displayed. For information about how to use the rule extensions in a multisite environment, see Multisite Targeting Rules.
To define the content in a content group:
Display the Rules tab for the content group
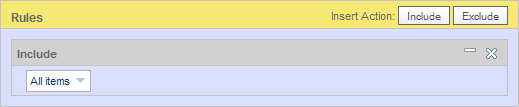
Click Include or Exclude in the Rules title bar.
Use Include to define the content group by the content you want to include.
Use Exclude to define the content group by the content you want to exclude.
The beginning of the new rule appears in the Rules panel:
Specify the content you want to include or exclude. To do so, click the default choice, All Items. The following options appear:
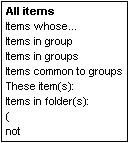
Specify the content you want to show or hide:
Click All Items if you want to include or exclude all content items stored in the selected repository.
Click Items in Group(s) if you want to include or exclude items from other existing content groups. Then select the group you want to add. Bear in mind that the only groups that can appear as options are those whose content source and type match the content source and type you specified in the General tab for this group. Note also that a content group must have a base version in the versioning system for it to appear here, which means it must have been added to another project and checked in (but not necessarily deployed). For more information on how and when an asset is checked in, refer to the ATG Content Administration Guide for Business Users.
If multiple groups exist and you want to specify more than one, click the bracket symbol after the first group you entered, and select the comma option:
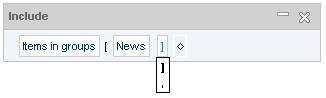
You can then specify another group. Repeat as many times as needed.
You can also add other criteria to further qualify this statement (for example,
Items in Group News whose Last Modified Date is after June 3, 2006.). To do so, click the diamond at the end of the phrase, as shown, and select Whose: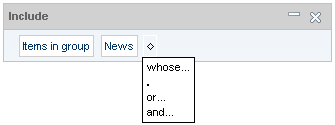
Follow the instructions for the Items Whose… option below.
Click Items Common to Groups to specify any items that appear in multiple groups; enter the groups to use as the criteria. Again, click the bracket and select the comma option to enter multiple groups.
Click Items in Folder(s) if you want to include or exclude all items from specific repository folders. The asset picker appears; use it to specify the folders you want. For more information, see Using the Asset Picker to Select Items.
As before, you can add other criteria to further qualify this statement by clicking the period at the end of the phrase and selecting Whose…
Follow the instructions for the Items Whose… option below.
Click These Item(s) if you want to include or exclude specific content items. Use the asset picker to select the individual content items you want to specify.
You can define additional criteria by selecting the Whose option.
Click Items Whose… if you want to include or exclude items based on specific content properties. When you select this option, several fields appear, allowing you to select the property, comparison operator, and value you want to use.
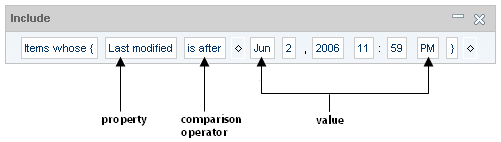
The properties that are available for selection depend on the repository you are working with. The selections in the Comparison Operator and Value drop-down lists change depending on the property you select. If the property has a limited set of values, the Value list will include all of your possible choices. If the property has an unlimited number of values, you can type a unique value directly into the list as shown below. An instruction showing the value type required appears below the text field.

If you want to add other condition statements to the rule, click the element at the end of the expression and select “and” or “or.”
If you want to make the group definition even more specific, click Include or Exclude again to create a rule set within the definition, and then repeat the steps above.
Click Create when you have finished defining the rule.
Follow the steps outlined in Project Basics to mark the Author task as complete and advance the project to the next task, usually Approval. When all tasks are complete, the project can be deployed, and the new targeter will be available on the live site.
