Install the CMA Comb
You will be installing the single-unit CMA comb. For installation of the multi-piece CMA, see Install the CMA (Multi-Piece CMA).
The CMA is attached to the rear posts of the rack.
Note - The CMA installation might block some of the power outlets in the rack, making them unavailable.
- Confirm that you have the correct hardware to install the CMA (Determine Correct Rackmount Hardware).
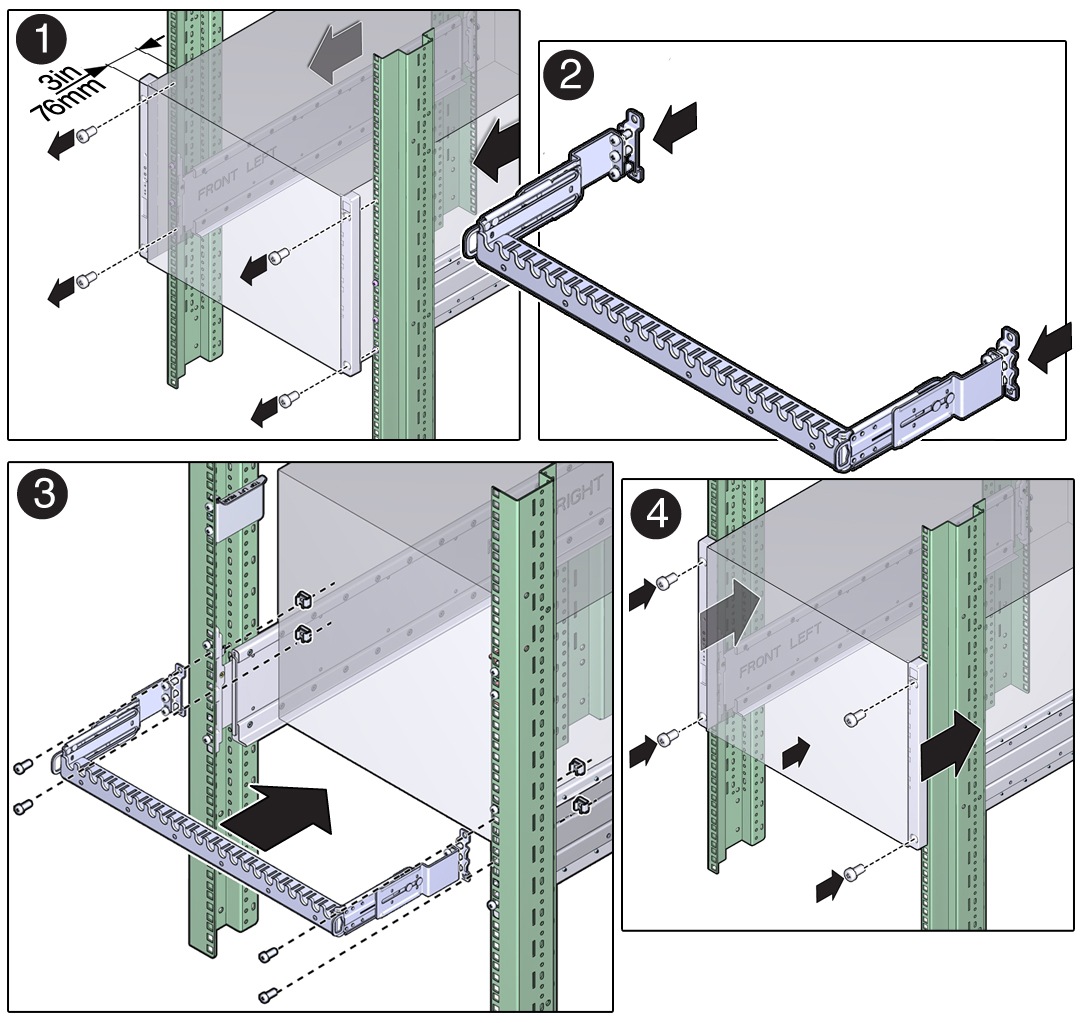
- At the front of the system, remove four screws, two per side.
-
At the rear of the system, on square hole racks, remove the middle adapter screw on each side
and push the system forward 3 in. (76 mm).

Caution - Do not remove the top adapter screw on the square hole racks.
- Attach the left and right CMA brackets to the comb, using three M6 screws per side.
- Attach the CMA comb to the rack posts, using two M6 screws per side.
- At the front of the system, push the system back until it touches the rails.
-
Reinstall the four screws, two per side.
