To open the Content Targeters window, select Targeting from the main ATG Control Center window, and then select Content Targeters. The following window appears:
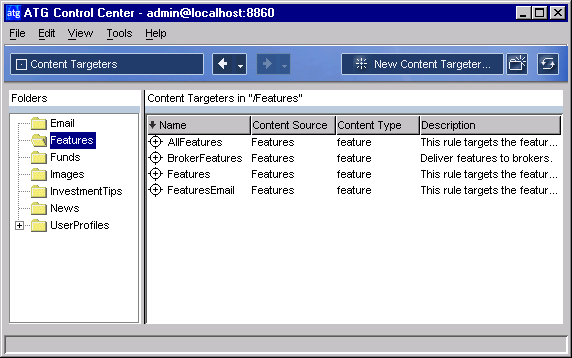
Targeting > Content Targeters window
The panel on the left shows a list of folders containing the content targeters that have been created for your Web site.
The panel on the right shows all the content targeters (identified by the
 icon) in the selected folder. You can add new targeters by clicking the New Content Targeter button in the toolbar. (See the Adding New Content Targeters section for more information.)
The Name column shows the name of each targeter in the selected folder. Note that the arrow next to the column title shows how targeters are sorted in this list; in this example, targeters are sorted alphabetically by their entry in the Name column. Clicking the column title reverses the sort order.
The Content Source column shows the name of the repository containing the content that will be delivered by this targeter. (A single targeter can deliver content from one repository only.)
The Content Type column shows the specific subset of items in the repository to which the targeters in this group must belong. (The subset is often used elsewhere in the product for organizational or querying purposes.)
The Description column displays a brief description of each targeter. If the column is too narrow to display all the text, hold the mouse pointer over a description that you want to read. The description text appears in a blue box.
To display the rules that make up a given targeter, click the targeter’s name in the Name column. The following window appears:
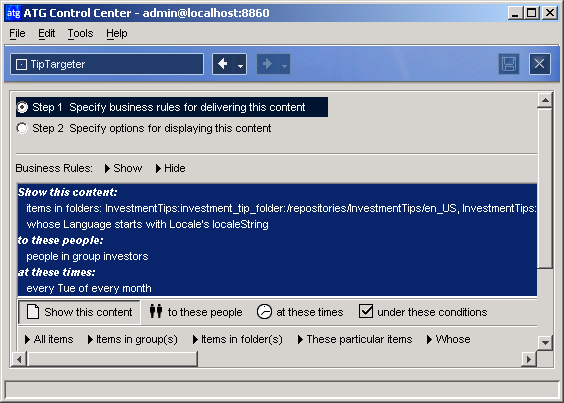
The Business Rules panel lets you define the circumstances under which this targeter displays content items to your Web site visitors. For more information, see the Setting Up Targeting Business Rules section.
Note: The various drop-down lists and options that appear in the Business Rules panel change as you build your targeting rules.
When you click Step 2 Specify options for displaying this content, the features of the window change as shown below, allowing you to sort the targeting results by certain content properties. Note: This is an optional step in the targeter creation process. For more information, see the Sorting Targeting Results section.
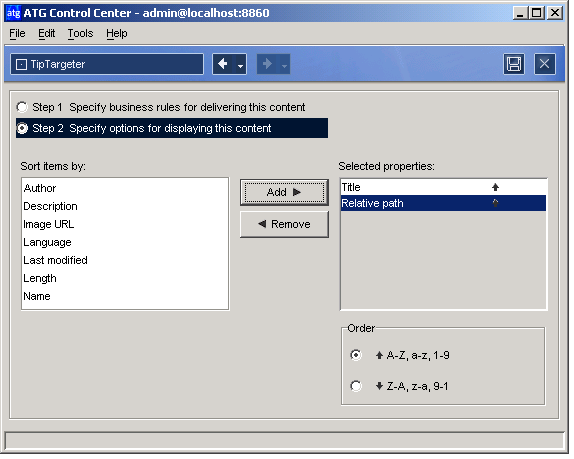
The Sort Items By list shows you the properties you can use for sorting. The properties that appear in this list vary depending on the selected targeter’s repository.
The Selected Properties list on the right displays the properties you select for sorting. Use the Add and Remove buttons to edit this list.
The Order buttons in the lower right corner let you switch between ascending (A-Z, 1-9) or descending (Z-A, 9-1) sort order for each property in the Selected Properties list.
