Install I/O Modules in a Fabric Interconnect F1‐4
The Fabric Interconnect F1-4 I/O Modules contain a locking mechanism (a quarter-turn Pawl) that is built-in to the module's handle. The lock is used to secure the module in place while it is inserted in the chassis, and has been designed with enough resistance that it cannot be unlocked or completely locked with your fingers. As a result, the module's handle is slotted to accept a screwdriver, which you will need to use to generate enough torque to lock or unlock the module.
By default, the Fabric Interconnect F1-4 is shipped with module blanks instead of the actual I/O Modules. I/O module blanks also have the locking mechanism. When you are initially installing I/O Modules, make sure to use the lock and unlocked positions appropriately—for example, make sure that you lock the modules when you are done installing them.
Oracle recommends that you keep all module blanks.
 | Caution - When using the screwdriver to lock or unlock an I/O Module, make sure not to dull or mar the slot in the I/O Module's handle. Also, if you apply excessive force, it might be possible to over-rotate the handle, which will skew the I/O module's open and closed positions. When using the screwdriver to lock or unlock an I/O Module, make sure to apply only enough force to the locking mechanism, and rotate the handle only enough to unlock or lock the module. |
- When handling I/O modules, make sure that you are using ESD safety precautions, such as a grounding strap that is properly attached to an earth ground source.
- Using a slotted screwdriver,
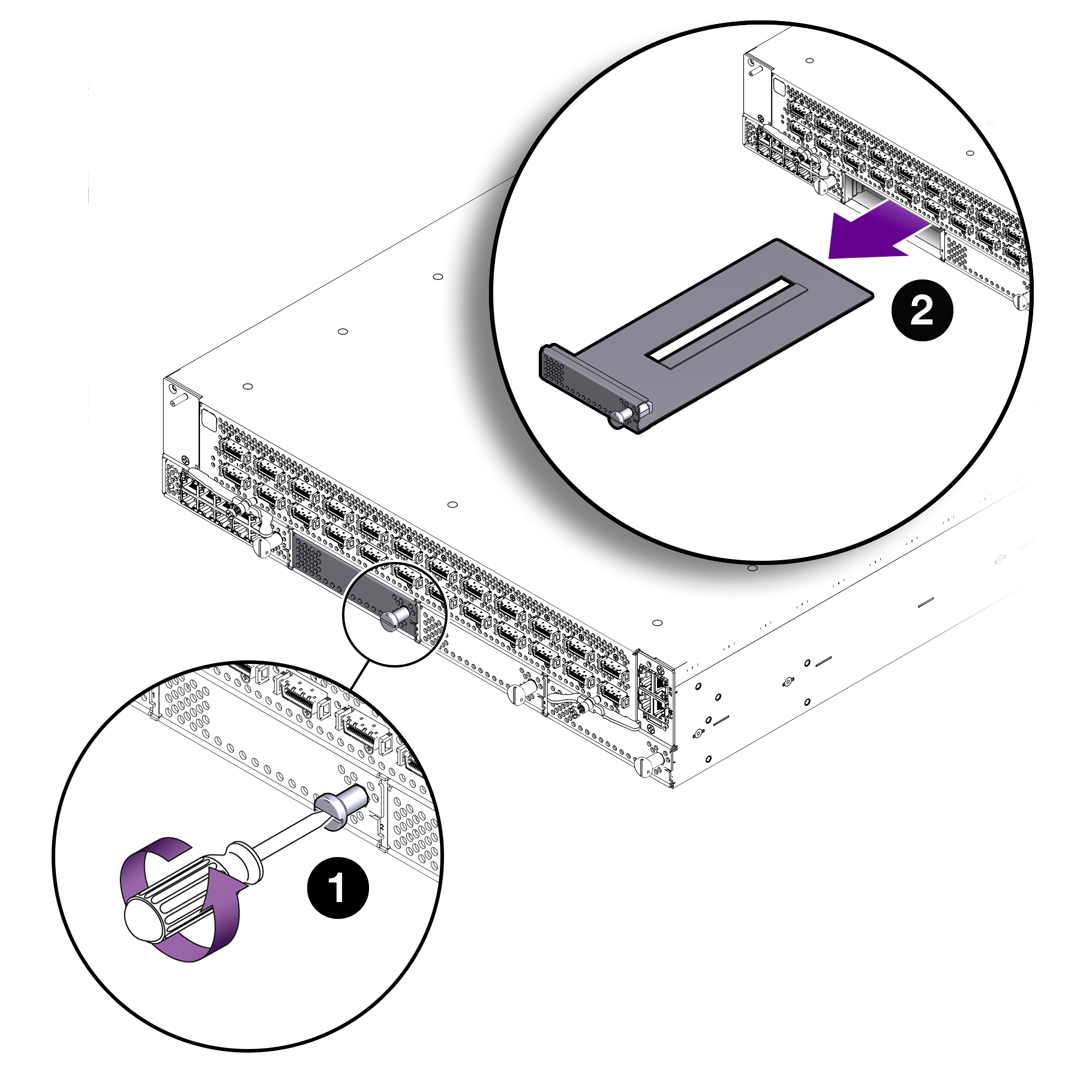
unlock the I/O module blank by turning it 90 degrees counterclockwise
(1) as shown in Removing an I/O Module Blank.
Figure 44 Removing an I/O Module Blank

- Grasp the module handle and remove the I/O module blank (2).
- Get the I/O module you will be installing, and make sure that the I/O module is in the unlocked position. Modules can be inserted into the Fabric Interconnect F1-4 only if they are in the unlocked position.
- Gently insert the I/O module
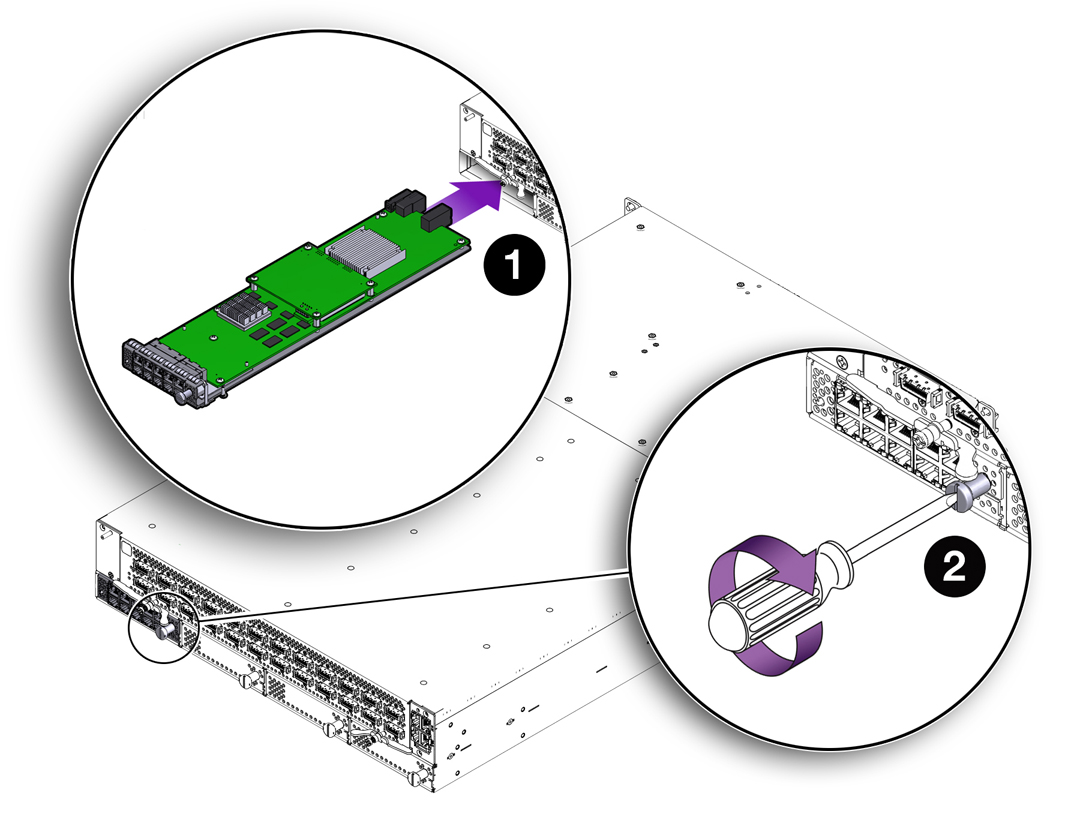
(1) as shown in Inserting a Fabric Interconnect F1-4 I/O Module.
Ensure that the I/O module is oriented so that the sheet metal side
is facing down and the module's faceplate is facing you. Also, ensure
that the module is aligned with the slot before sliding it into
the chassis.
Figure 45 Inserting a Fabric Interconnect F1-4 I/O Module

When the I/O Module is almost completely inserted, you will feel some resistance, which is the I/O Module's connector meeting its midplane socket. Continue to apply gentle pressure until the connector is seated in the socket.
- When the module is completely inserted, it should lie flush with the face of the Fabric Interconnect F1-4.
- Using a slotted screwdriver, lock the I/O Module into the chassis (2) by turning the lock 90 degrees clockwise.
- Repeat this procedure as needed to remove all the I/O module blanks and install all the I/O modules.