Install a Fabric Interconnect F1-4 Front Panel Assembly
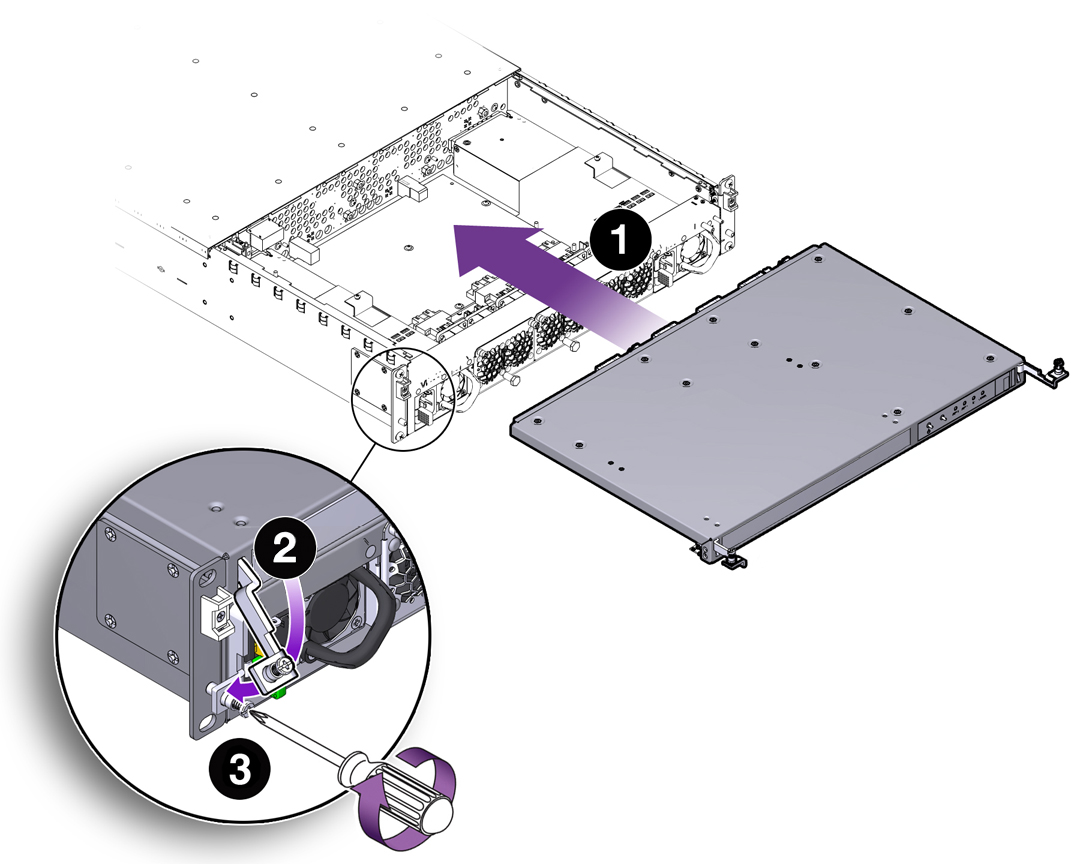
- Orient the Front Panel so that the sheet metal side is facing up, and align the left and right sides of the Front Panel with their guides on the left and right sides of the chassis.
-
Holding the lever arms, apply even pressure to both handles and slide the
Front Panel into place on the chassis (1). See Installing the Fabric Interconnect F1-4 Front Panel Assembly.
Figure 99 Installing the Fabric Interconnect F1-4 Front Panel Assembly

As the Front Panel slides into place, you will feel the gaskets at the rear of the Front Panel make contact with the chassis sheet metal.
- When the Front Panel is completely seated on the chassis, lower the lever arms in a 90- degree downward arc (2) as shown in Installing the Fabric Interconnect F1-4 Front Panel Assembly.
- Align the captive screws in the lever arm's handle with their threaded standoffs in the front mounting bracket.
- Use a #2 Phillips-head screwdriver to tighten the captive screws to their threaded standoffs (3). Do not overtighten the screws.