Attach the Right Angle Bracket
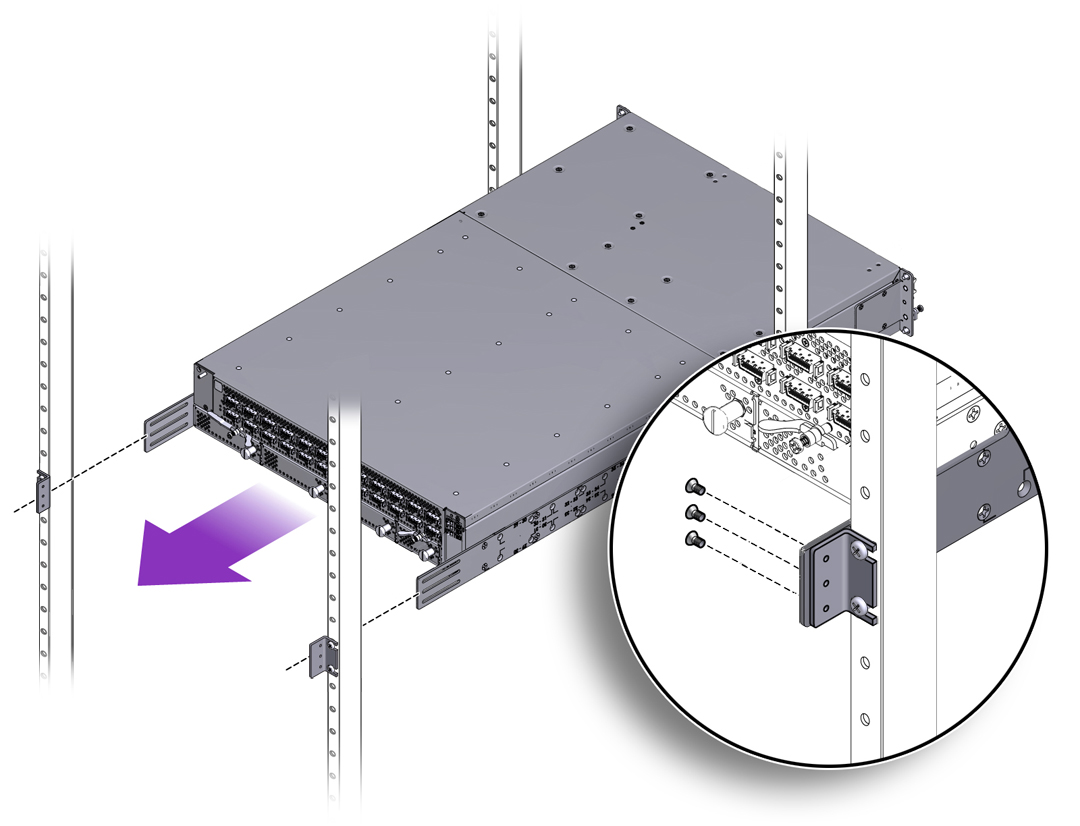
- Slide
the Fabric Interconnect into the rack until the front mounting brackets make
contact with the front rack posts. See Attaching the Rack Depth Measures to the Angle Brackets.
Figure 26 Attaching the Rack Depth Measures to the Angle Brackets

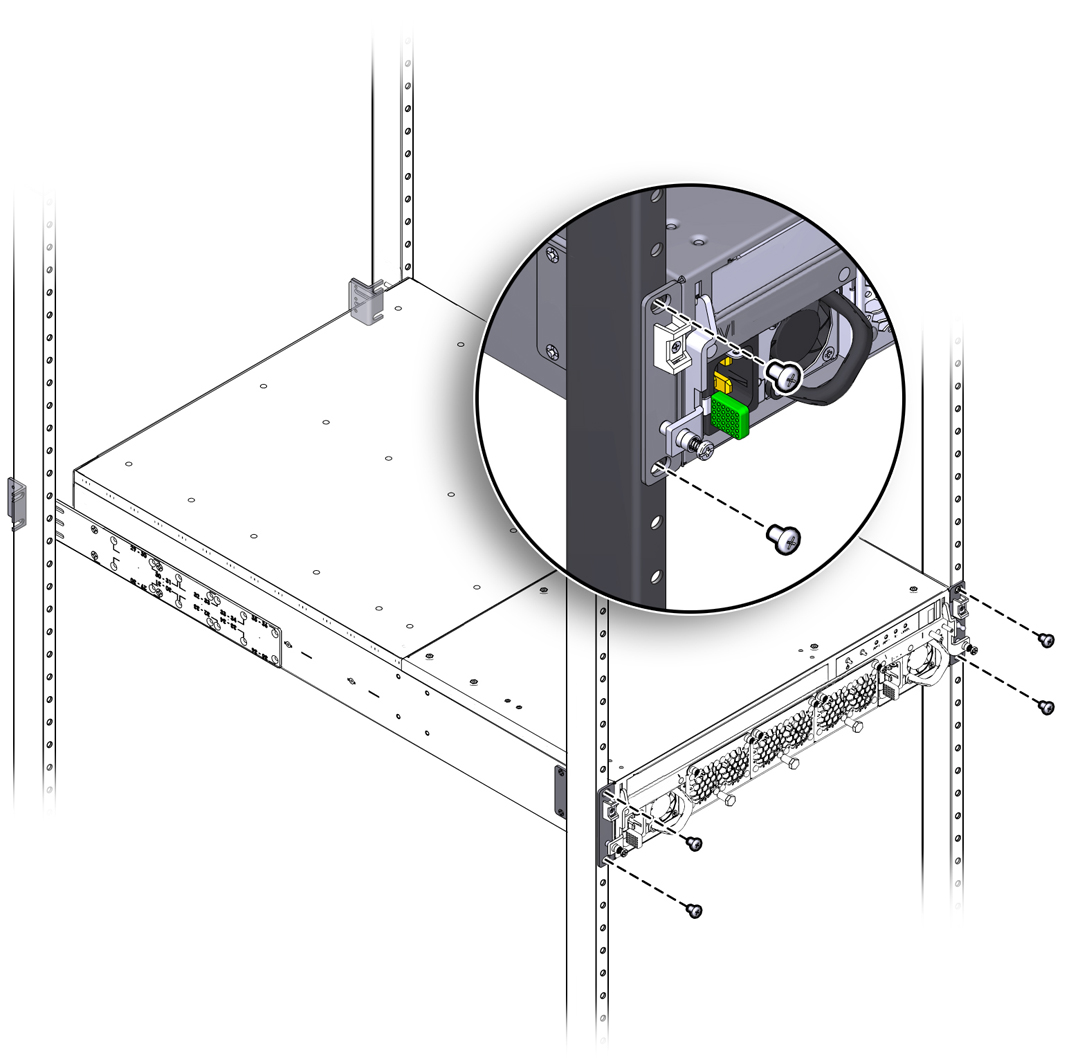
- Keeping the Fabric Interconnect
level, insert the appropriate rack mounting screws (10-32, 12-24,
or M6) into the mounting brackets on the front of the Fabric Interconnect
(the fan unit end). See Securing the Front Mounting Brackets to the Equipment Rack.
Use two (2) pan-head screws per bracket. Use the appropriate screw for your rack type:
10-32 x .75” Phillips pan-head screws
12-24 x .75” Phillips pan-head screws
M6 x 20 mm Phillips pan-head screws
Figure 27 Securing the Front Mounting Brackets to the Equipment Rack


Caution - Make sure that all screws are tight before proceeding.
- Align the slots in the rack-depth
rails with the screw holes in the right angle brackets, and insert
the 6 M3.5 x .6 x 6 mm Phillips flat-head screws through the slots
in the rack-depth rails and tighten them into the screw holes in
the right angle brackets (2).
Note - You might find it helpful to tighten the screws to finger tightness or just less. By doing so, you allow the Fabric Interconnect to slide forward and backward in the rack-depth rail's slots, and as a result, you can make minor adjustments to the Fabric Interconnect's depth in the rack (if needed). - Install the Cable Management
Assembly (CMA) as documented in Installing the Cable Management Assembly.
The same CMA is supported for both the Oracle Fabric Interconnect F1-15 and Oracle Fabric Interconnect F1-4, so use the same procedure. Where illustrations show the Oracle Fabric Interconnect F1-15, you will substitute the Oracle Fabric Interconnect F1-4.
- Install the I/O modules as documented in Installing an I/O Module.
- Cable the Fabric Interconnect F1-4 as documented in Connecting the Fabric Interconnect to Other Equipment.
- When the Fabric Interconnect F1-4 is installed on the rack and cabled to the other equipment, you will plug in the power cords and anchor the power cables in place as documented in AC Power.