Install Fabric Interconnect F1-4 Power Supplies
Note - When a PSU is disconnected, you must wait for at least 30 seconds before re-inserting it. This 30-second wait period is required to properly raise alarms and update the PSU part number, serial number, and other pertinent information for the system's hardware inventory. When hot swapping a PSU for a Fabric Interconnect F1-4, make sure to wait for more than 30 seconds before re-inserting a PSU.
- Orient the new PSU so that the locking tab is at the bottom left corner when the PSU is facing you.
-
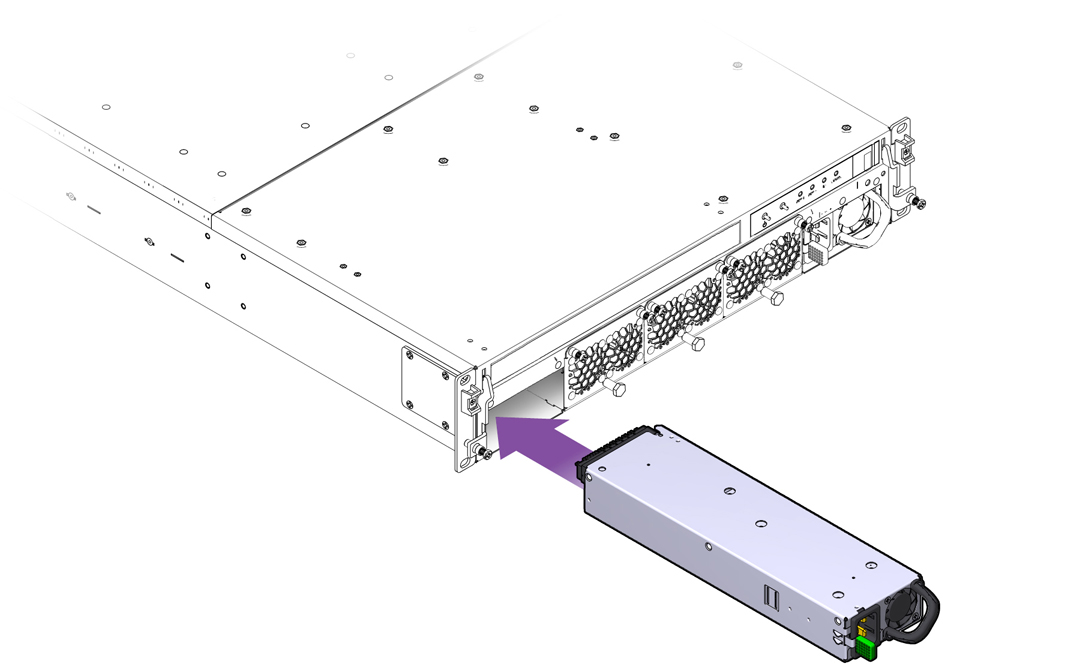
Align the PSU with the empty PSU bay, and gently slide the PSU into the
chassis by pressing on the handle until the locking tab clicks back into
place. See Inserting a Fabric Interconnect F1-4 PSU.
Figure 68 Inserting a Fabric Interconnect F1-4 PSU

When the PSU is almost all the way inserted, you might feel some resistance, which is caused by the PSU's power socket meeting its mating part on the Fabric Interconnect F1-4 midplane. Continue to apply gentle pressure until the PSU is fully seated in the Fabric Interconnect F1-4 chassis.
The PSU is correctly seated when the locking tab clicks into place.
-
Reconnect the power cord. Be aware that the power cord might have jostled
in the tie wrap.
Note - When reconnecting power cords after servicing the power supplies, make sure read the requirements documented in Power Cord Management.