Remove the FBA
Removing the FBA provides access to other components, such as the power supply, for service.
- Follow safety and ESD precautions.
- Remove the server from the system, and place the server on an antistatic surface.
- Release both stops on the side rails to allow the FBA to slide back.
- Slide the rails with attached FBA away from the server.
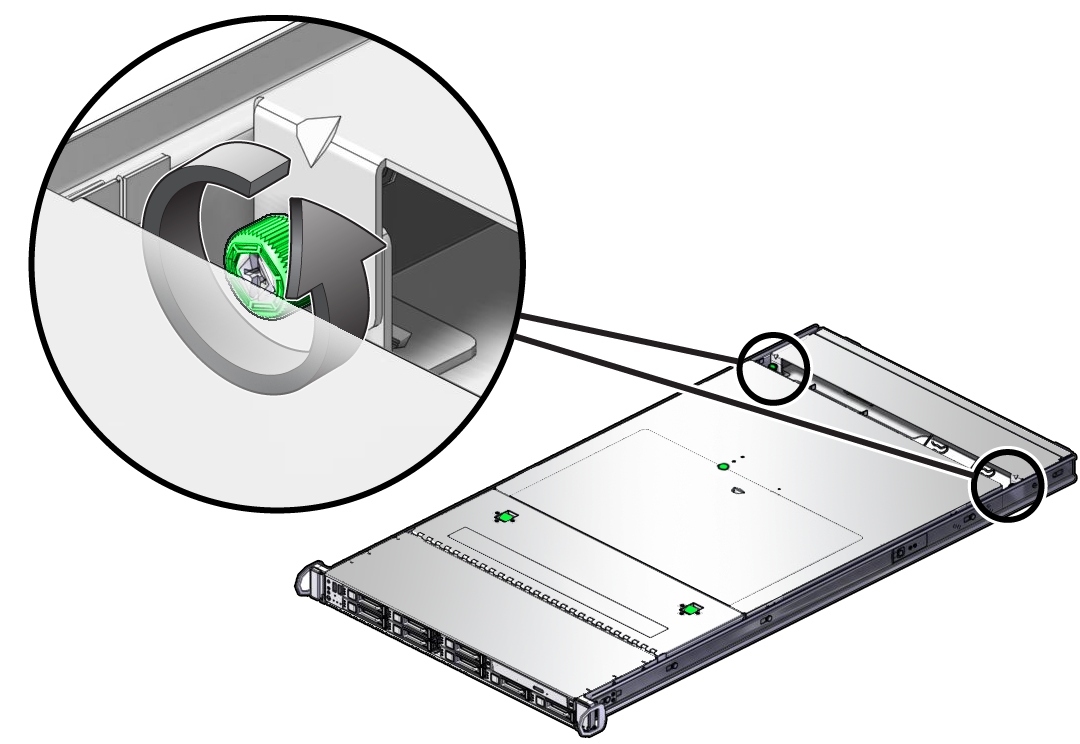
- Loosen the captive FBA cover screws on both the right and left sides.

-
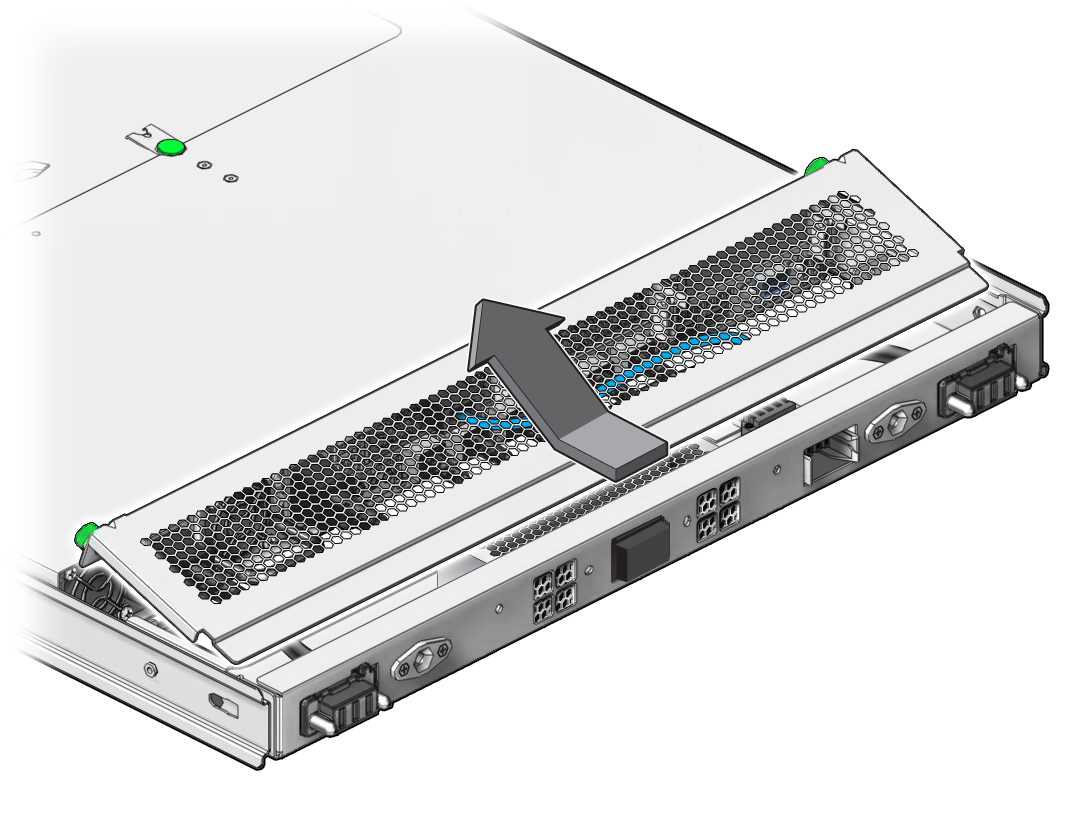
Slide the cover back and off the server, then set the cover aside.

-
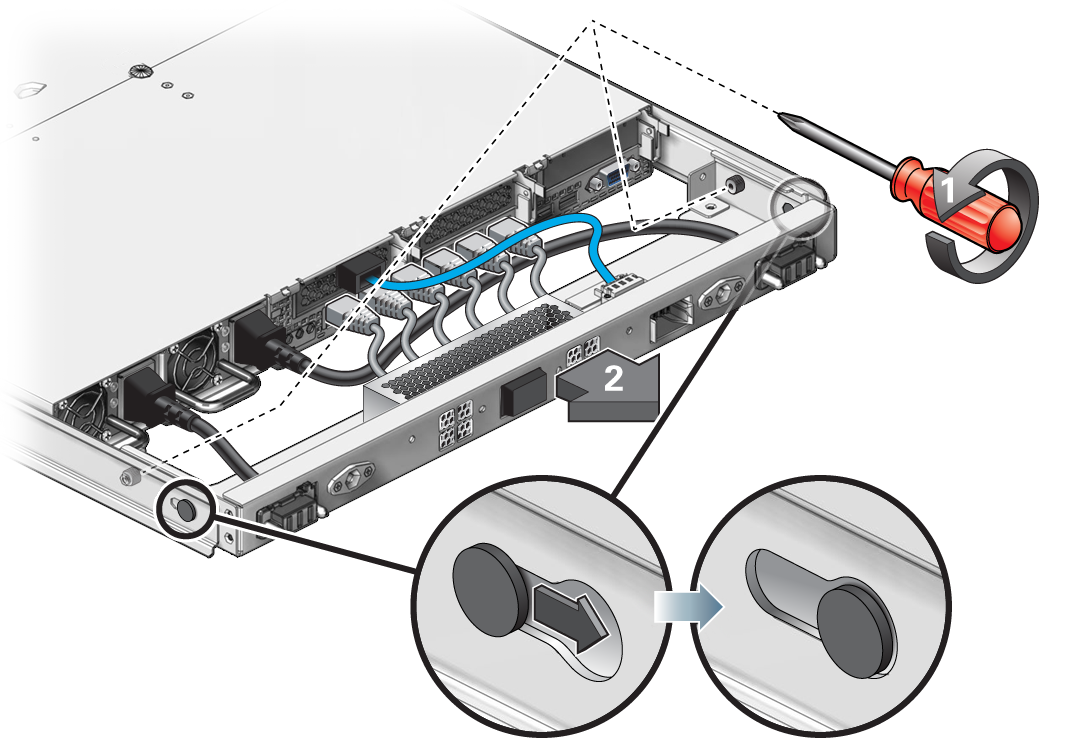
Loosen the two captive screws at the bottom right and left of the FBA (panel 1).
These screws fasten the FBA to the slide rails.

- Pull the FBA away from the server (panel 2) until the FBA aligns with the slide rail slot holes.
-
Gently pull one of the slide rails away from the FBA, just far enough for it to disengage.
Note - Align the holes in the slide rail with the studs on the FBA. -
Disengage the FBA from the other slide rail.
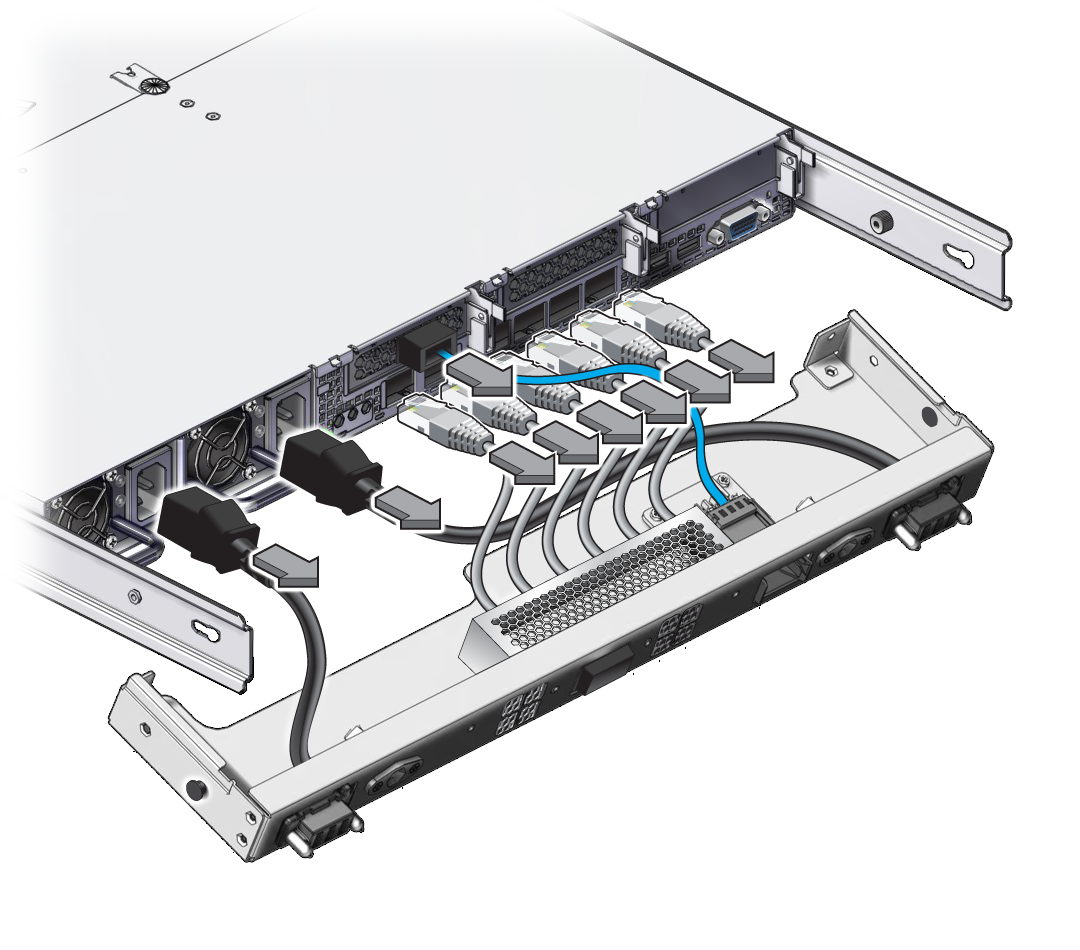
Note - Before removing the cables, label them or or note which cables connect where on the server. The FBA cables are not labeled at the factory. -
Disconnect all of the cables from the server, including the power cords.

-
Determine the applicable action:
- If you are replacing the entire FBA, disconnect all cables and power cords from the FBA, then properly dispose of the faulty FBA.
- If you are replacing a cable or power cord, disconnect and properly dispose of the faulty cable or power cord.
See Install the FBA.