Install a Replacement PDU
-
Unpack the replacement PDU and perform the following on an antistatic
workbench:
-
If the replacement PDU came with brackets installed, remove and
discard the brackets.
Note - Only the mounting brackets from the modular system are compatible. -
Using a T-25 Torx screwdriver, attach the modular system
bottom PDU bracket to the replacement PDU.
This bracket is the one you removed from the faulty PDU.
- Turn all circuit breaker switches on the replacement PDU to the on position.
-
If the replacement PDU came with brackets installed, remove and
discard the brackets.
- Feed the PDU input cords through the side and out the top of the frame.
- Connect the power cords to their correct PDU sockets, as indicated on the power cord labels.
-
In the same position as originally installed, attach the top PDU bracket
to the modular system using a T-30 Torx screwdriver.
Earlier you noted the location.
Note - Make sure you place the bottom PDU bracket inside the modular system, and when adding the top PDU bracket, also have the PDU inside that top bracket. -
Hang the PDU in the top bracket, then use a T-25 Torx screwdriver to
install the screws that attach the PDU to the top bracket.
Note - Only the top and bottom mounting brackets from the modular system are compatible. If the replacement PDU came with brackets attached, do not use those brackets to install the PDU. - In the same position as originally installed, use a T-30 Torx screwdriver to install the screws that attach the bottom PDU bracket to the modular system.
-
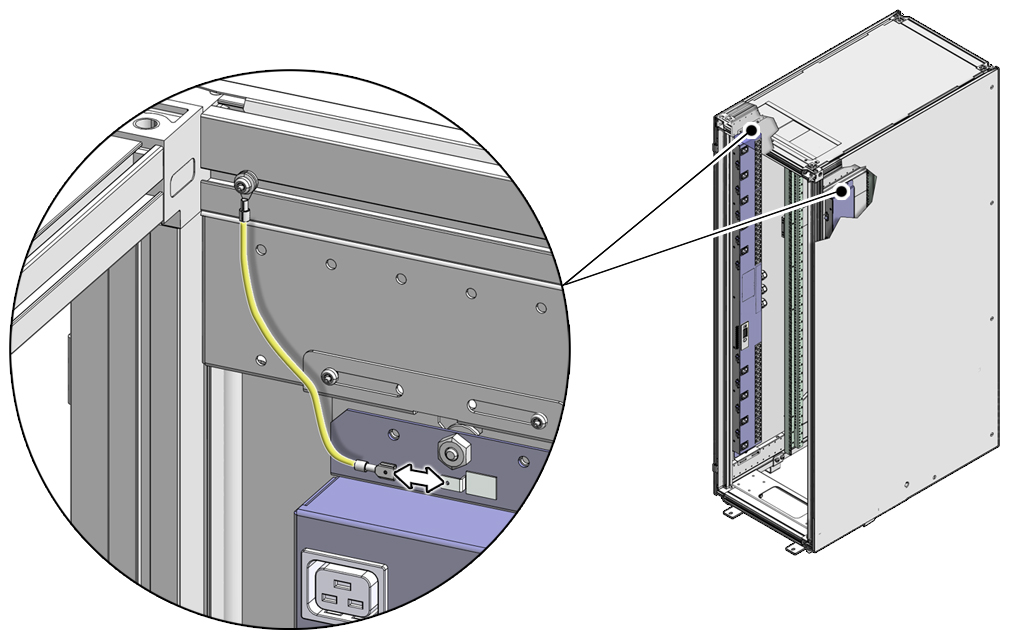
Reattach the
grounding straps, top and bottom.

- Connect and install adjacent components.