Install the FBA
- Follow safety and ESD precautions.
- If replacing a faulty FBA, remove the cover from the new FBA.
-
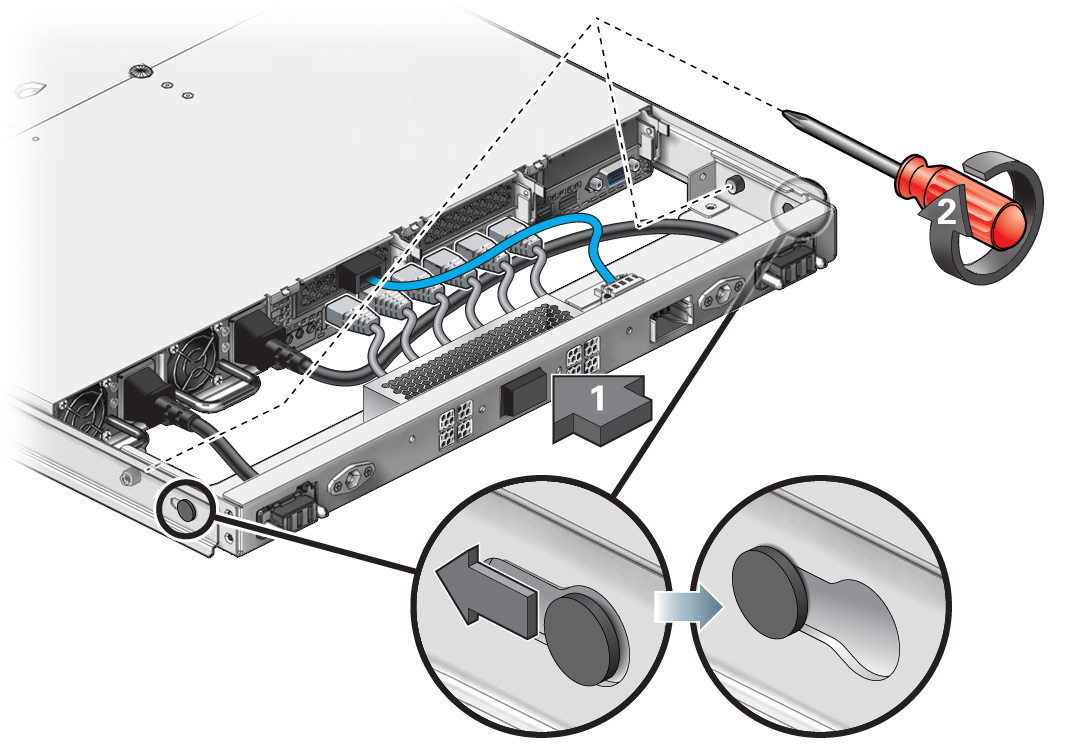
Align the FBA studs with the hole slots on the server's slide rail, and push the FBA slightly toward the server to engage it in the slide rail (panel 1).

- While holding the FBA in place, tighten the two captive screws that fasten the FBA to the slide rail (panel 2).
-
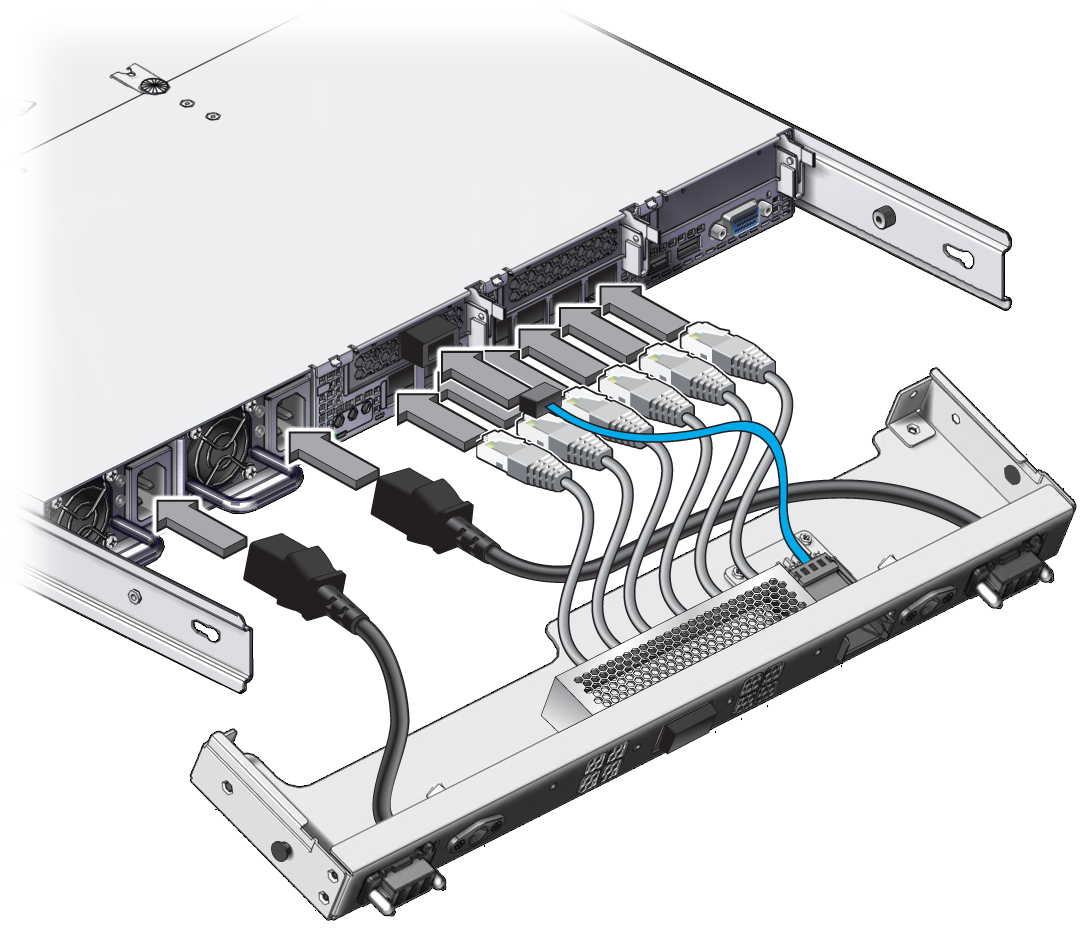
Connect all cables including the power cords.

Caution - Take care to connect the cables to the correct ports, as some cables cross over each other. Cables connected left to right on the FBA do not connect exactly in the same order on the server. For Oracle Server X5-2M and Oracle Server X6-2M, the NET MGT and SER MGT cables cross.

-
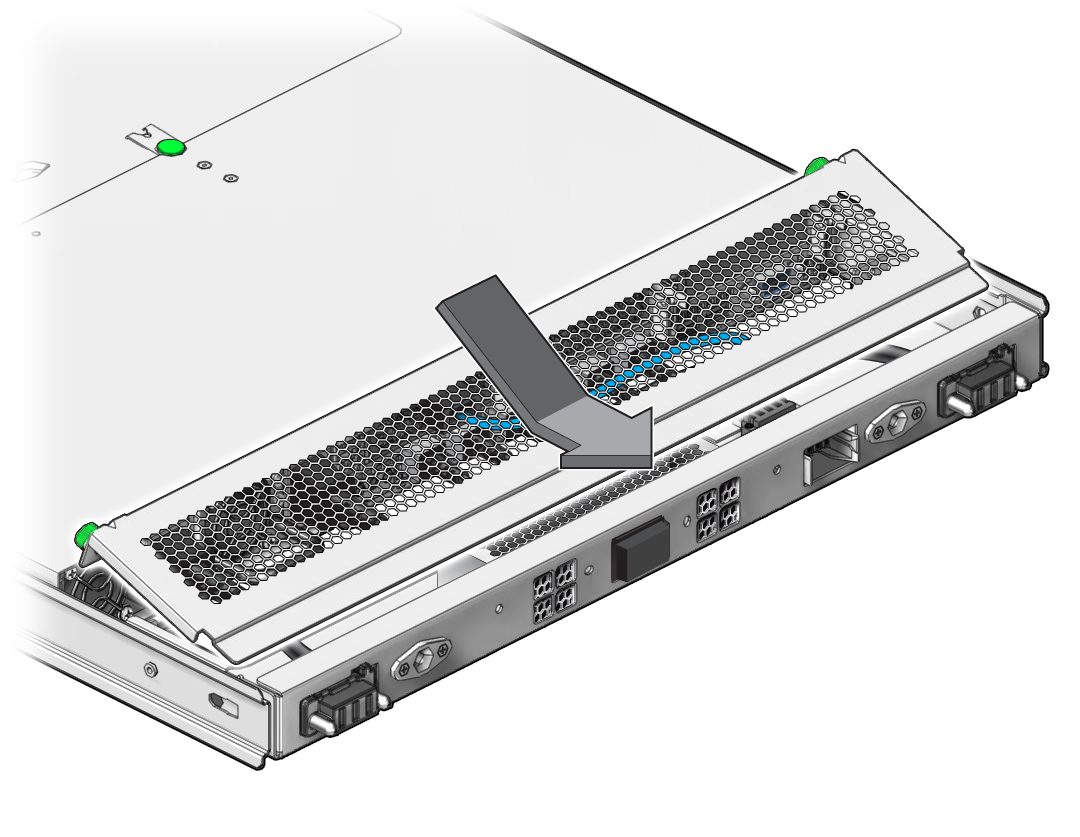
Replace the FBA cover on both the right and left sides.

-
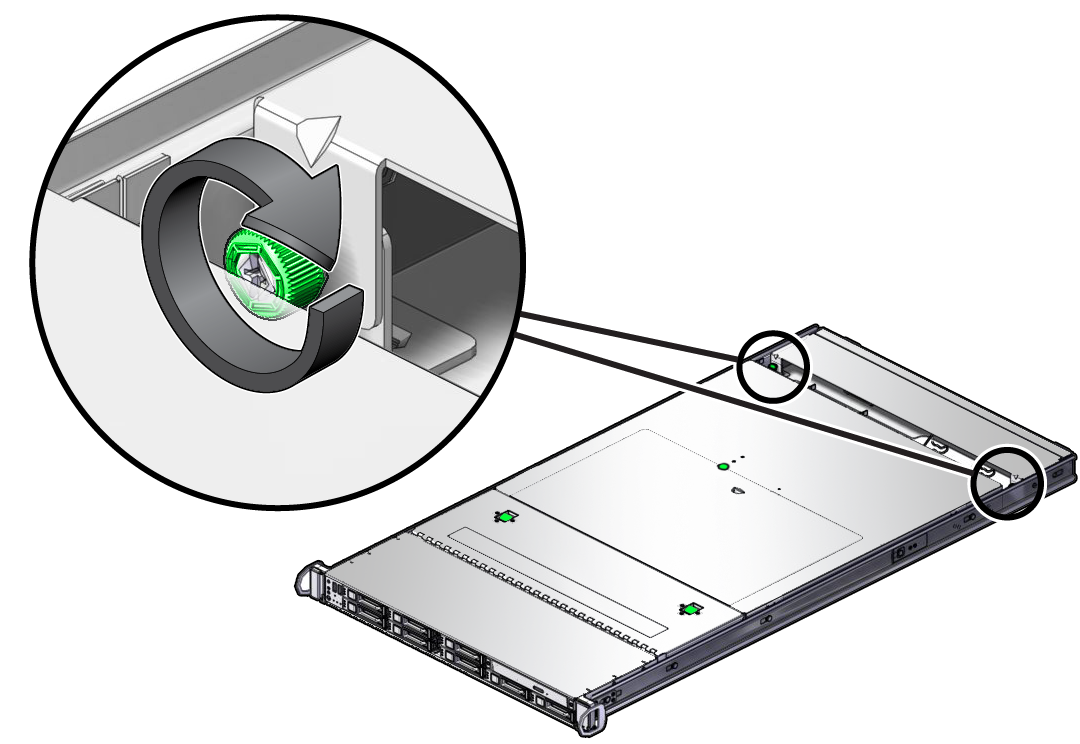
Tighten the captive FBA cover screws on both the right and left sides.

- Push the FBA and rails toward the server until the rails engage with the stops.