| Skip Navigation Links | |
| Exit Print View | |

|
Sun Datacenter InfiniBand Switch 648 Topic Set |
Documentation, Support, and Training
Understanding Administrative Commands
Monitoring the InfiniBand Fabric
Controlling the InfiniBand Fabric
Understanding Signal Routing Through the Switch
Understanding Switch Startup and Component Addition
Understanding ILOM on the Switch
Switching Between the ILOM Shell and the Linux Shell
Controlling ILOM Targets (CLI)
Upgrading the Switch Firmware Through ILOM (CLI)
Administering ILOM (Web Interface)
Access ILOM From the Web Interface
Monitoring ILOM Targets (Web Interface)
Controlling ILOM Targets (Web Interface)
Upgrading the Switch Firmware Through ILOM (Web Interface)
Understanding InfiniBand Cabling
Understanding Switch Specifications
Understanding the Installation
Installing the InfiniBand Software Stack
Verifying the InfiniBand Fabric
Understanding Service Procedures
Inspect the Power Supply Hardware
Inspect the Power Supply Connectors
Servicing the Fabric Cards and Fabric Card Fillers
Inspect the Fabric Card Chassis
Inspect the Fabric Card Retainer Bolts
Inspect the Fabric Card XBOW Connectors
Remove a Fabric Card or Fabric Card Filler
Install a Fabric Card or Fabric Card Filler
Servicing the InfiniBand Cables
Inspecting the InfiniBand Cables
InfiniBand Cable Identification
Inspect the InfiniBand Cable Hardware
Inspect the InfiniBand Cable Connectors
Inspect the Line Card Retainer Bolts
Inspect the Line Card XBOW Connectors
Inspect the Line Card CXP Connectors
Doing Supportive Software Tasks
Configure CMCs for Identical Addresses
Understanding Switch-Specific Commands
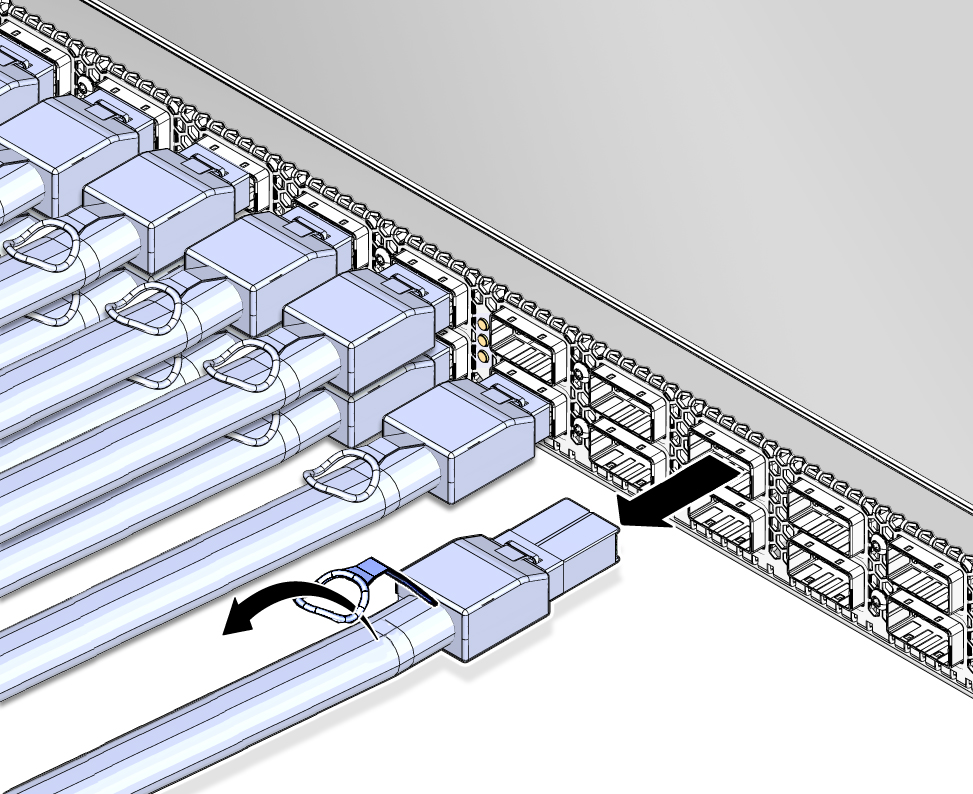
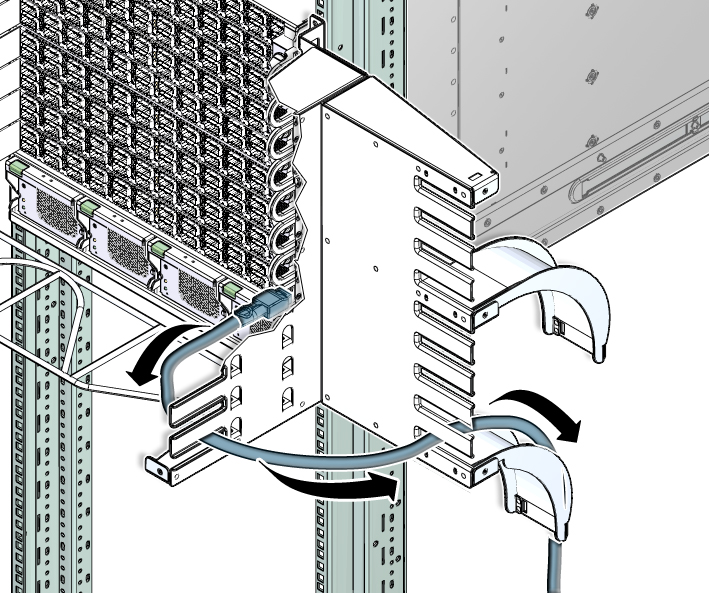
This procedure describes how to remove the cables from one line card, so that line card can be replaced. If you are removing cables for several line cards or all line cards, work from the upper line card down. This way, you have more working space as your task progresses.
If you are removing a cable from the switch to replace that cable, consider the following:
If you are removing a cable from connectors 0A through 5B, start the procedure at connector 5A.
If you are removing a cable from connectors 6A through 11B, start the procedure at 6A.
Note - If you are disconnecting all cables for a line card replacement, begin at connector 5A.
See the table in Servicing the InfiniBand Cables.
This cable is the upper cable.
The cable connector comes free.


Note - “A” cables stack on top of “B” cables. For example, the cable for 5A is on top of the cable for 5B.
Otherwise, go to Step 7.
 | Caution - Do not allow the cable to drop or strike the floor. Jerking, bending, pulling on, or dropping the cable can damage the cable. |