Using the UEFI Diagnostics GUI
This task provides instructions for using UEFI diagnostics graphic user interface (GUI).
The UEFI GUI is available in Manual mode on Oracle Server X4-4, X4-8, X5-4, and X5-8 systems equipped with Oracle ILOM 3.2.4 or newer.
Before You Begin
Start UEFI diagnostics as described in Run UEFI Diagnostics Using the Oracle ILOM Web Interface.
- From the Oracle ILOM diagnostics page, select Manual from the pull down menu, then click Save.
- If the Status buttons says Stop Diagnostics, click it to stop any currently-running diagnostics.
-
If you do not have an active remote system console session, start one as
described in Run UEFI Diagnostics Using the Oracle
ILOM Web Interface.
If a message asks you to start a KVM session, select OK.
-
Click Start Diagnostics.
Boot messages appear in the KVM screen, then the UEFI diagnostics GUI appears.
The boot process can take several minutes, and might include a power cycle.
Note - As UEFI diagnostics boot, you might see messages stating that you can use function keys to interrupt the boot process. These messages do not apply to UEFI diagnostics. Do not press any function keys when starting the UEFI diagnostics.The Manual mode initial screen appears.
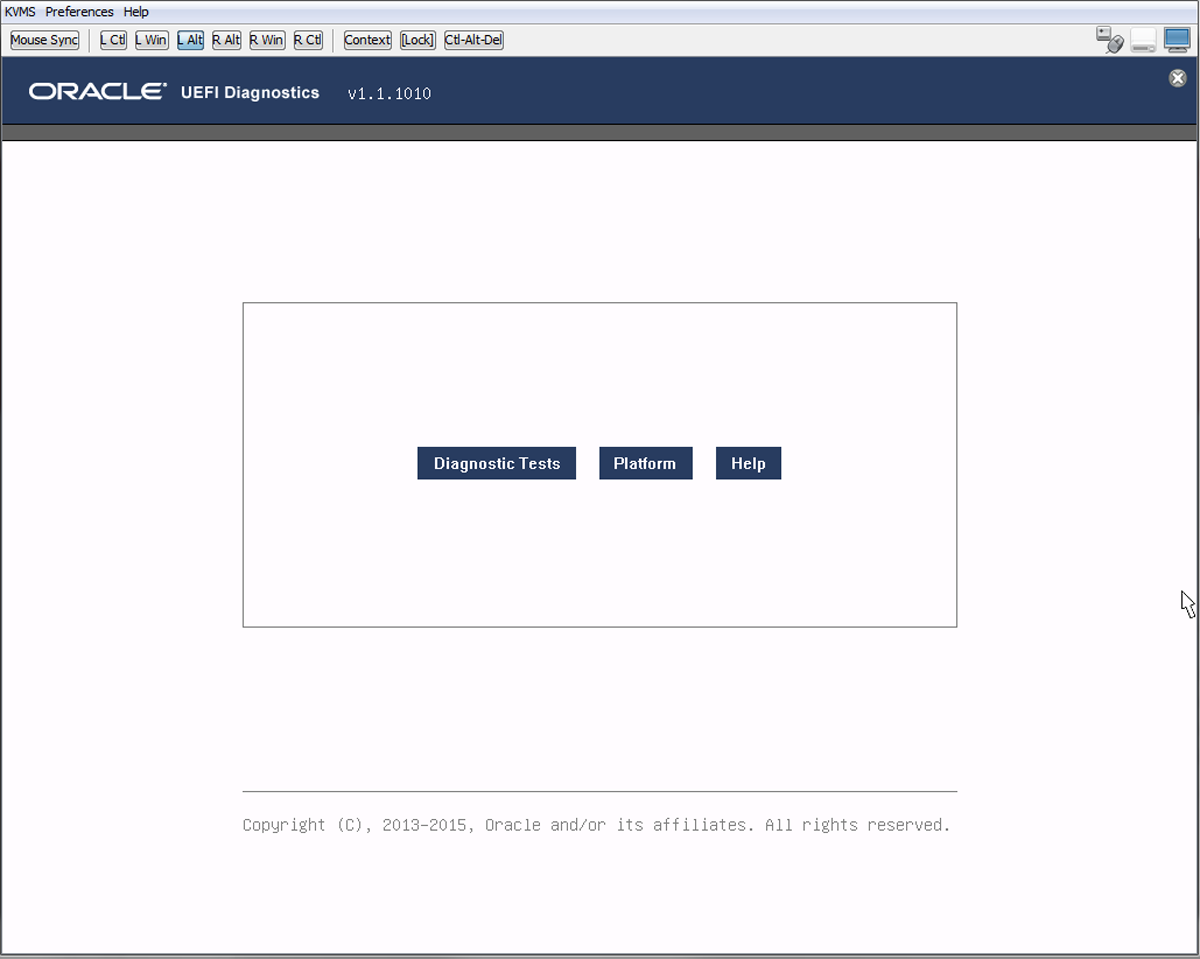
Note - To exit the GUI and run the CLI, press the Escape (ESC) key. To return to the GUI, type the command udiag. -
Click Diagnostic Tests.
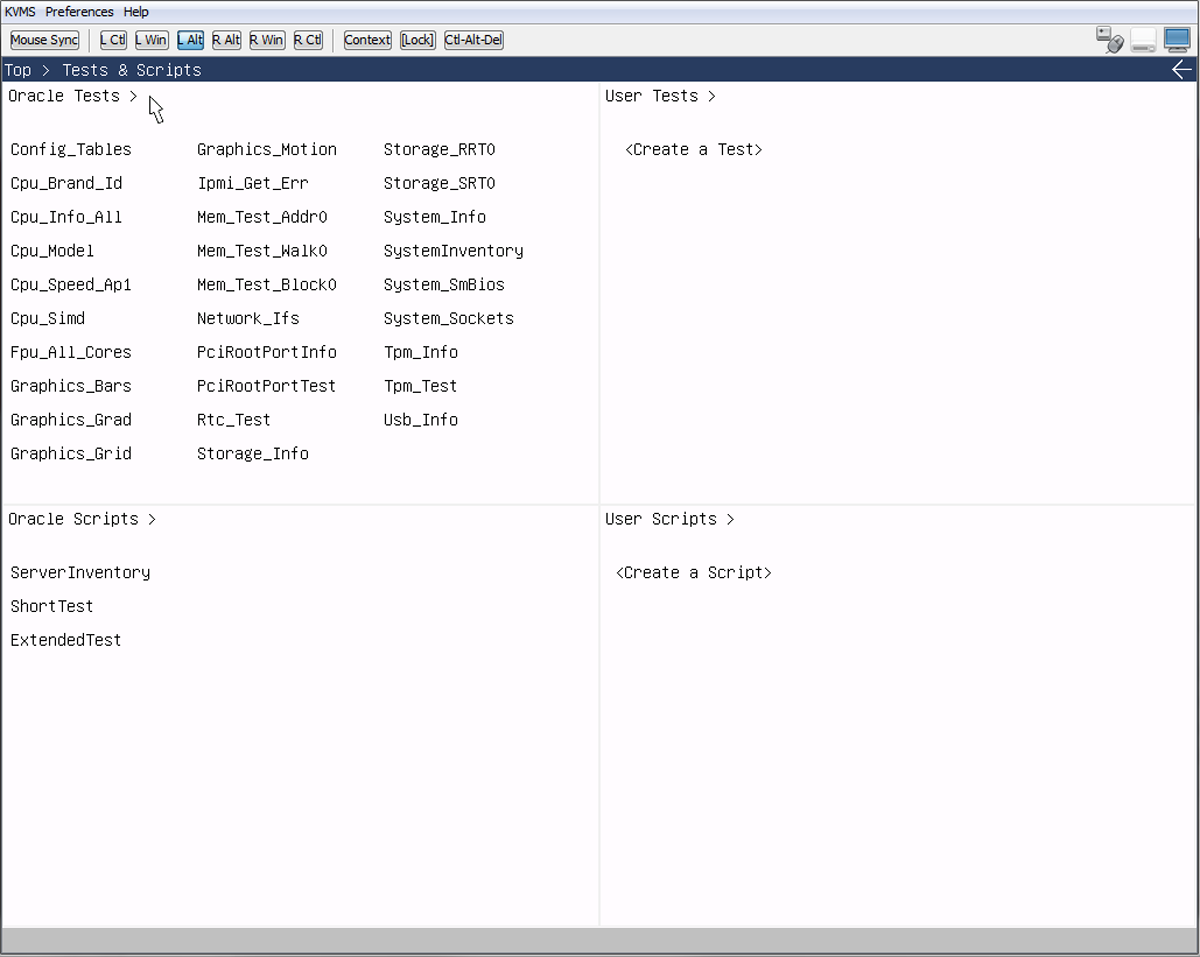
The test window appears.
-
Oracle Tests: These are Oracle-defined tests with default parameters to a single command. Right-click a test and select View to see parameters related to the command and Copy to create a new User Test with different parameters.
-
User Tests: Users can change test parameters and save the changes. See Step 9 for more details.
-
Oracle Scripts: Predefined scripts that run multiple tests.
-
User Scripts: Users can select multiple tests and save their selections as a script. See Step 11 for more details.
-
-
To run a test, select it on the test page.
The test runs and the results appear in a test results page. The following picture shows the results after selecting Cpu_Info_All.
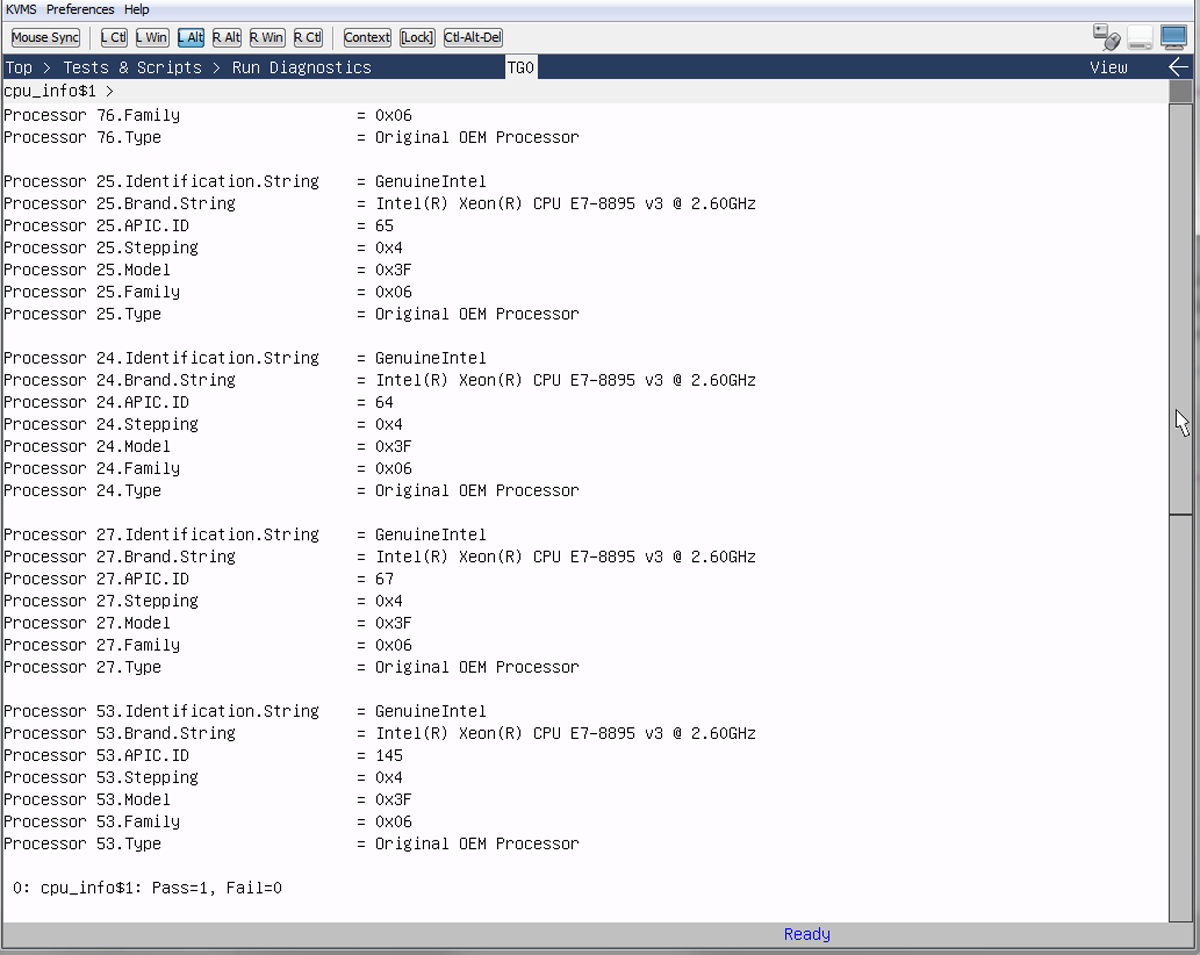
The line at the bottom indicates how many times the test ran, and how many times it passed or failed. For example:
0: cpu_info$1: Pass=1, Fail=0
This indicates that the test ran once, and it passed. For example, if a test runs 10 times and fails once, the bottom line reads:
0: cpu_info$1: Pass=9, Fail=1
For more information about reading the test output, see UEFI Diagnostics Output.
- To navigate through the GUI, use the white arrows in the upper right-hand corner of the screen.
-
To see test details, right click the test and select View.
The test details view appears in write-only mode.
-
To modify a test:
-
Right-click the test, then select Copy.
The test details view appears in copy mode.
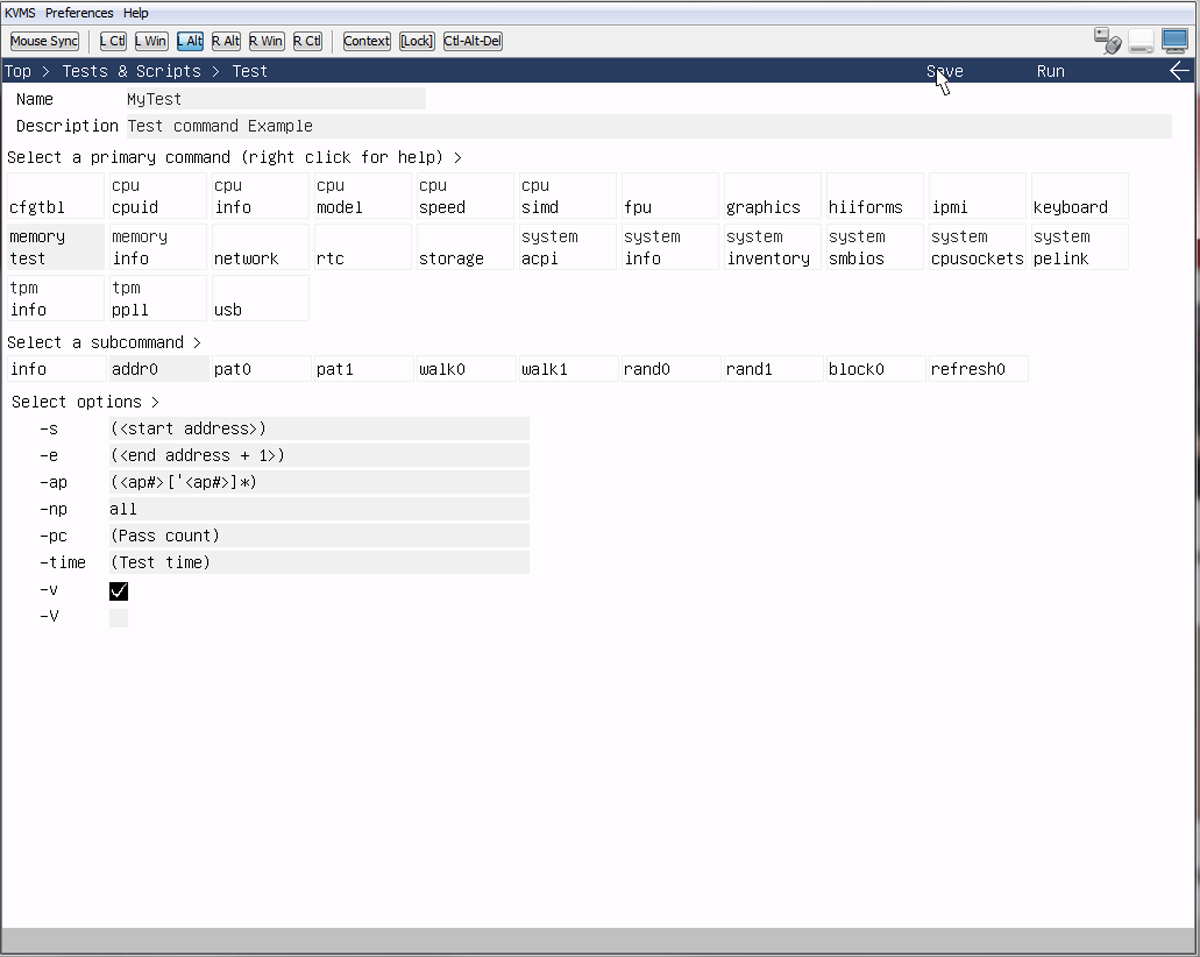
- Select subcommands and parameters as desired.
-
To run a test with your modifications, click the Run
button.
UEFI diagnostics displays the test results. Use the white up-arrow to return to the details screen.
-
Type in a test name, and then click Save.
The new test is added to the User Test list.
Note - You cannot save a test that is identical to an existing test.The following figure shows the Copy view of the addr0 memory test.
-
Right-click the test, then select Copy.
-
To see script details, right click it, then select View.
The script details screen appears.
-
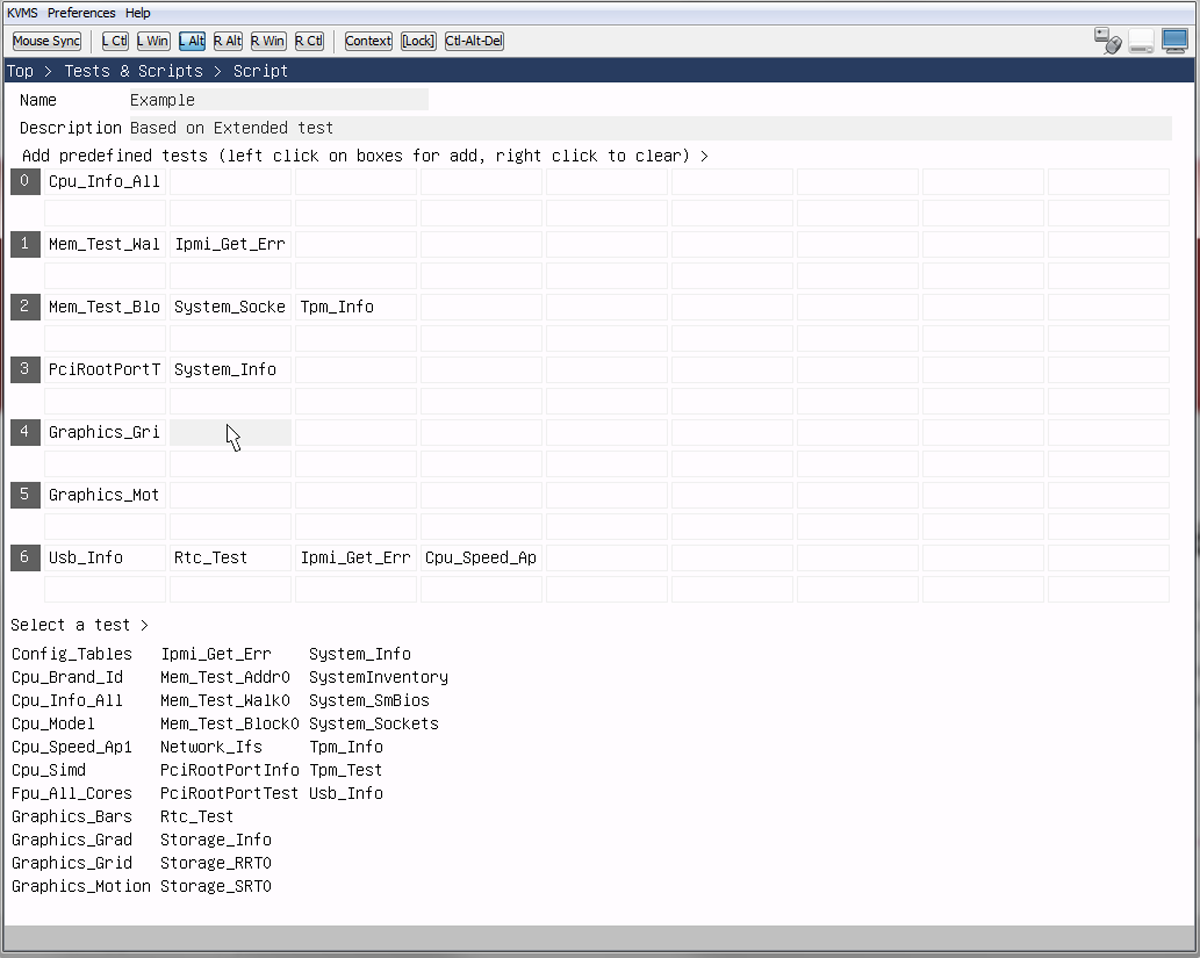
To modify a script:
-
Right-click the script, then select Copy.
The script details screen appears in copy mode.
-
Select a cell in the table, then select a test from the list that
appears.
The test you selected is inserted into the cell. If the cell already contained a test, that test is replaced by the test you selected.
Tests in columns are executed sequentially. Steps in rows are executed in parallel.
-
When you are done, type in a name for your script, then select
Save.
Your script is added to the User Scripts list.
-
Right-click the script, then select Copy.
See Also