
To convert the operating system and applications on a physical computer to a hardware virtualized guest with the P2V utility, complete the following steps:
Before you begin, burn the Oracle VM Server ISO image to bootable physical media, such as a DVD-ROM.
Insert the Oracle VM Server installation media into the optical disc drive of the computer you want to image.
Change the boot order to start from the optical disc drive in the BIOS or UEFI settings.
Boot the computer with the Oracle VM Server installation media.
The Oracle VM Server boot screen displays.
At the
boot:prompt, enterp2vand then press Enter.
The Oracle VM Server installer initializes. The first step in the conversion process is for the network manager to configure the network interface.
If the host has one network interface, the network manager automatically configures it.
If the host has two or more network interfaces, the network manager prompts you to select one network interface and then automatically configures it.
If the network manager cannot successfully configure the network interface, you are prompted to configure TCP/IP settings.
If prompted, configure the TCP/IP settings as appropriate.
Setting
Description
Enable IPv4 support
Enables Internet Protocol Version 4 (IPv4) in the network interface.
Dynamic IP configuration (DHCP)
Uses the Dynamic Host Configuration Protocol (DHCP) network service to automatically assign an IPv4 address to the hardware virtualized guest and retrieve DNS settings.
Manual configuration
Lets you specify the following:
IPv4 address for the hardware virtualized guest.
IP address of the gateway server for your network.
IP address of the name server for your network.
Enable IPv6 support
Enables Internet Protocol Version 6 (IPv6) in the network interface.
Automatic
Uses the DHCP network service to automatically assign an IPv6 address to the hardware virtualized guest and retrieve DNS settings.
Automatic, DHCP only
Uses the DHCP network service to automatically assign an IPv6 address for the hardware virtualized guest.
Manual configuration
Lets you specify the following:
IPv6 address for the hardware virtualized guest.
IP address of the gateway server for your network.
IP address of the name server for your network.
After the network interface is configured, you are prompted to test the media for errors. Do one of the following:
Select OK and then press Enter to test the bootable media for errors.
NoteYou must reboot after the test is complete.
Select Skip and press Enter to continue without testing the bootable media.
The disk selection screen displays.
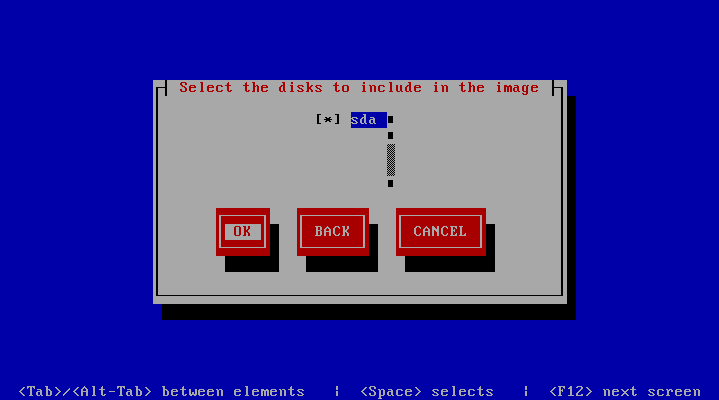
Select the disk partition(s) on the computer to include in the guest image.
Select OK and then press Enter.
The virtual machine parameters screen displays.
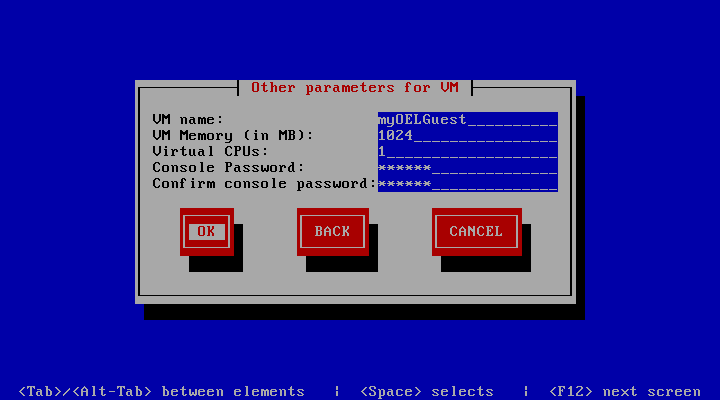
Specify values for each parameter as appropriate.
Parameter
Description
VM name
Specifies a name for the virtual machine.
VM Memory (in MB)
Specifies the amount of RAM, in megabytes, to allocate to the virtual machine when it is running. The amount of RAM that you specify will be requested from the host operating system. For this reason, it must be available or made available as free memory on the host when attempting to start the virtual machine and will not be available to the host while the virtual machine is running.
Virtual CPUs
Specifies the number of CPU cores to allocate to the virtual machine.
Console Password
Specifies a password for the virtual machine console.
Confirm console password
Verifies the console password.
Select OK and then press Enter.
A secure web server (HTTPS) starts. The IP address of the computer and port number where the web server is available displays.

You can now access the vm.cfg and virtual
disk(s) that the P2V utility created on the web server. Proceed
to Section 10.4, “Importing Guests as Virtual Machine Templates to Oracle VM Manager”.