Remove a Filler Panel
 | Caution - To maintain thermal stability, never operate the switch with an empty slot. Remove filler panels only as you replace them with an I/O module in a one-for-one basis. |
- Identify the prerequisite and subsequent installation tasks that you must perform in conjunction with this task.
-
At the location where you are installing the module, remove the filler
panel.
-
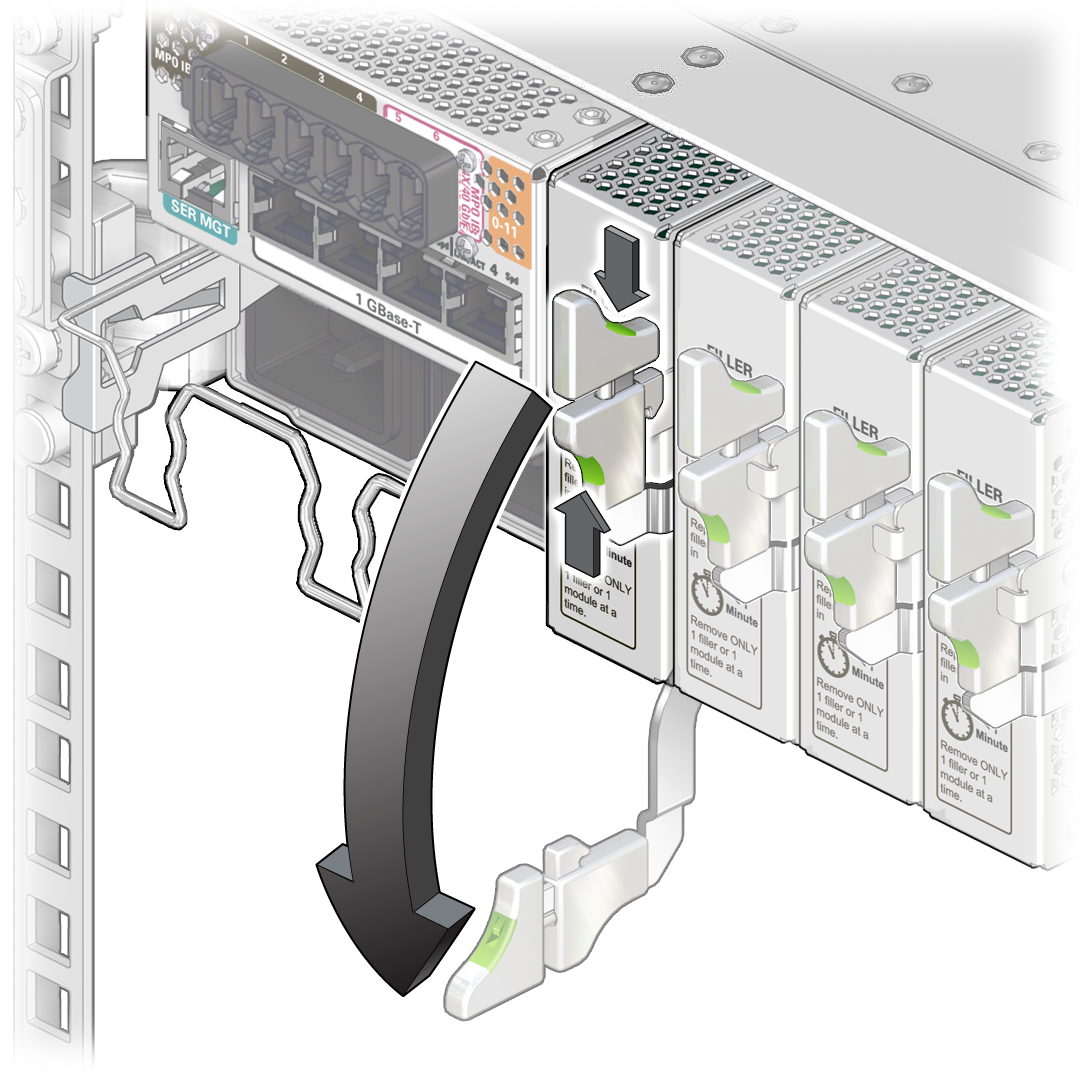
Squeeze the upper and lower halves of the release lever together, and
pull the lever in a downward motion.

The filler panel is unseated from the slot connection.
-
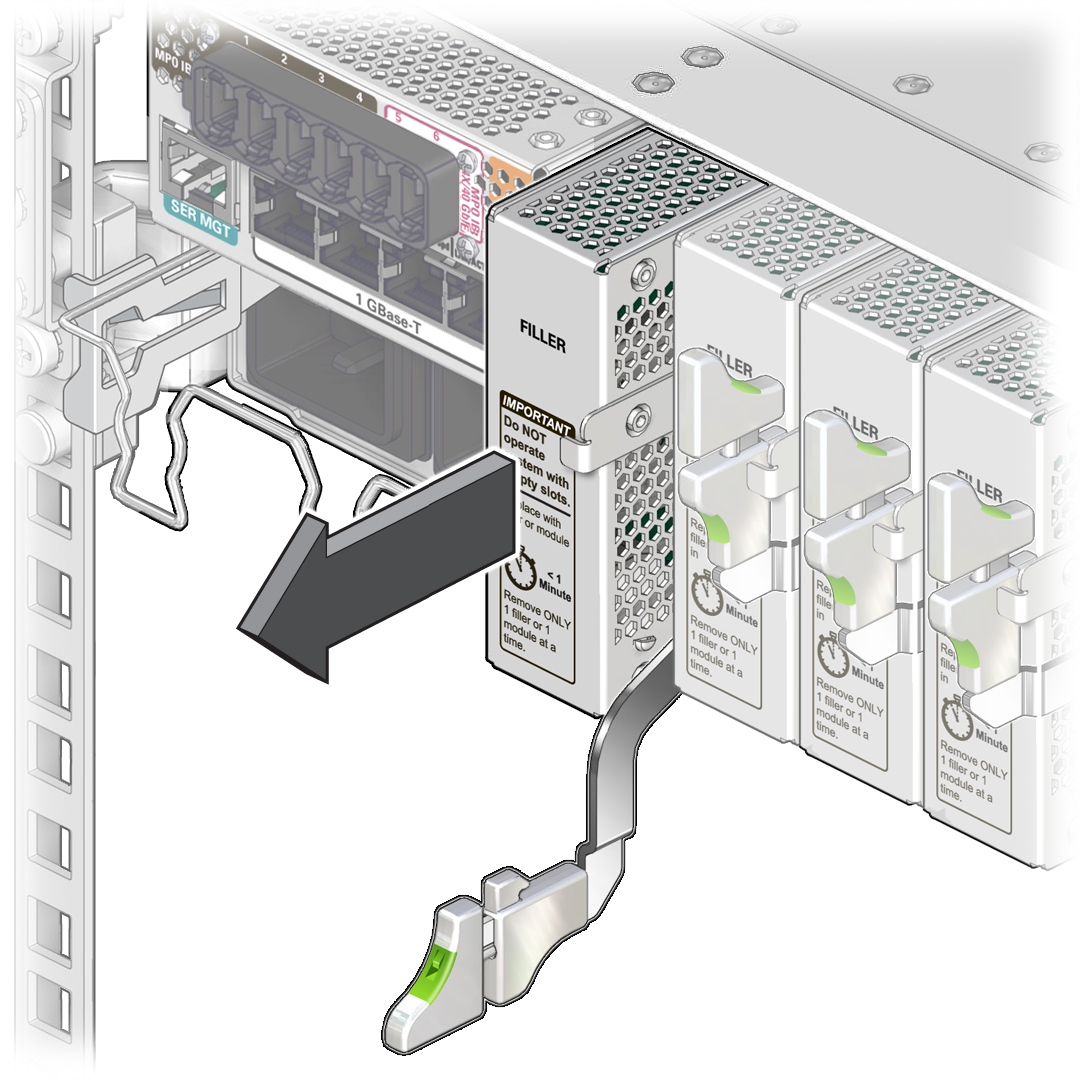
Use the release lever to pull the filler panel from the switch
chassis.

- Use your free hand to take the weight of the filler panel, as it comes free of the chassis.
- Set the filler panel aside.
-
Squeeze the upper and lower halves of the release lever together, and
pull the lever in a downward motion.
- Finish installing an I/O module.