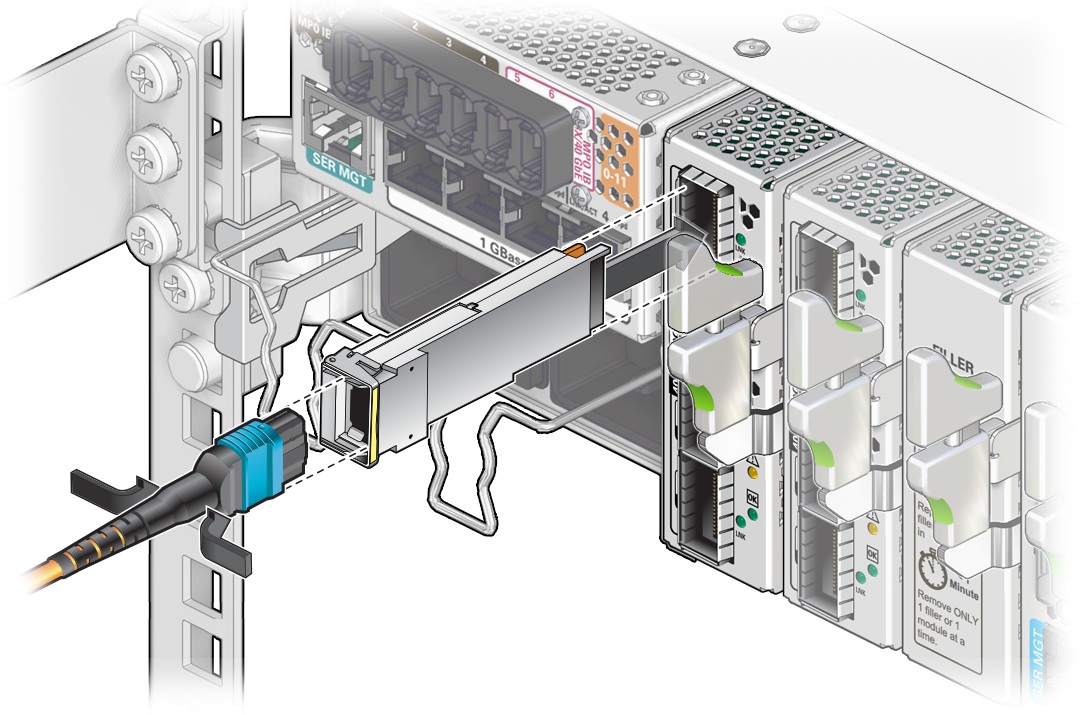
Connect the QSFP Cables
- Identify the prerequisite and subsequent installation tasks that you must perform in conjunction with this task.
-
Remove the protective cap from the connector or transceiver, and visually
inspect the cable connector.
The shell should not be bent and should be parallel to the inner boards. If the connector is bent or damaged, use a different cable.
- Ensure that the retraction strap is folded back against the cable.
-
Orient the cable connector to the QSFP receptacle squarely and vertically.
For the Oracle F2 10 Gb and 40 Gb Ethernet module, ensure that the L groove is to the right.

-
Slowly move the connector in.
As you slide the connector in, the shell should be in the center of the QSFP receptacle.
- Connect the cable.
- Lay the cable into a slot on the cable management comb.
- Continue to push the connector in until you feel it seat.
- Repeat Step 6 through Step 7 for each cable to be connected.
- Secure the cables to the cable management comb.