(Optional) Assemble the SFP+ Cables
If the optical SFP+ cables are unassembled, you must assemble the cables before attaching them to the switch.
Note - The ends of the optical fiber cable and the receptacles of the transceivers must be clean and optically clear before assembly. Do not remove the protective caps from the optical fiber cable or the plugs from the transceivers until instructed to do so.
- Identify the prerequisite and subsequent installation tasks that you must perform in conjunction with this task.
- Remove the SFP+ optical transceivers and fiber optic cables from their packaging.
-
Sort the components into groupings ready for assembly.
If you are to assemble an Ethernet splitter cable, you will need one QSFP optical transceiver, four SFP+ optical transceivers, and an optical splitter cable.
- Remove the plug from an SFP+ optical transceiver.
- Remove the caps from an LC connector of the fiber optic cable.
-
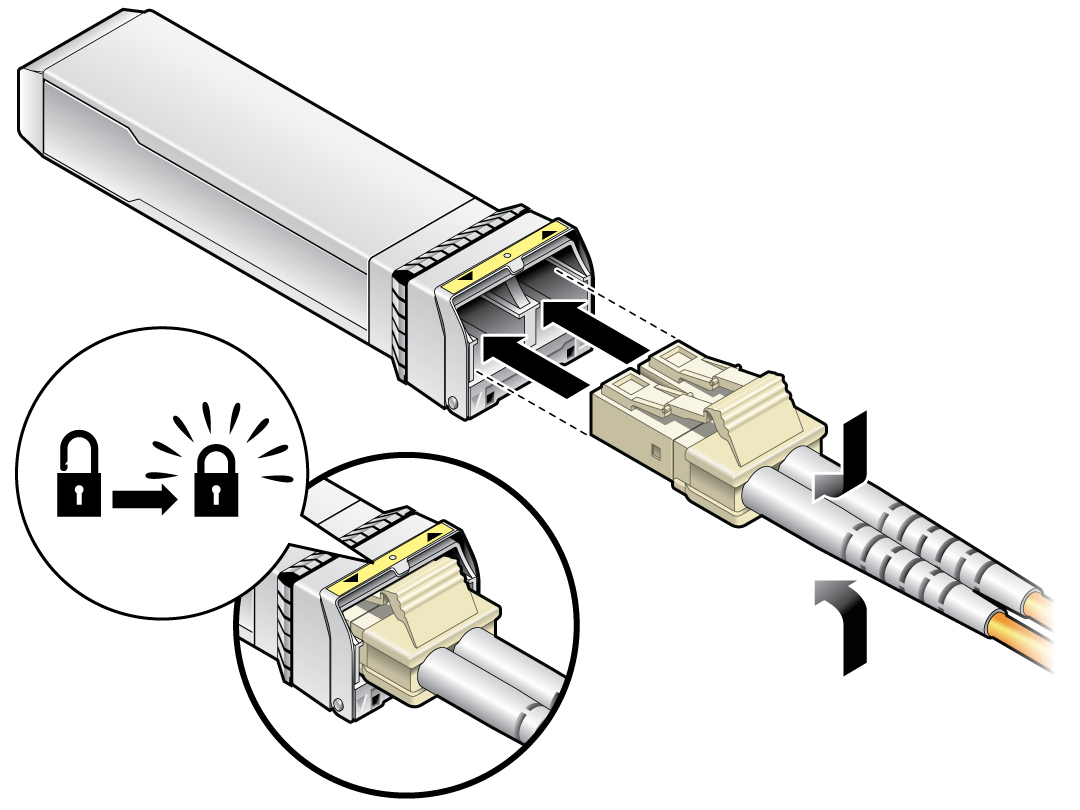
Holding the shafts of the LC connector, insert it into the
receptacles of the SFP+ optical transceiver.
Note - The LC connector and SFP+ receptacles are keyed for proper fitting.
- Push the connector into the transceiver until it clicks.
- Repeat from Step 4 for all SFP+ optical transceivers and LC connectors.
- Repeat from Step 3 for all data cables to be assembled.
-
Route the data cables.
See Route the Cables.