Install the Rackmount Hardware
- Identify the prerequisite and subsequent installation tasks that you must perform in conjunction with this task.
-
Identify the left and right shelf rails.
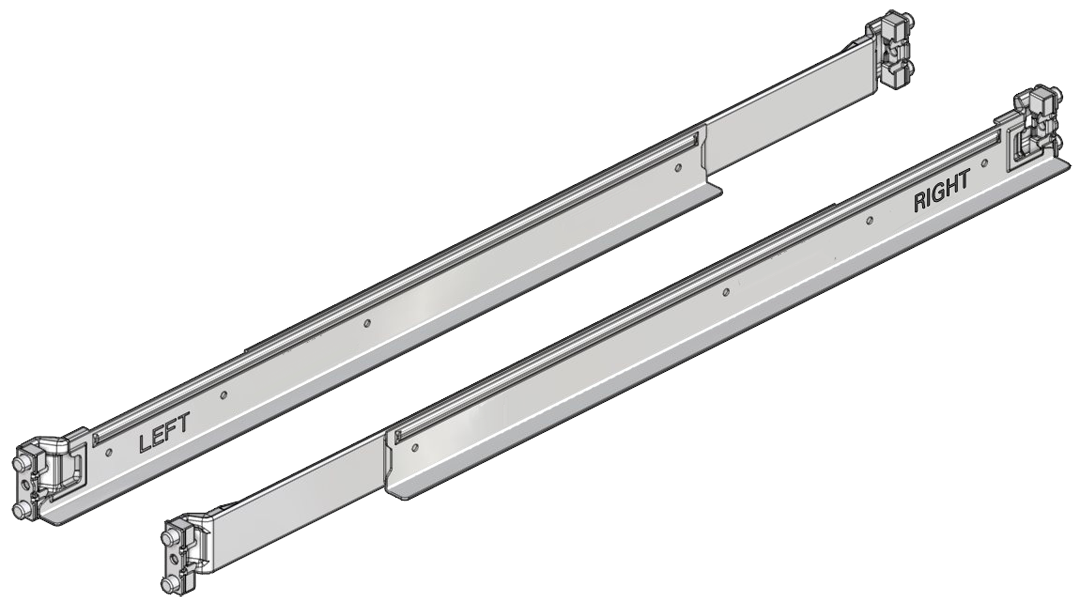
The words LEFT and RIGHT on the shelf rails indicate the front ends of the shelf rails.
-
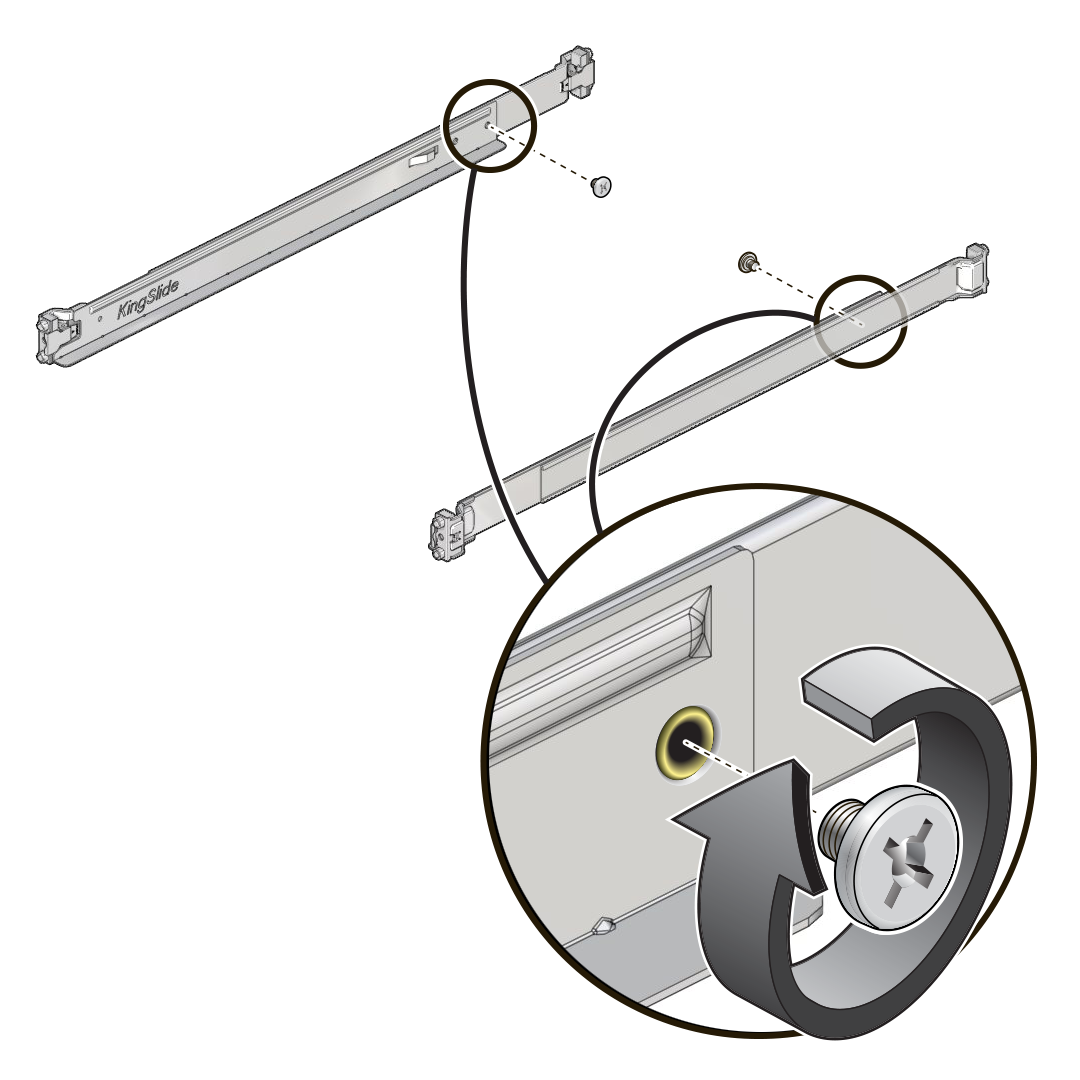
Insert the mushroom screw into the last screw hole on the interior of the
shelf rail.
-
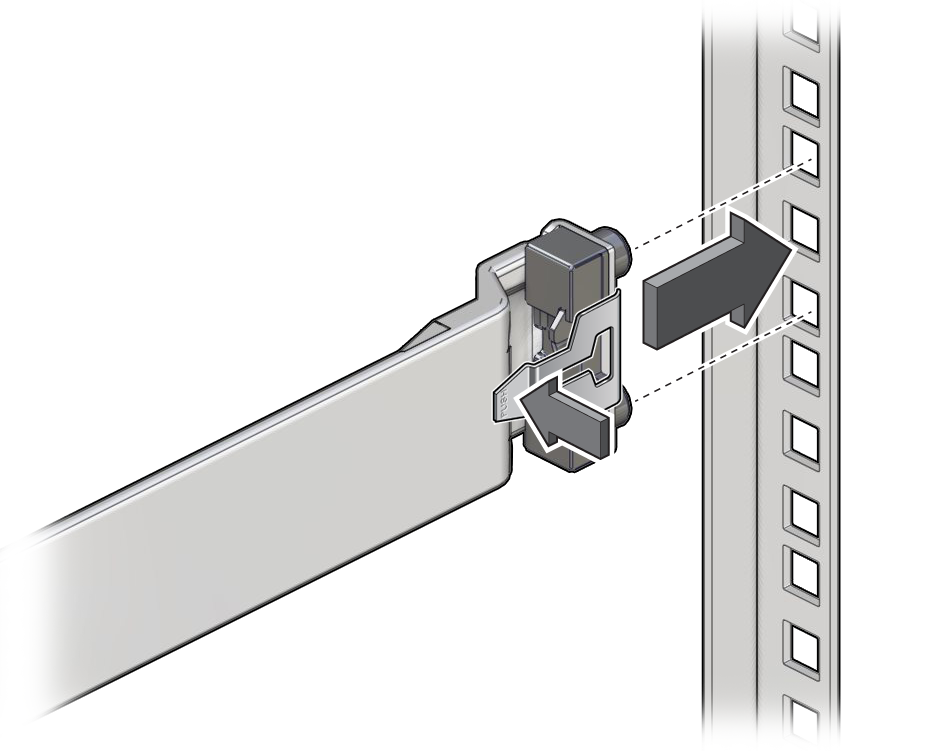
Lift the left shelf rail, and from the front of the rack, position the rear of
the shelf rail into the rear rack post.
-
Press the shelf rail into the rear rack post while pressing and releasing the
release tab.
The shelf rail secures to the rear rack post.
-
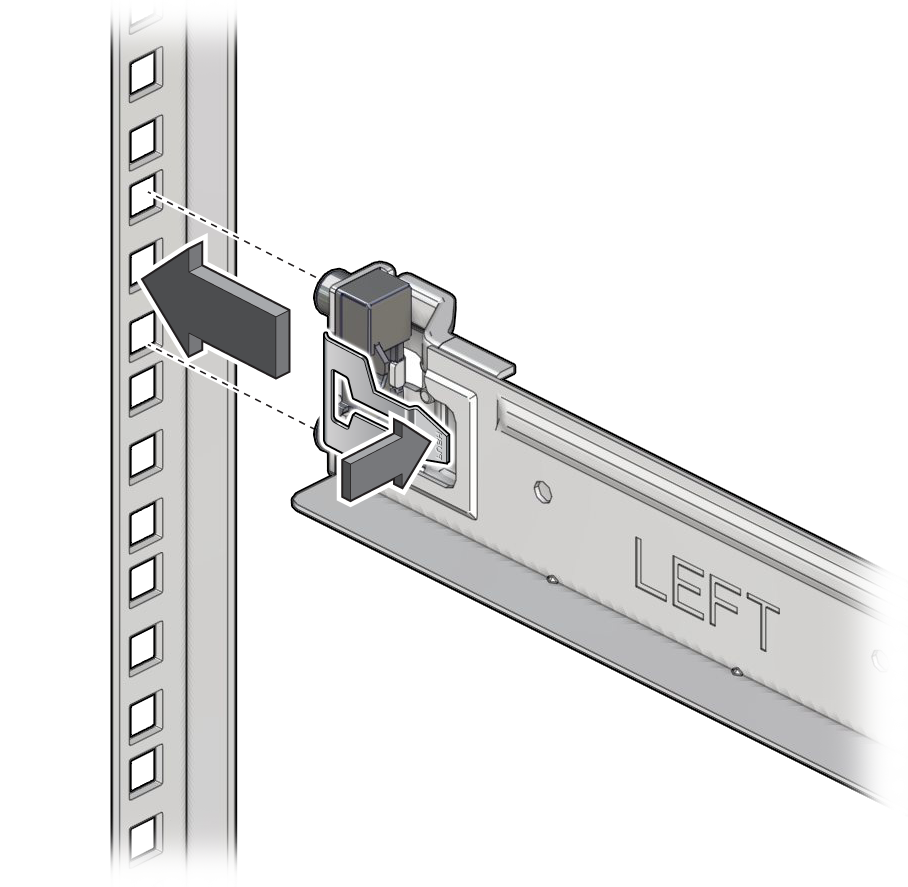
Extend the shelf rail toward the front of the rack, and position the front of
the shelf rail into the front rack post.
-
Press the shelf rail into the front rack post while pressing and releasing the
release tab.
The shelf rail secures to the front rack post.
- Repeat Step 4 through Step 7 for the right shelf rail.
-
Install a 10-32 cage nut into each rear rack post, in the upper square hole of
the rack unit immediately above where the shelf rail is installed.
- Orient the cage nut to the upper square hole of the rack unit, with the flanges to the right and left.
-
Insert the outer flange into the square hole.
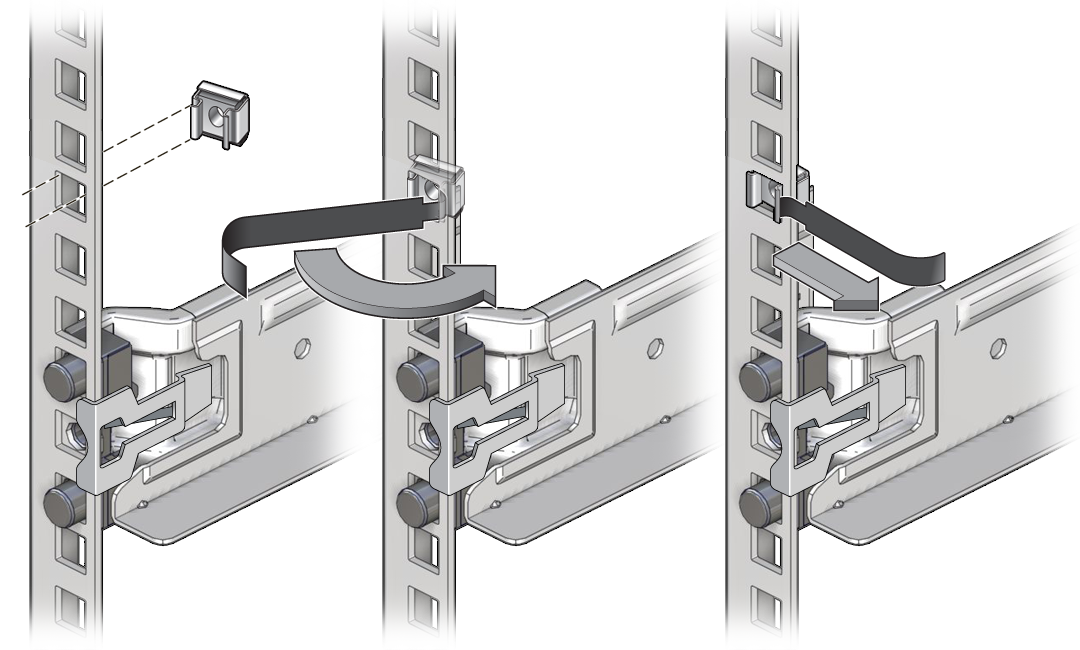
- Using the cage nut installation tool or flat-blade screwdriver as a guide, catch the inner flange and pry it into the square hole.
- Pull the cage nut installation tool or flat blade screwdriver from the flange.
- Repeat to install a 10-32 cage nut into the other rear rack post.
- Install the cable management comb.