In a Manage Commerce Assets project, navigate to Price Lists and show Price Lists or Price Lists and Folders.
(Optional) If you are working in Price Lists and Folders view, select a folder in the Navigation pane.
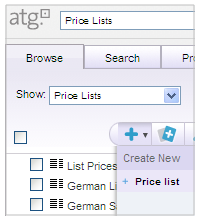
Click Create in the toolbar and select Price list.
Fill in the property fields in the Details pane. Name and Locale are the only required fields.
If you want the new price list to inherit prices from another list, click Edit next to the Base Price List property. When the Select an Item dialog box opens, navigate to the price list, select it, then click OK.
If you are working in Price Lists and Folder view, specify the price list’s location in the folder tree by adding, replacing, or removing a parent folder. A parent is preselected if you see a folder name next to Select Parent.
Add or replace a folder parent by clicking Select Parent and selecting a parent folder in the dialog box that appears. Click OK to close the dialog box.
Remove a parent folder by clicking Clear.
Click Create.
If you did not specify a base price list, a message tells you that this item will not appear in the parent/child hierarchy. Click OK to proceed without a base price list, or go back to step 5 and specify a base price list.
The new price list displays in the Navigation pane, and information that describes it displays in the Details pane.
ATG automatically populates new price lists with all products in the site catalogs on your system. You can see these listed on the Price Lists tab when the create operation is finished. New price lists also automatically display in the Price List tab in the Details pane for all products and SKUs. See Creating and Managing Products and Creating and Managing SKUs for more information.
