Install a DIMM
DIMMs are cold-service components that can be replaced by customers. For the location of the DIMMs, see Processor Module Components.
 | Caution - This procedure requires that you handle components that are sensitive to electrostatic discharge. This discharge can cause failure of server components. |
- Consider
your first steps:
Familiarize yourself with DIMM configuration rules.
Prepare the system for service.
Remove the processor module. Place the processor module on an ESD-protected work surface.
- Consider your next steps:
- If you are replacing a faulty DIMM, ensure that you have removed the faulty DIMM.
- If you are populating a new processor
module, ensure you have the correct DIMMs for your server.
Note - If you ordered processor modules without memory to upgrade the server from a single-module configuration to a dual-module configuration, you must install DIMMs of the same type and capacity that are already in the existing processor modules.
- Unpack the replacement DIMMs and place them on an antistatic mat.
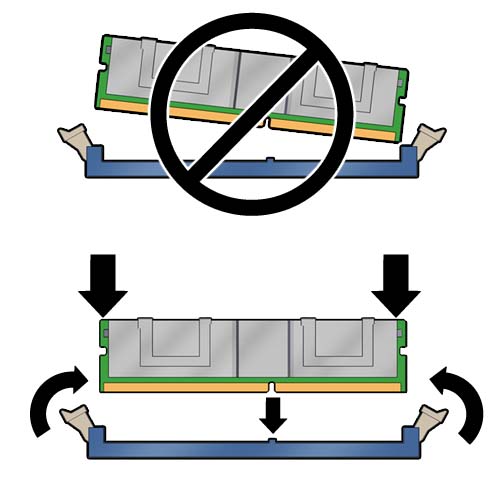
- Ensure that the ejector tabs on the connector that will receive the DIMM are in the open position.
- Align the DIMM notch with the
key in the connector.

Caution - Ensure that the orientation is correct. The DIMM might be damaged if the orientation is reversed.

- Push the DIMM into the connector
until the ejector tabs lock the DIMM in place.
If the DIMM does not easily seat into the connector, check the DIMM's orientation.
- Repeat Step 4 through Step 6 until all new DIMMs are installed.
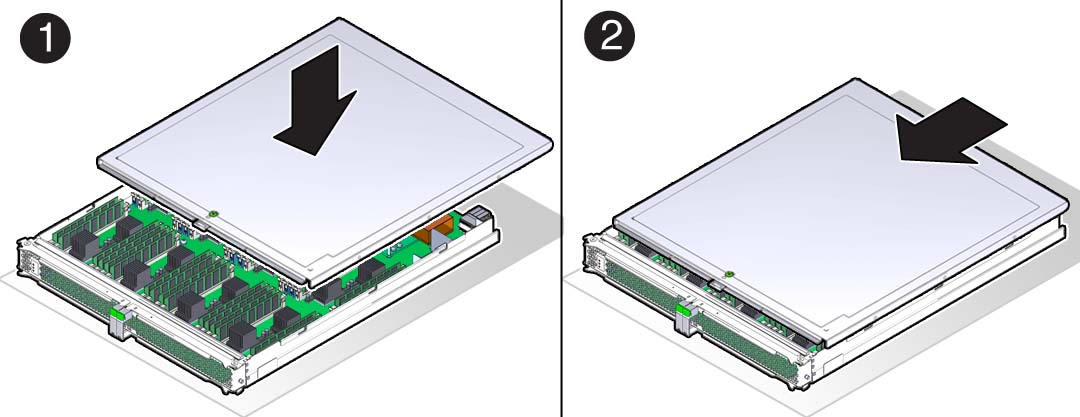
- Place the cover onto the processor
module and slide the cover forward until the latch clicks into place.

- Consider your next steps.
- If you are adding a second processor module to the server, return to Server Upgrade Process.
- If you are replacing a processor module after installing replacement DIMMs, proceed to Step 10.
- Finish the installation procedure.
See:
Install the processor module.
Return the server to operation.
Verify DIMM functionality.
See Verify a DIMM.