Creating and Booting a VM Instance
Use the Project panel in the dashboard to create a VM instance.
How to Create a VM Instance by Using the Dashboard
Before You Begin
Make sure you have an SSH keypair. See How to Create an SSH Keypair.
Make sure you have an external network defined. See Configuring the Neutron L3 Agent.
-
Click the Project tab on the panel on the left side of the dashboard.
The project the user is currently using is shown at the top of that panel. By default, the admin user in this OpenStack configuration is using the demo project.
- In the Manage Compute section of the panel, click Instances.
-
On the right side of the Instances panel, click the Launch Instance button.
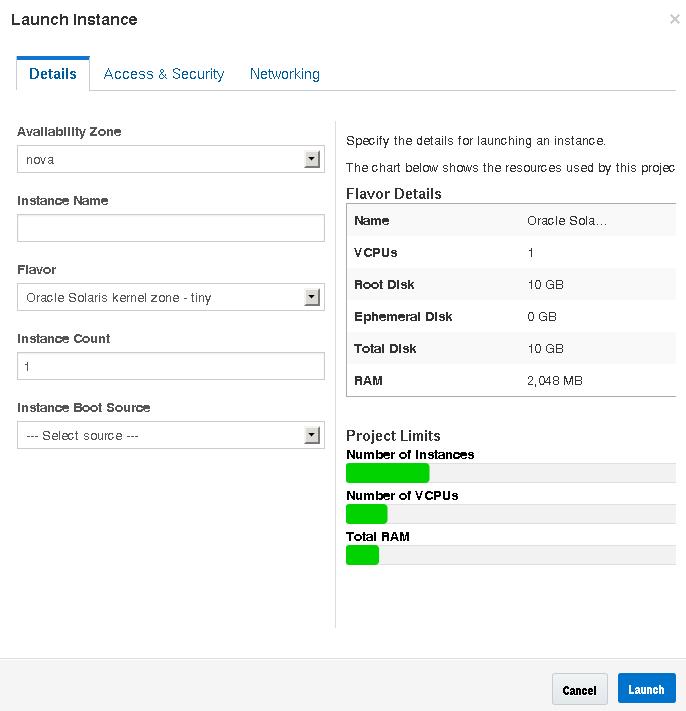
The following Launch Instance dialog box is displayed that enables you to specify the name of the new VM instance and select the flavor and image type of the instance.
Figure 2-5 Launch Instance Dialog Box

- In the Instance Name field, enter a name for the new VM instance.
-
Select a flavor from the Flavor drop down list.
If this OpenStack system is a kernel zone and not a bare-metal system, then you must select a non-global zone flavor.
-
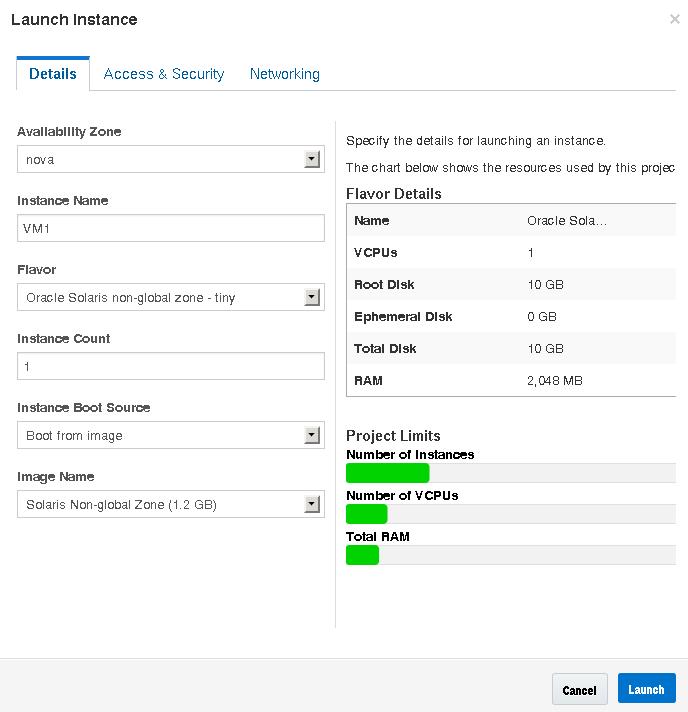
Under Instance Boot Source, select Boot from image.
An Image Name selection is displayed. Select the image that is the same type of zone as the flavor you selected. Both the flavor and the image must be for either a solaris non-global zone or a solaris-kz kernel zone. If this OpenStack system is a kernel zone and not a bare-metal system, then you must select a non-global zone image.
Figure 2-6 Launch Instance Dialog with Selections

-
Click the Access & Security tab in the dialog box.
Select which SSH keypair to install in the new VM instance.
-
Click the Networking tab in the dialog box.
Select the network where the new VM instance should be attached.
-
Click the Launch button at the bottom of the dialog box.
The new VM instance is created, installed, and booted.
The time required for a new instance to be made available depends on several factors including the size of the image, the resources provided in the flavor, and where OpenStack has placed the root file system of the new VM instance.
-
Associate a floating IP address with the new VM instance.
You can do these steps while the new VM instance is installing. The VM instance must have an associated floating IP address so that users can log into it.
-
Click the Associate Floating IP button in the Actions column.
The Manage Floating IP Associations dialog opens.
-
Select an address from the IP Address drop-down menu.
If the IP Address field displays a message that no IP addresses are available, click the + button. See How to Associate a Floating IP Address with a Project.
-
Select an associated port.
The ports list shows the fixed IP addresses of the VM instances.
- Click the Associate button at the bottom of the dialog box.
-
Click the Associate Floating IP button in the Actions column.
Next Steps
-
Click Instances and click the name of the instance to view detailed information about the instance and view the console log of the instance. Reload the page to view log updates.
-
Click Volumes to view Cinder volumes that have been created.
-
Click Network Topology to view a representation of the cloud network including all subnet segments, virtual routers, and active instances.
-
Click Images & Snapshots to view the Unified Archives that have been uploaded into the Glance image store.
-
When the new VM instance has finished installing and reached the Active status, log in to the instance. The following command logs in to the zone as root using the key from Step 7 and the floating IP address from Step 10:
# ssh root@floating-ip-address
How to Create an SSH Keypair
- Click the Project tab on the panel on the left side of the dashboard.
- In the Manage Compute section of the panel, click Access & Security.
- Click the Keypairs tab.
-
Click the Create Keypair button.
The Create Keypair dialog opens.
- Enter a name for the keypair in the Keypair Name field in the dialog.
-
Click the Create Keypair button in the dialog.
The new keypair should download automatically.
If the new keypair does not download automatically, click the provided Download keypair link.
The new keypair should be listed in the Keypairs tab of the Access & Security panel.
How to Create a Network for a Tenant
- Click the Project tab on the panel on the left side of the dashboard.
- In the Manage Network section of the panel, click Networks.
-
Click the Create Network button.
The Create Network dialog opens.
- On the Network tab, enter a name for the network in the Name field.
- Provide the information requested on the Subnet and Subnet Details tabs.
-
Click the Create button at the bottom of the dialog box.
The new network and subnet should be listed in the Networks panel.
How to Associate a Floating IP Address with a Project
- Click the Project tab on the panel on the left side of the dashboard.
- In the Manage Compute section of the panel, click Access & Security.
- Click the Floating IPs tab.
-
Click the Allocate IP To Project button.
The Allocate Floating IP dialog opens.
- From the drop-down menu in the dialog, select a pool from which to allocate the floating IP.
- Click the Allocate IP button in the dialog.