Exploring the Dashboard
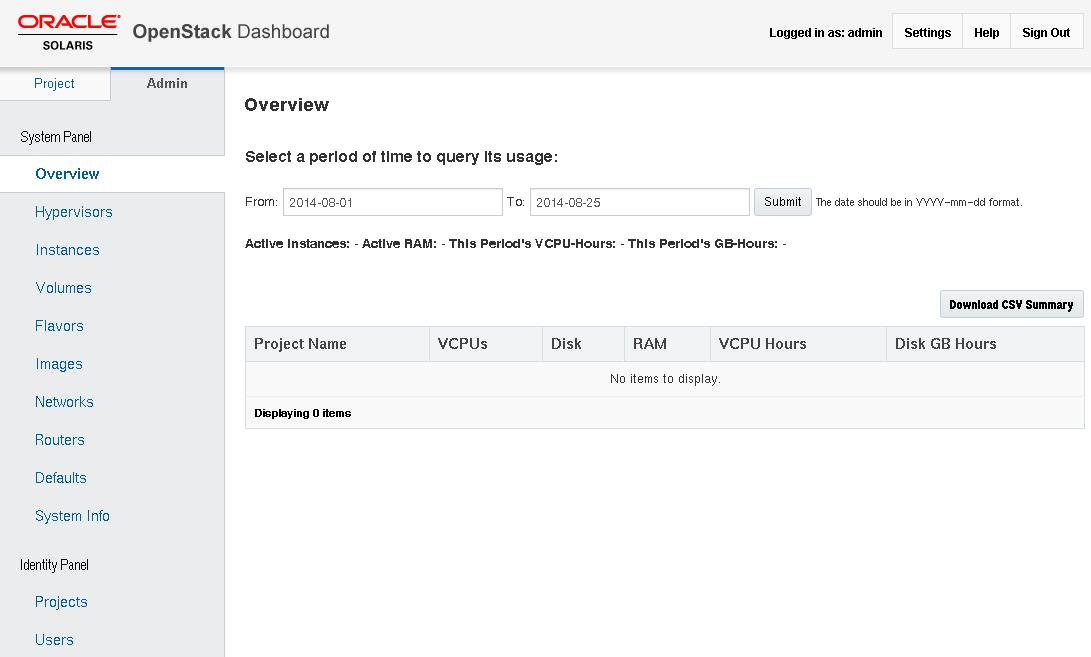
When you log in as the cloud administrator, the window contains a panel on the left side of the screen with two tabs: Project and Admin. The Admin panel is the default cloud administrator view. The selections on the Admin panel provide the following functionality:
-
An overall view of the Nova instances and Cinder volumes in use within the cloud
-
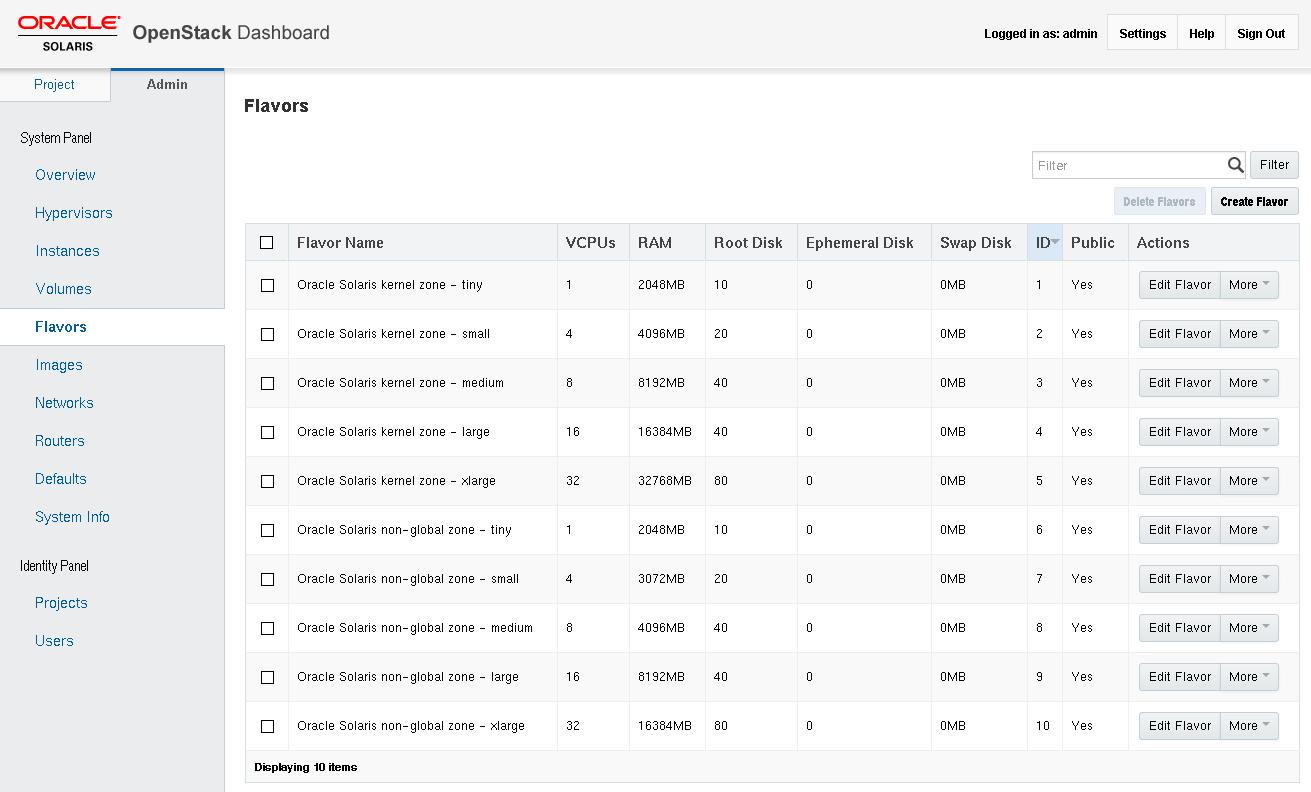
The ability to view and edit the flavor definitions that define VM instance characteristics such as the following:
-
The number of virtual CPUs
-
The amount of memory
-
The disk space assigned
-
The brand of the underlying Solaris zone: solaris for non-global zones and solaris-kz for kernel zones
-
-
The ability to create virtual networks and routers for use by cloud administrators
-
The ability to view and edit projects by grouping and isolating ownership of virtual computing resources
-
The ability to view and edit users, which are the persons or services that use the cloud resources
Figure 2-1 OpenStack Dashboard Admin Overview Window

If you installed OpenStack as described in Installing the Single System, your OpenStack system is preconfigured with the following resources:
-
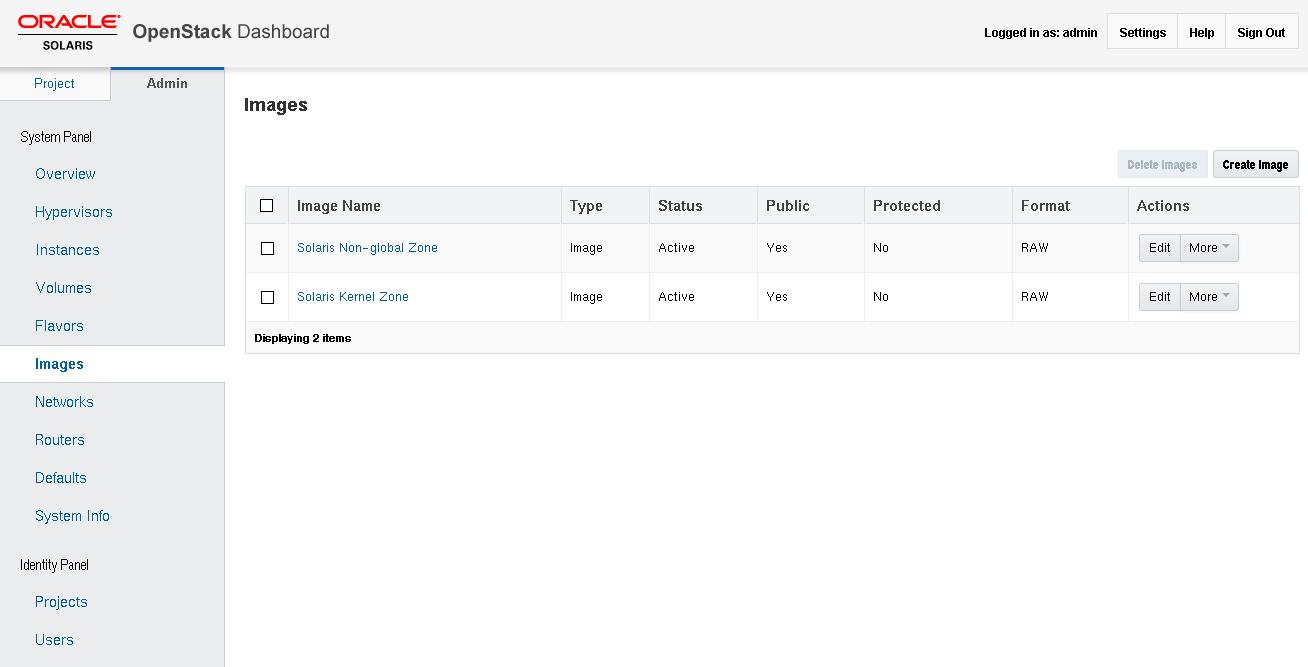
Two images: Solaris Non-global Zone and Solaris Kernel Zone
-
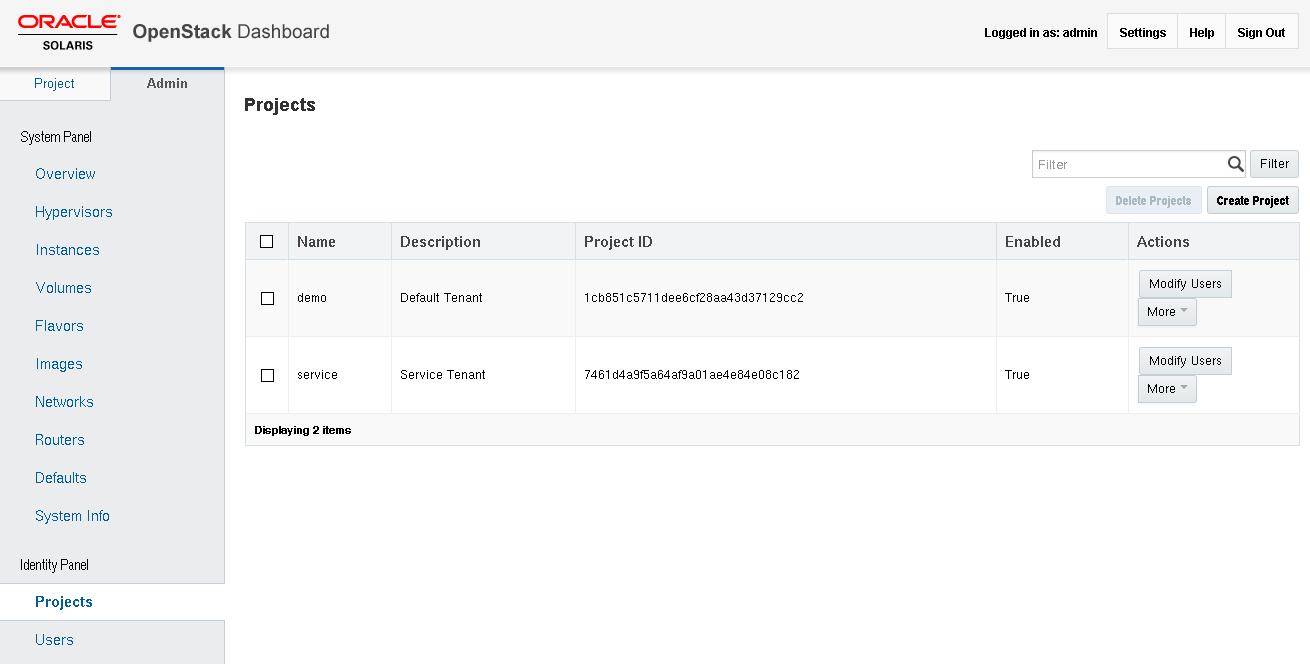
Two projects: demo and service
-
Ten flavors
The following figure shows the images.
Figure 2-2 Images Screen in the OpenStack Dashboard

The following figure shows the projects, also known as tenants.
-
The demo tenant is the default tenant. By default, the demo tenant is created with a single user, admin, as a member.
-
The service tenant is a tenant that is used by the cloud administrator to create resources that will be shared across multiple tenants. For example, in the examples and scenarios in the document, the Neutron router is created in the service tenant so that the router is shared by all the tenants. You must not use the service tenant for any other purpose in your OpenStack setup. OpenStack services communicate with each other by means of service-specific users, who all have the admin role are part of the service tenant.
Figure 2-3 Projects Screen in the OpenStack Dashboard

The following figure shows the flavors. See Displaying Information About Flavors for a text list of flavors.
Figure 2-4 Flavors Screen in the OpenStack Dashboard
