
The Partner Locations Wizard allows you to create a basic Location partner-to-partner connection with tubes that distinctly define all of the traffic allowed over that connection. To add more functionality or more advanced configurations to a partner connection, use the Partners tab of both Location partners, as described in Section 2.3, “Partners”.
When you launch the Partner Locations Wizard from the File menu or the tool bar, App Net Manager takes you step-by-step through the partnering process.
The screens in the Partner Locations Wizard are as follows:
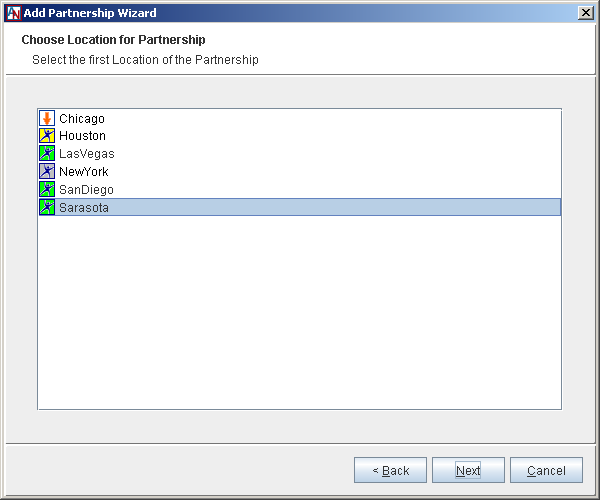
Choose Location for Partnership: Choose the first partner for the partnership and click Next.
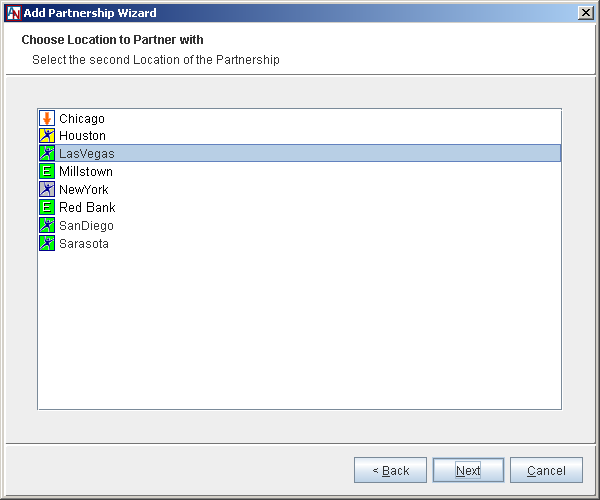
Choose Location to Partner with: Choose the second partner and click Next. (Note that you can choose an extranet Location as a partner, but you cannot establish a partnership with client group using this wizard.)
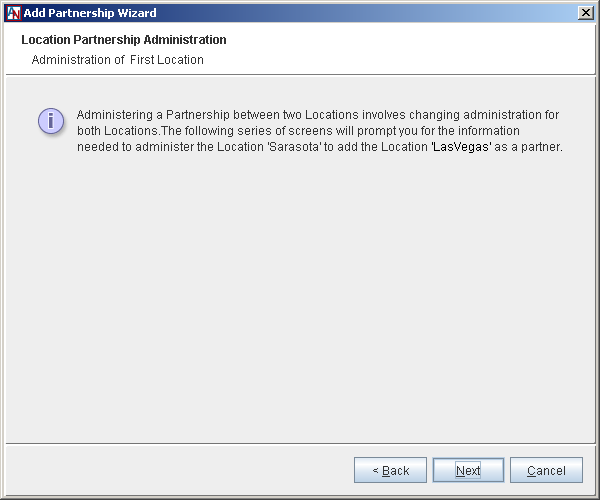
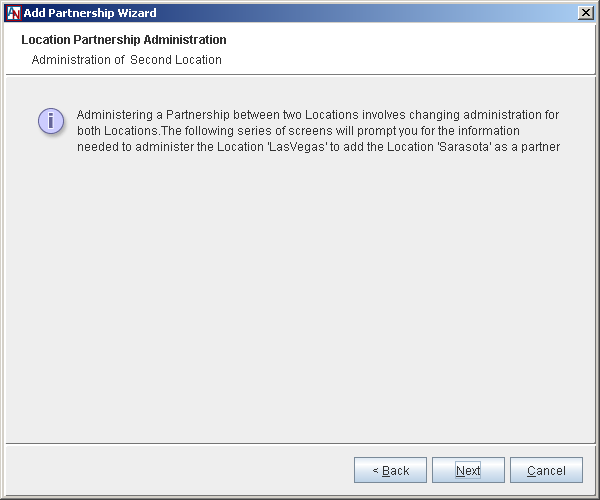
Location Partnership Administration: The wizard will take you through the steps of administering each side of the partnership, one at a time. (If there is already a partnership between the two Locations that you selected, you can use this wizard to Modify or Delete the partnership.)
Click Next to begin administering the first partner.
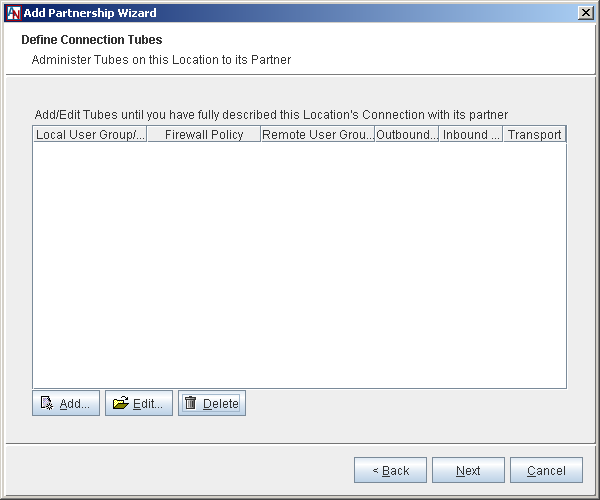
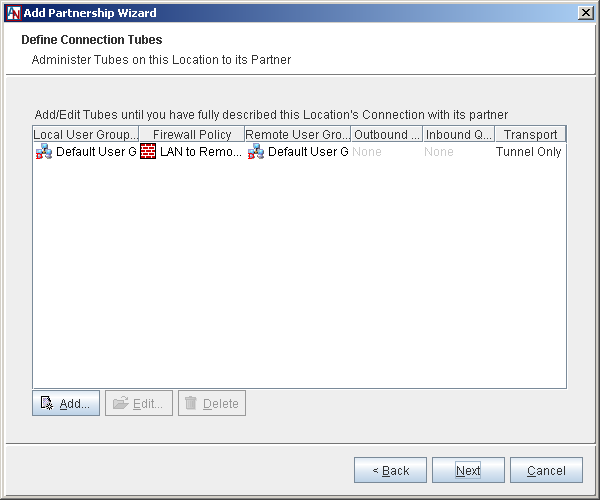
Tube Definitions: This screen asks you to define tube definitions for the first partner's side of the partnership.
You can Edit or Delete any existing tubes.
To add a new tube, click Add.
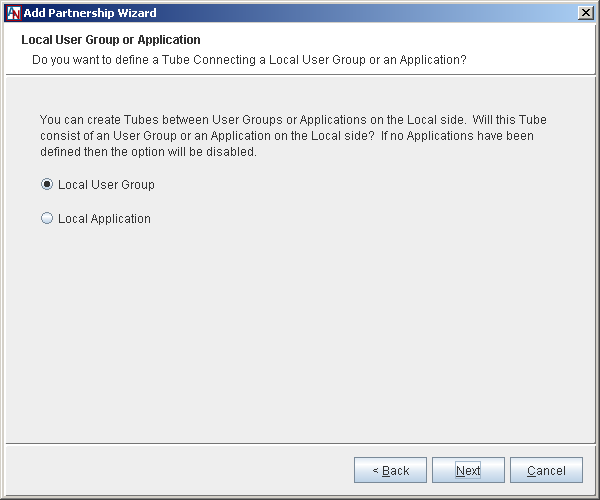
Local User Group or Application: If applications have been defined for the first partner, the next screen asks you to select whether this tube definition will contain a local User Group or application.
If you want to define a tube for a local User Group, select Local User Group and proceed to Step 6. For information on defining User Groups for a Location, refer to Section 1.8, “User Groups”.
If no applications are configured on this Location, proceed to Step 7.
If you want to define a tube for a local application, select Local Application and proceed to Step 8. For information on registering applications with a Location, refer to Section 1.6, “Applications”.
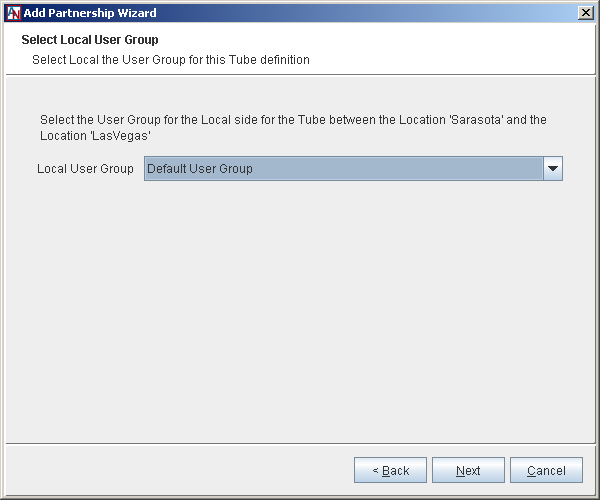
Select Local User Group: If you select Local User Group (or no applications have been configured), the next screen asks you to select a local User Group from the pull-down menu and click Next.
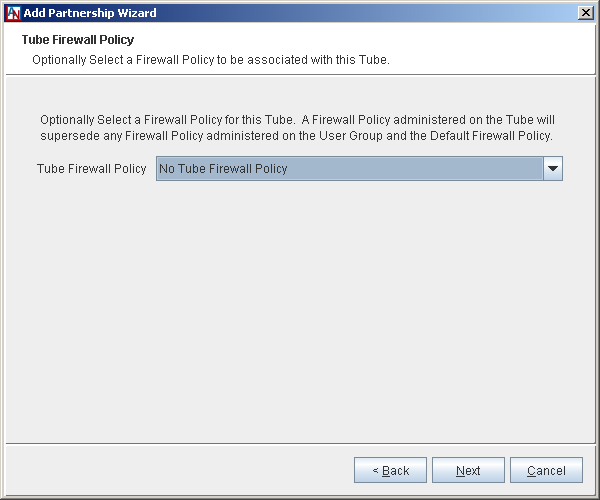
Tube Firewall Policy: On the next screen, you are asked to select an (optional) Firewall Policy that will be enforced locally on the tube. For more information on Firewall Policies, refer to Section 2.1, “Corente Virtual Services Gateway Security and Firewalls”.
Click Next.
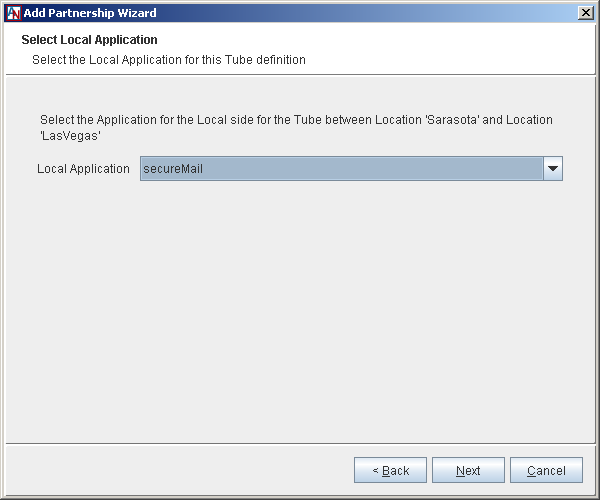
If you select Local Application, the next screen asks you to select a local application from the pull-down menu and click Next.
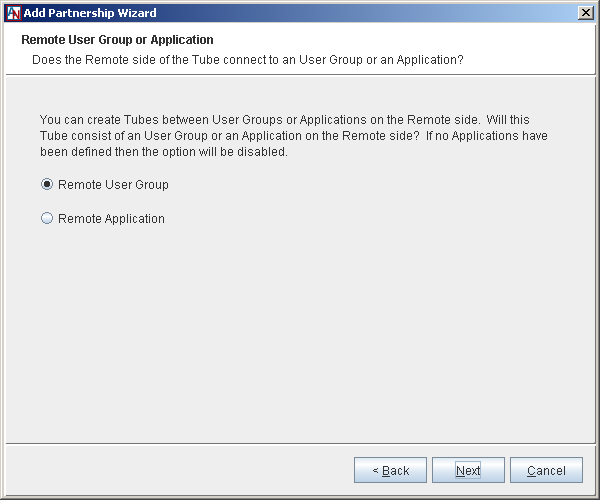
Remote User Group or Application: If applications have been defined for the second partner, the next screen asks you to select whether this tube definition will contain a remote User Group or application.
If you want to define the tube for a remote User Group, select Remote User Group and proceed to Step 10.
If no applications are configured on this partner, proceed to Step 10.
If you want to define the tube for a remote application, select Remote Application and proceed to Step 11.
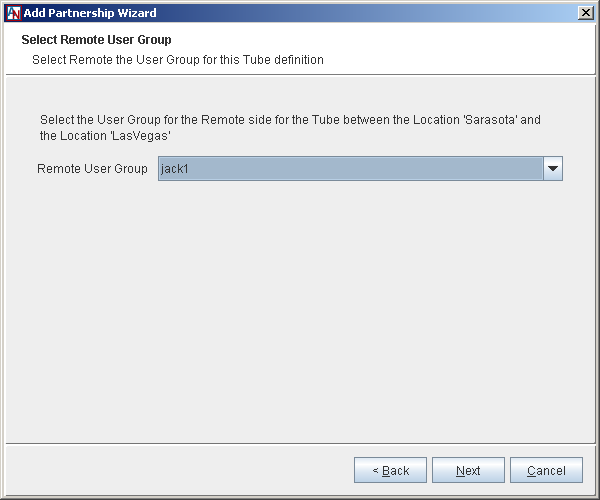
Select Remote User Group: If you select Remote User Group (or no applications have been configured), the next screen asks you to select a remote User Group from the menu and click Next.
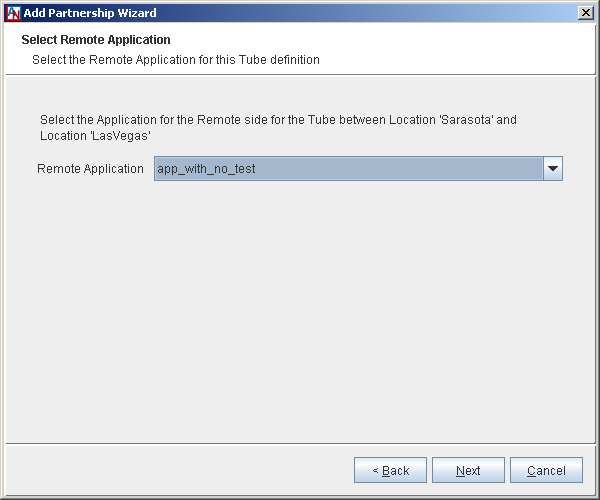
Select Remote Application: If you select Remote Application, the next screen asks you to select a remote application from the menu and click Next.
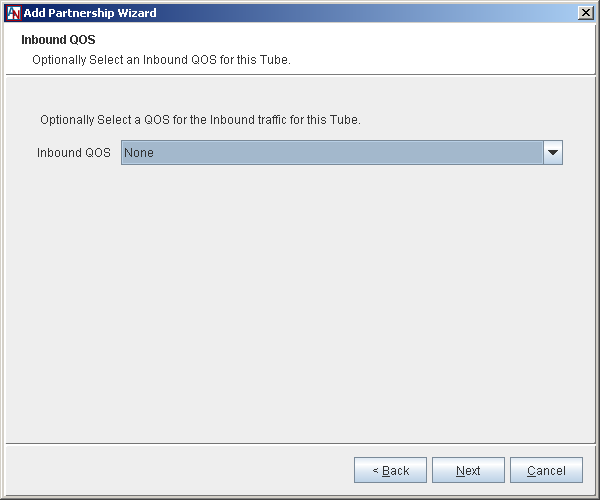
Inbound QoS: Select an (optional) Inbound QoS setting that will apply to all traffic from the second partner inbound to the first partner and click Next.
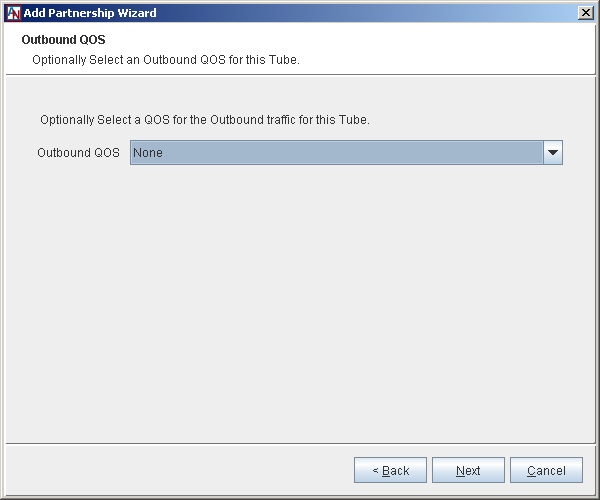
For information on defining Quality of Service settings to use with your Locations, refer to Section 2.2, “Quality of Service (QoS)”.
Outbound QoS: Select an (optional) Outbound QoS setting that will apply to all traffic to the second partner outbound from the first partner and click Next.
Define Connection Tubes: You will return to the Tube Definitions screen of the wizard. Add, edit, or delete as many tubes as you would like. When you have finished defining tubes for the first partner, click Next.
Location Partnership Administration: After the Tube Definitions screen for the first partner, you will be asked to perform the same steps you just completed for the second partner's side of the partnership. Location partnerships are reciprocal and must be defined on both sides of the partnership. This allows each side to enforce their own rules on the connection.
When you are finished, a line will appear on the domain map to represent the new connection between partners. When this line turns green, the connection is active and can be used.
Tubes Wizard
As in previous releases, with Tubes, you can organize the secure connection between a Location and its partner into logical tubes that regulate the access of each machine on the LAN to each machine on the remote LAN, and vice versa.
When you launch the Tube Wizard from the File menu or the tool bar, App Net Manager takes you step-by-step through the tube creation process. These steps are the same as Step 4 through Step 13 of the Partner Locations Wizard.