| Skip Navigation Links | |
| Exit Print View | |

|
Sun Blade 6000 Ethernet Switched NEM 24p 10GbE User’s Guide |
Understanding the Switched NEM
Switched NEM Features Overview
Installing or Replacing the Switched NEM
Verifying the Switched NEM Installation
Verify Installation With the CMM ILOM Web Interface
Verify Installation With the CMM ILOM CLI
Finish the Switched NEM Installation
Install the Fabric Expansion Module in the Server Blade
Installing or Removing SFP+ or QSFP Optical Transceiver Modules
Remove an SFP+ or QFSP Optical Transceiver Module
Managing the NEM Remotely (ILOM)
Configuring an Externally Accessible IP Address on the NEM
Connecting to the NEM ILOM Through the CMM ILOM
Configure SEFOS User Privileges
Special Considerations for RADIUS Users
Configure User Privileges for RADIUS Users
Backing Up and Restoring the ILOM and SEFOS Configuration
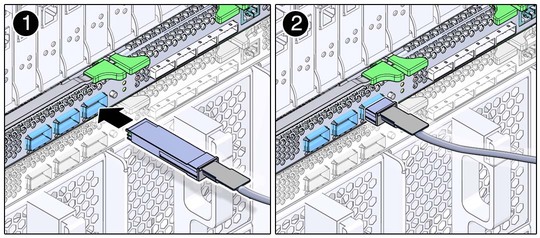
Note - The figures in this topic show how to install and cable a SFP+ transceiver module. Some QSFP transceiver modules have a similar design, where the module and the cable are two separate components. For that type of QSFP transceiver module, the installation of the QSFP transceiver module is the same as for the SFP+ transceiver module, but the cable that attaches to the QSFP transceiver module looks different.
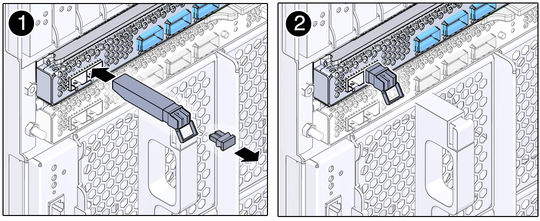
Some optical transceiver modules are dual-part modules, where the module and the cable are two separate pieces. Other transceiver modules are single-part modules, where the transceiver and the cable are a single combined unit.
The following figure shows the correct alignment for the transceiver module.

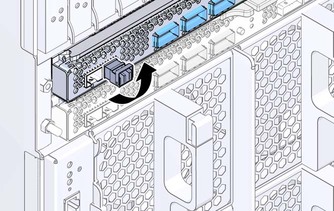
Note - If you pull the locking handle down when the SFP+ or QSFP optical transceiver module is installed, remove the optical transceiver module entirely and reinstall it. The handle operates an internal lock. Pulling the handle down can disconnect the module, even though it might appear to be connected.

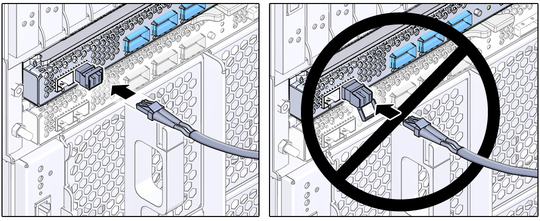
If you are plugging in a dual-part module, verify that the handle is in the locked position and connect the cable to the optical transceiver. If the handle is in the unlocked position, you must push it up into the locked position before attaching the cable.

If you are plugging in a single-part module, plug the module into the slot in the Switched NEM.
