Log in to the CMS window (see "Logging In to the CMS Window").
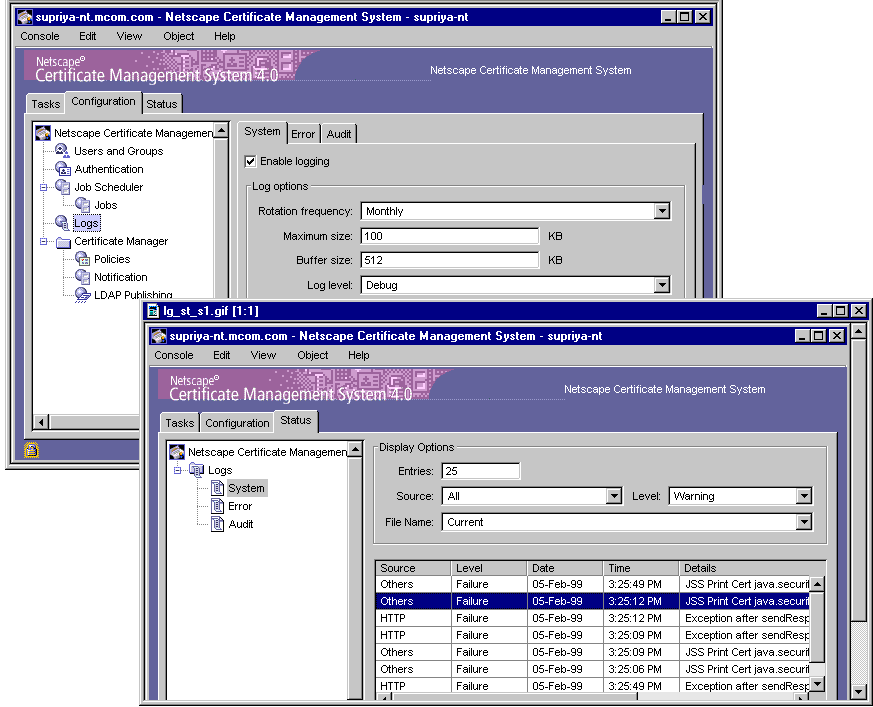
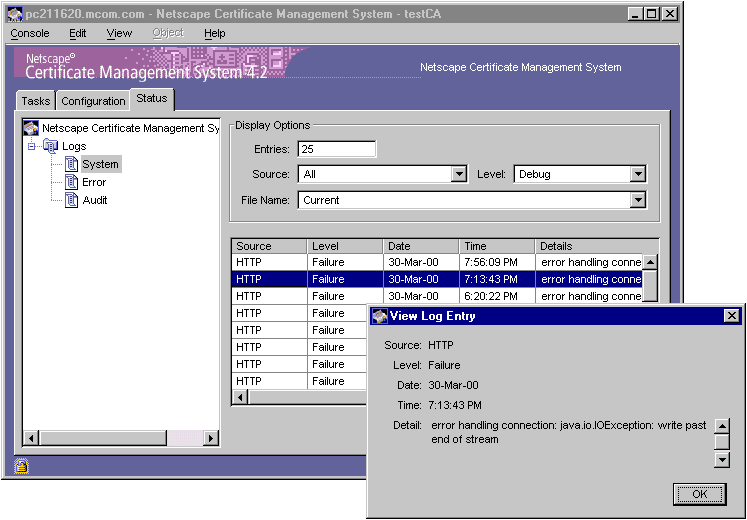
In the navigation tree, select Logs.
The System tab appears in the right pane. It shows the current configuration
for the system log. 
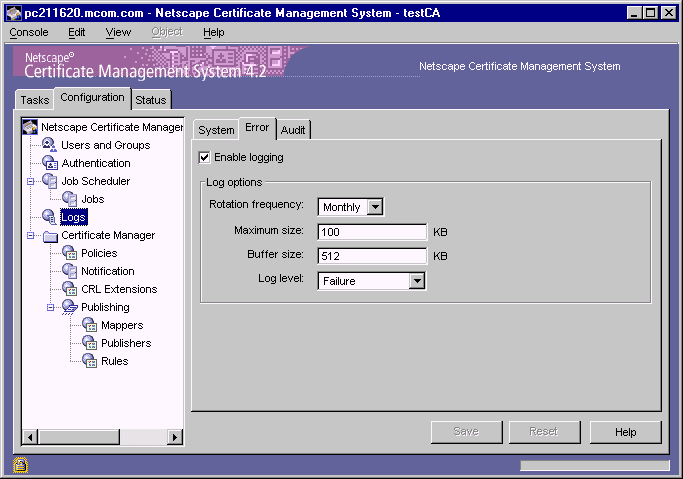
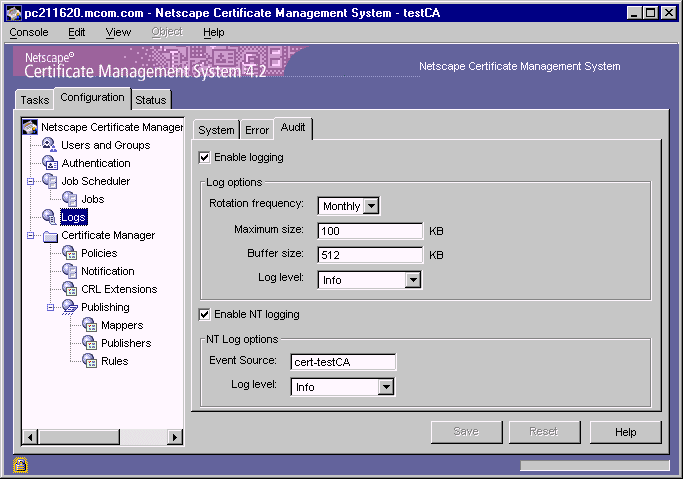
Check the "Enable logging" box if you want the server to log system-level messages to the appropriate CMS log file (see "Log File Locations"). All the associated fields become available for you to enter information. Leave the box unchecked if you do not want the server to log messages of this type.
In the "Log options" section, specify information as appropriate:
Rotation frequency.
From the drop-down list, select the interval at which the server should rotate the active system log file. The available choices are Hourly, Daily, Weekly, Monthly, and Yearly. The default rotation interval is Monthly. For more information, see "Rotation of Log Files".
Maximum size.
Type the file size in kilobytes (KB) for the system log. The default file size is 100 KB. For more information, see "Rotation of Log Files".
Buffer size.
Type the buffer size in kilobytes (KB) for the system log. The default size for the buffer is 512 KB. For more information, see "Buffered Versus Unbuffered Logging".
Log level.
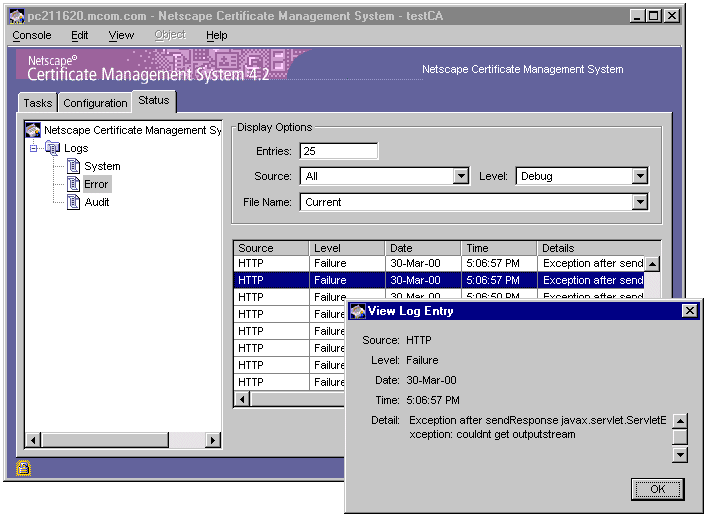
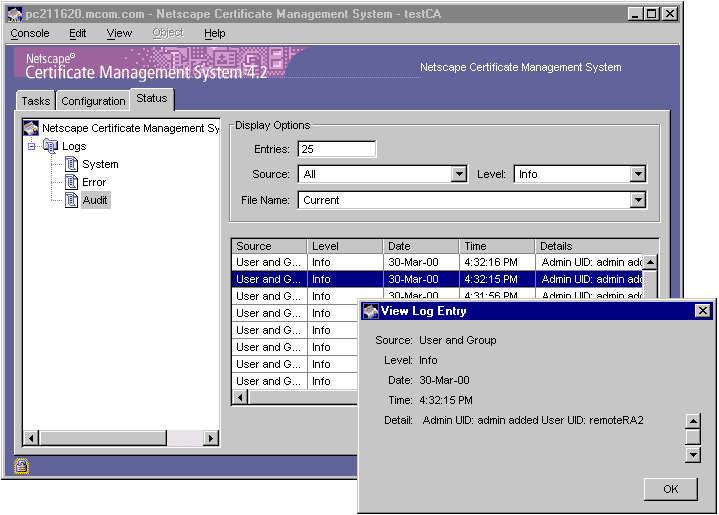
From the drop-down list, select a log level. The choices are Debug, Info, Warning, Failure, Misconfiguration, Catastrophe, and Security. The default selection is Failure. For more information, see "Log Levels (Message Categories)".
This step is applicable to Windows NT system only.
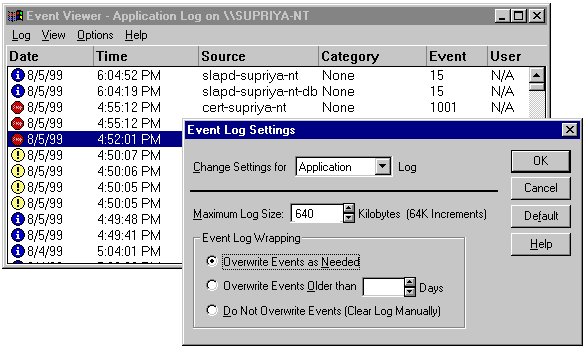
On a Windows NT system, check the "NT Event logging" box if you want
the server to log system-level messages to the Event Log maintained by the
system. All the associated fields become available for you to enter
information. Leave the box unchecked if you do not want the server to log
messages of this type to the Event Log.
Event source.
Specifies the CMS instance ID for which the system messages are to be logged. For example, the instance ID could be
cert-test CA.
Log level.
From the drop-down list, select a log level. The choices are Debug, Info, Warning, Failure, Misconfiguration, Catastrophe, and Security. The default selection is Warning. For more information, see "Log Levels (Message Categories)".
To save your changes, click Save.
The CMS configuration is modified. If the changes you made require you to
restart the server, you will be prompted accordingly. In that case, restart the
server.