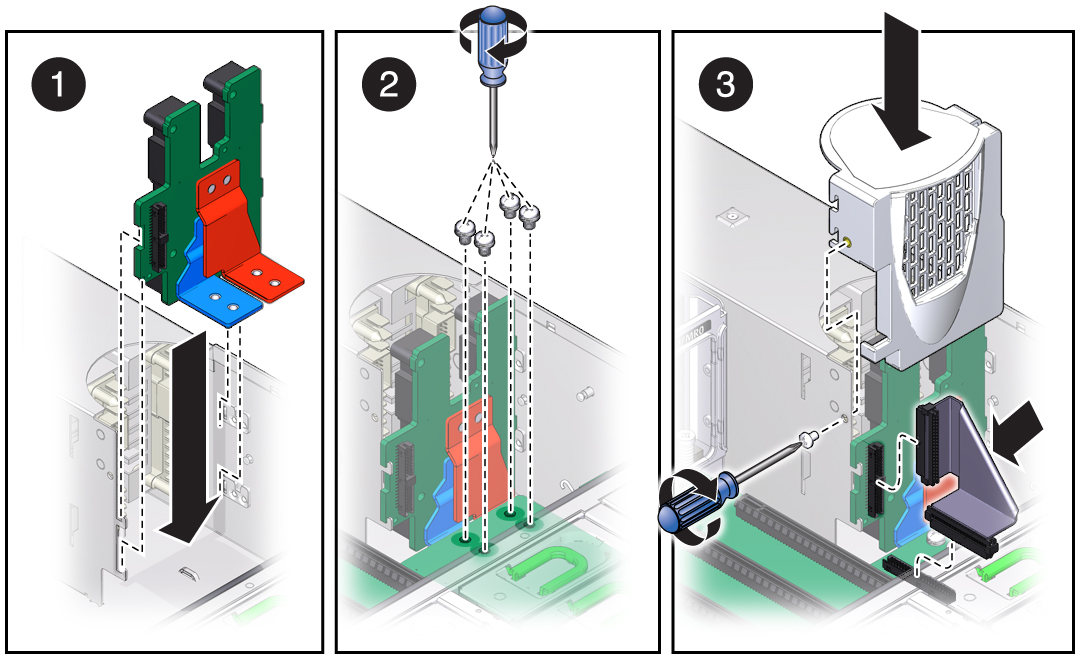
Install the PS Backplane
This is a cold-service procedure that must be performed by qualified service personnel. Power down the server completely before performing this procedure.
 | Caution - This procedure requires that you handle components that are sensitive to ESD which can cause server components to fail. |
- Unpack the replacement PS backplane and place it on an antistatic mat.
- Hold the PS backplane at the end of the power supply cage at an angle, and connect the AC
cables to the AC connectors on the PS backplane.
Ensure that each AC cable is connected to the appropriate connector. You must connect the AC cable on the right to the AC connector on the right, and connect the AC cable on the left to the AC connector on the left.
- Insert the PS backplane into position (panel 1).
Ensure that the tabs on the power board slide onto the hooks on the power supply cage.

- Reconnect the ribbon cable from the motherboard to the PS backplane.
- Install the four bus bar screws to secure the mother board to the PS backplane (panel
2).
Use a No. 2 Phillips screwdriver to tighten the bus bar screws until the PS backplane and the motherboard are securely fastened to the bus bars.
- Replace the PS backplane cover (panel 3).
- Align the PS backplane cover.
Ensure that the tooth at the bottom of the cover is clear of the power supply cage.
You must guide two slots on the PS backplane cover around two pins on the inside of the power supply cage.
- Fit the two slots on the cover around the two pins.
- Lift up the cover a little to guide the two pins into the other part of the slots.
- Attach the screw to fasten the PS backplane cover in place.
- Align the PS backplane cover.
- Reinstall the air divider by sliding it into the chassis.
- Reinstall the memory risers.
- Push the power supplies all the way back into the chassis.
- Return the server to operation.