Configure RAID on Oracle Storage 12 Gb SAS PCIe RAID Host Bus Adapter, Internal 16-Port
The Oracle Storage 12 Gb SAS PCIe RAID Host Bus Adapter, Internal 16-Port manages the HDDs and SSDs in your system. When the system is shipped, the HDD and SSD drives are configured into RAID 0 volumes. Use this procedure to reconfigure these into RAID volumes according to your performance and redundancy needs.
 | Caution - Degraded Performance. Combining HDDs and SSDs in the same array is not recommended. It causes the entire array to operate at the speed of the HDDs, which is significantly lower than the speed of the SSDs. |
-
Configure the server for a one-time boot to BIOS.
- Access the Oracle ILOM web interface.
- Navigate to Host Management → Host Control.
-
Select BIOS from the drop-down list, and select Save.
This causes the server to boot to BIOS on the next boot.
-
Access a system console.
For more information, see Redirect Host Server Desktop or Storage Devices and refer to Oracle X7 Series Servers Administration Guide at https://www.oracle.com/goto/x86admindiag/docs.
-
Power on or reset the server.
For example, to reset the server:
-
From the local server, press the On/Standby button on the front panel of the server for approximately 1 second to power off the server, and then press the On/Standby button again to power on the server.
-
From the Oracle ILOM web interface, select Host Management → Power Control, and in the Select Action list box, select Power On. Click Save, and then click OK.
-
From the Oracle ILOM CLI, type: reset /System.
The system boots to the BIOS Setup Utility.
Note - The steps and screens in this procedure are examples. What you actually see might differ depending on your system's equipment and configuration. -
-
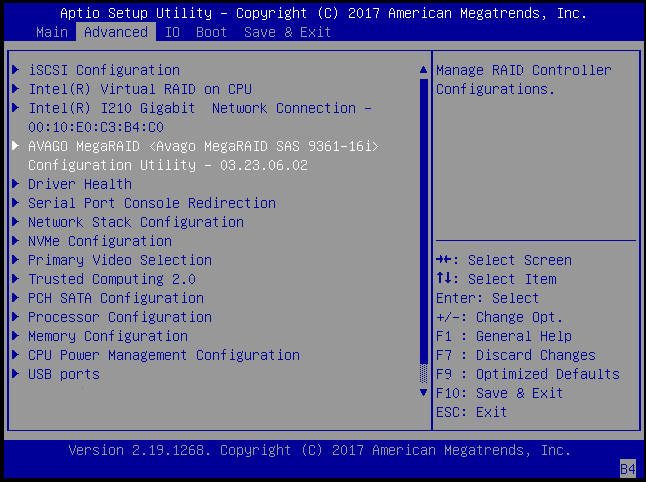
On the BIOS Setup Utility screen, select the Advanced tab, select Avago
MegaRAID Configuration Utility, and press Enter.
-
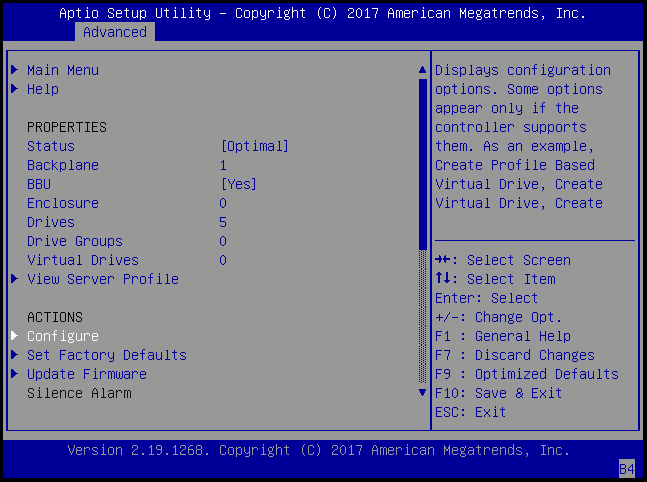
From the ACTIONS menu, select Configure and press Enter.
-
Select Create Virtual Drive, and press
Enter.
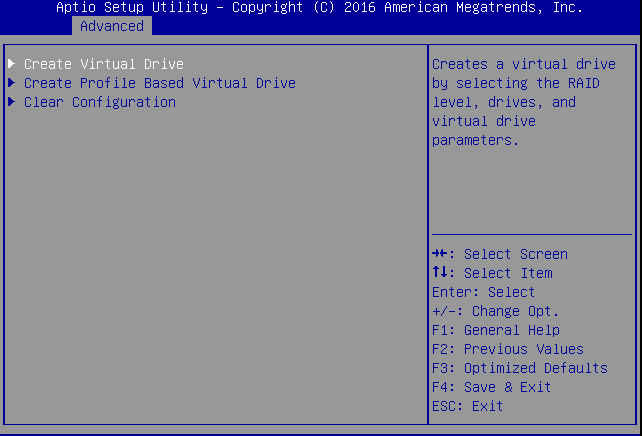
The Create Virtual Drive menu appears.
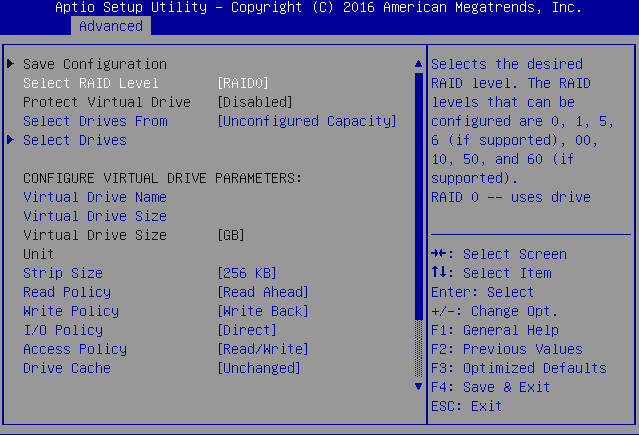
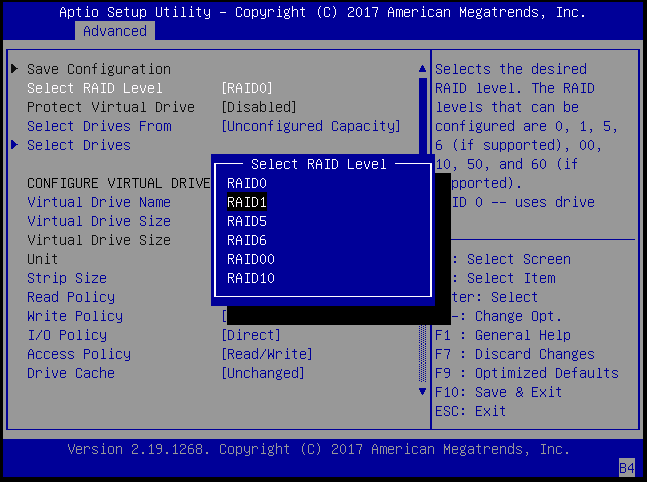
- Select Select RAID Level, and press Enter.
-
When the popup appears, select a RAID level.
-
Navigate to Select Drives, and press
Enter.
A list of drives appears.
-
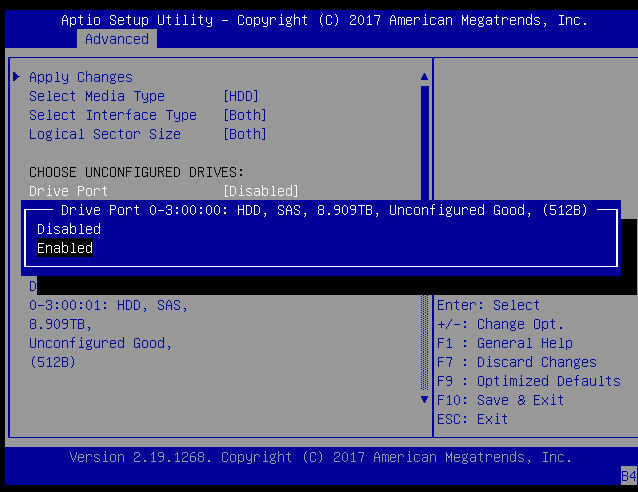
For each drive that you want to include in the RAID volume, do the following:
- Use the arrow keys to navigate to the drive.
- Press Enter.
-
In the pop-up window, select Enabled, and press
Enter.
The drive is now listed as Enabled.
-
Repeat Step 10 until all the desired drives are Enabled.
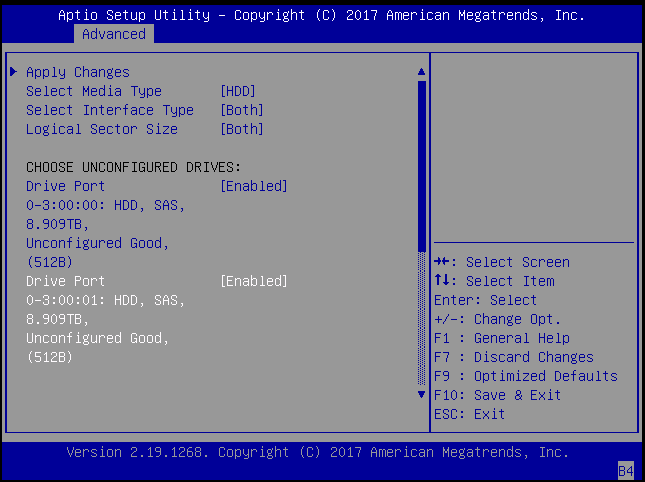
Note - You can navigate to the bottom of the list and select Check All to enable all drives, or Uncheck All to disable them.
-
Select Apply Changes, and press Enter.
A window confirms that you have finished configuring the RAID volume.
For more information on performing this procedure, refer to the 12Gb/s MegaRAID SAS Software User's Guide located at https://docs.broadcom.com/docs/pub-005110.
- To return to the Create Virtual Drive Advanced menu, press the ESC key twice.
-
Select Save Configuration, and press Enter.
-
Select Confirm and then press Enter, then select
Enabled and press Enter.
The [Disabled] changes to [Enabled].
-
Select Yes, and press Enter.
A screen confirms that the array was created.
-
To verify that the RAID volume was created:
-
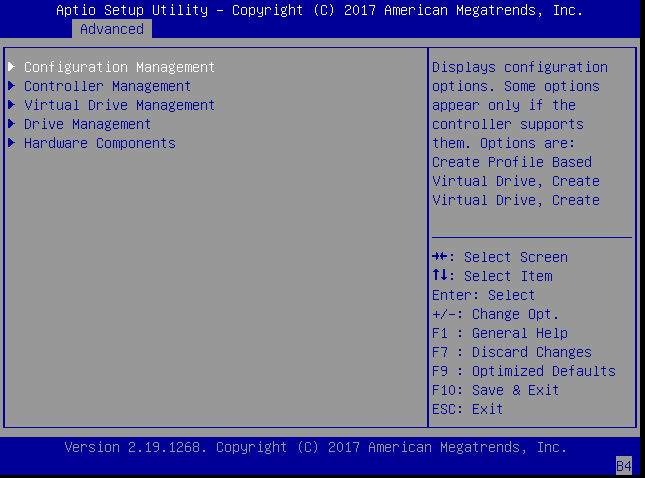
Use the ESC key to navigate to Configuration Management.
Alternatively, from the Advanced menu, select the Avago MegaRAID Configuration Utility, and press Enter.
-
Select the Main menu (if it is not already selected) and then press Enter.
-
Select Configuration Management and, press Enter.
-
-
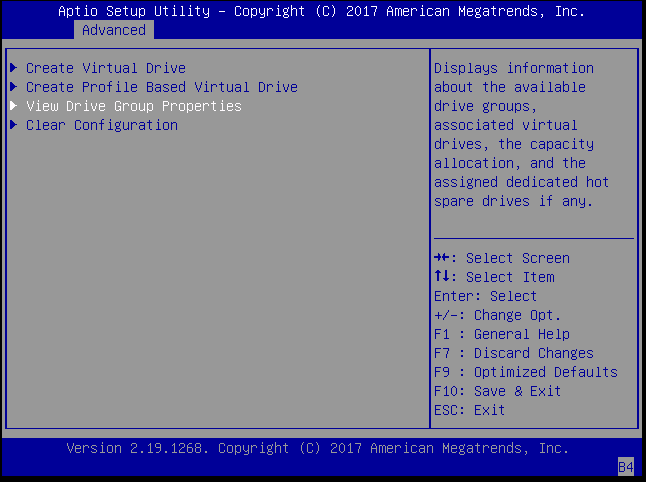
Select View Drive Group Properties, then press
Enter.
-
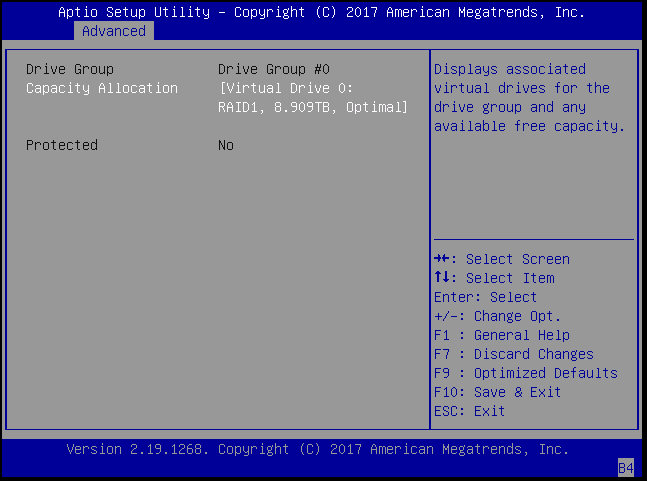
Examine the drive group properties.
- Press the Esc key multiple times to return to the BIOS Setup Utility Main menu.
-
Use the ESC key to navigate to Configuration Management.
- Navigate to the Save and Exit menu, select Save Changes and Exit,, and press Enter.