Install the Server Into the Rack
-
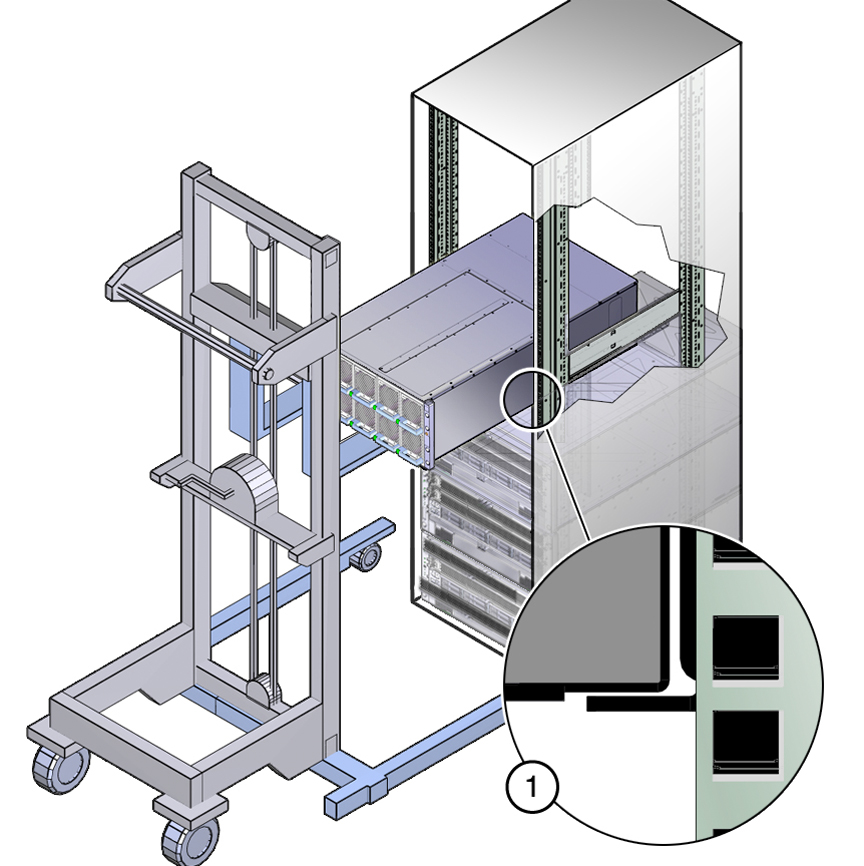
Use a lift to raise the server to its position in the rack.

Caution - Equipment damage or personal injury: Always load equipment into a rack from the bottom up so that the rack does not become top-heavy and tip over. Deploy your rack anti-tip device to prevent the rack from tipping during equipment installation.


Caution - Personal injury or damage to equipment. Be sure the server is firmly supported by the shelf rails before releasing it from the lift.
-
Slowly slide the server into position on the shelf rails.
Do not remove support from the lift until the server is fully supported by the shelf rails.
-
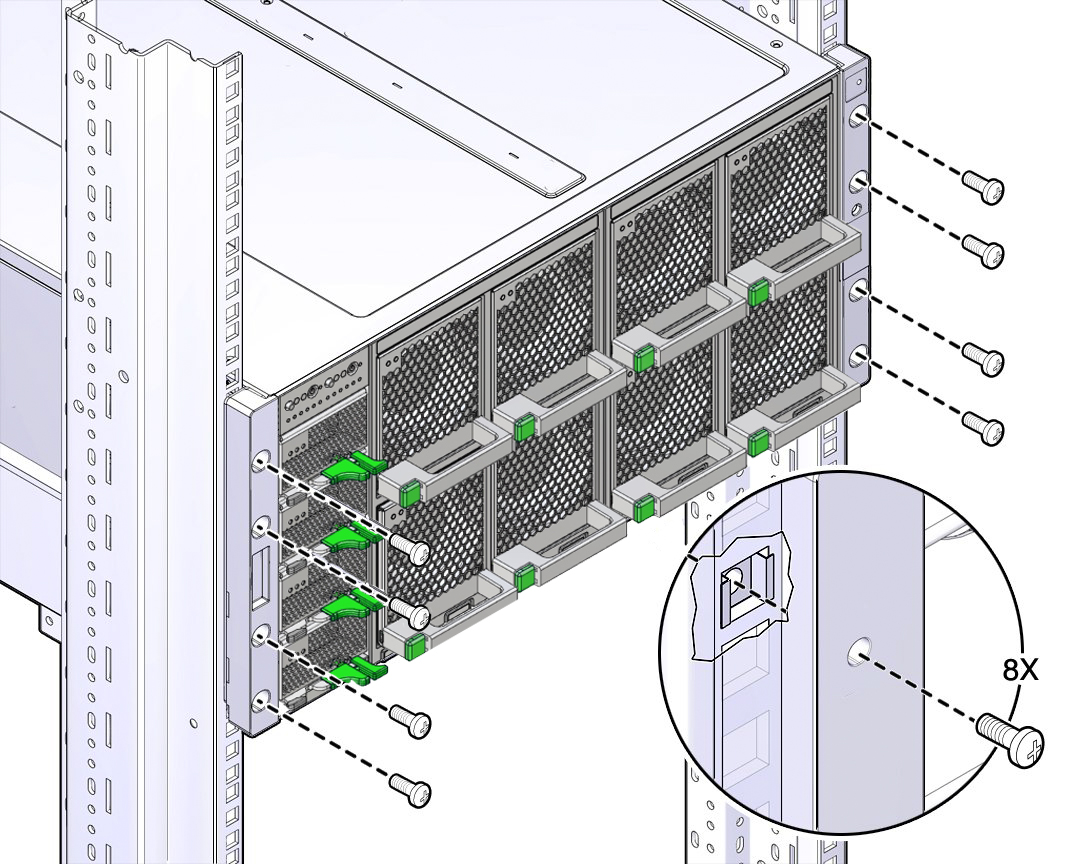
Using a No. 2 Phillips screwdriver, use eight M6 screws to attach the
front of the server to the rack.
The top two screws attach to the cage nuts installed previously. The bottom screws attach to threaded holes in the shelf rails.

- Press the back mounting brackets against the server and tighten the screws.
See Also