Configure the Preinstalled Oracle Solaris OS
When the server is started for the first time, you are prompted to configure the preinstalled Oracle Solaris OS.
Note - You can only perform this procedure if the server was ordered with the Oracle Solaris OS preinstalled.
-
If you are not already logged in to Oracle ILOM, log in either through the
serial management port or from the network management port.
Refer to Server Administration, accessing Oracle ILOM.
-
If main power has not yet been applied to the server, power on or restart the
server in one of these ways.
-
Power on the server – Use one of these methods:
-
From the Oracle ILOM web interface System Information page, click Power State → Turn On.
-
From the Oracle ILOM CLI, type:
-> start /System
-
-
Restart the server – Use one of these methods:
-
From the Oracle ILOM web interface, click Host Management → Power Control and select Reset from the Select Action list box. Then click Save and OK.
-
From the Oracle ILOM CLI, type:
-> reset /System
-
The server starts the boot process.
-
-
From Oracle ILOM, start the remote console using one of these methods.
-
From the Oracle ILOM web interface
Navigate to the System Information → Summary page, click Launch for Remote Console in the Actions panel. Then click Turn On for the Power State.
-
From the Oracle ILOM CLI
Type:
-> start /HOST/console
Are you sure you want to start /HOST/console (y/n)? y
Serial console started.
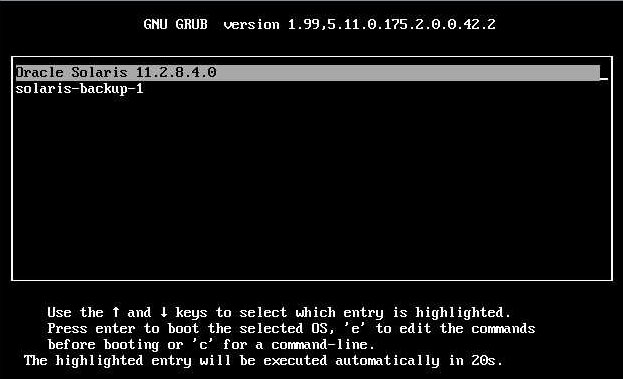
After the server boots, the GRUB menu appears.

From the GRUB menu, you can choose whether you want to continue to direct the display to the serial port, or whether you want to direct the display to a device connected to the video port.
Note - If you do not press a key within the time limit, the GRUB menu disappears from the screen and the display is by default directed to the serial port. To pause at the GRUB menu, press any key other than Enter. Then select the option you want to use and Press Enter to continue. -
-
Use the up and down arrow keys to select one of these display options.
Note - The first two options and the last option listed on the screen are not supported.-
Display output to the serial port
– Select the appropriate option in the GRUB menu and press
Enter.
This is the default option. If you do not select an option on the GRUB menu, after five seconds, the GRUB menu is no longer available and the system continues with the output directed to the serial port.
-
Display output to the video port
– Select the appropriate option in the GRUB menu and press
Enter.
If you choose this option, you must connect a device to the VGA connector on the server and an input device (USB keyboard or mouse).
-
Display output to the serial port
– Select the appropriate option in the GRUB menu and press
Enter.
-
Follow the Oracle Solaris 11 installer on-screen prompts to configure the
software.
Use the information gathered in Configuration Worksheet (Oracle Solaris) to help you enter the system and network information as you are prompted.
The screens that are displayed will vary, depending on the configuration option you select (for example, DHCP or static IP address).
After you enter the system configuration information, the server completes the boot process and displays the Oracle Solaris login prompt.
For detailed information about using the Oracle Solaris OS, access the documentation listed in http://www.oracle.com/goto/solaris11/docs.